Category Archives: Flag Challenge

Work Space

PoppyHello,

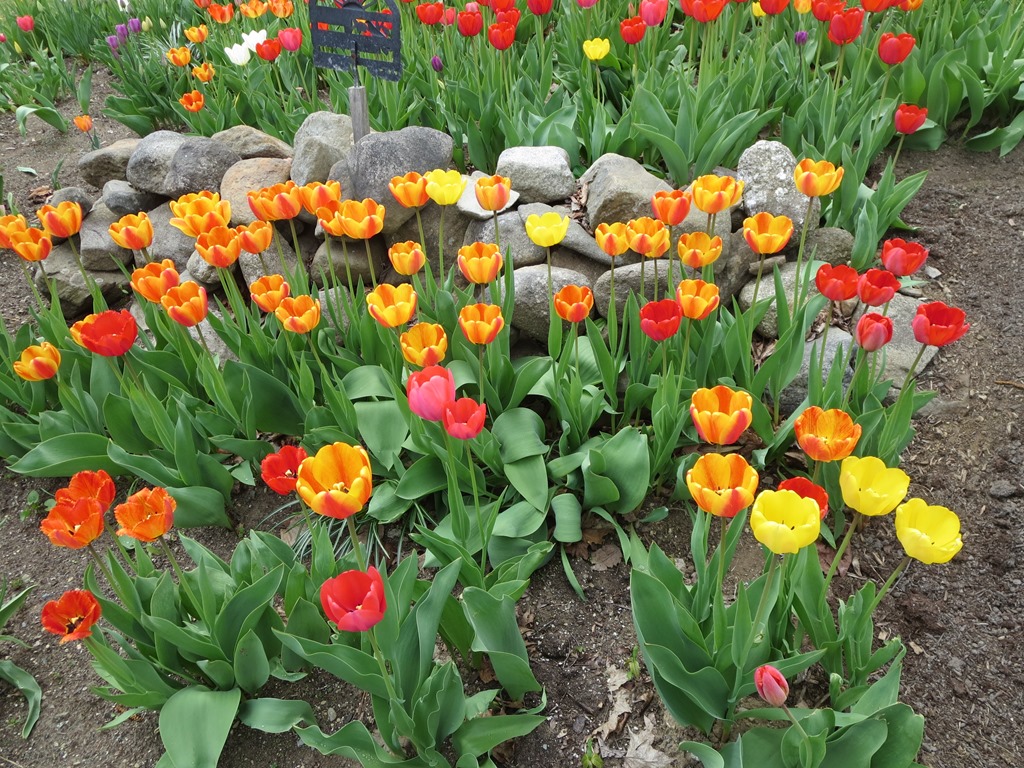
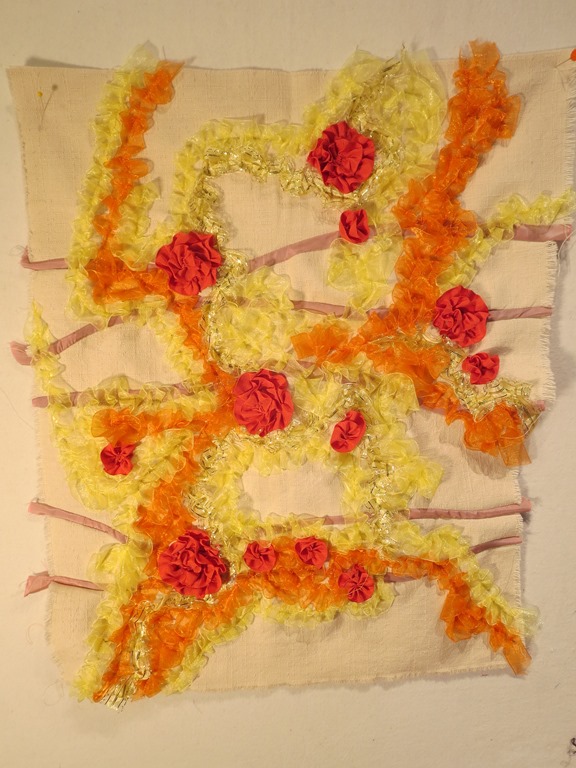
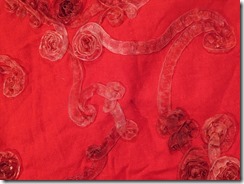
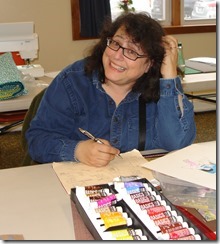
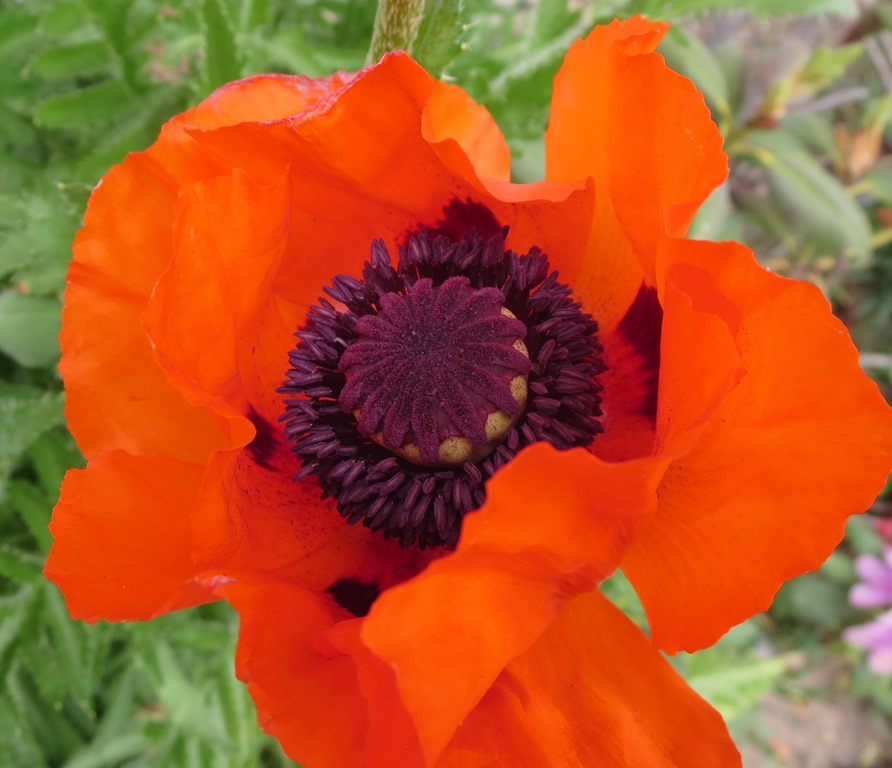
Summer is upon us now with all its wonders.  I love how fast a beautifully the flowers are opening and changing the landscape.   This Poppy is from Regina’s garden wereIMG_3762 I was visiting yesterday.    I enjoy her work an find her approach exciting.      One of the things she is working on is printing on fabric with a linoleum block and then quilting into the image.  She added the red thread to emphasize the blossoms.   She has asked a friend to enlarge the image and print it on the fabric for her so there will be even more of this image in her future work.      IMG_3760

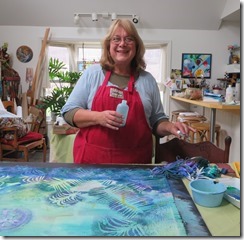
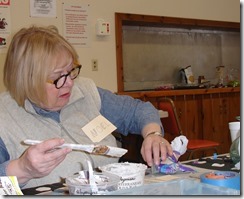
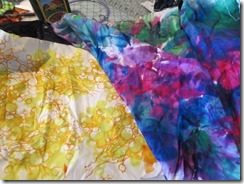
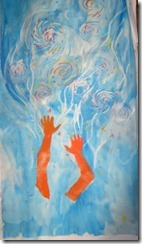
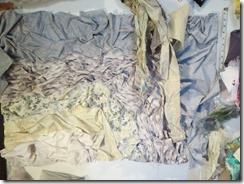
I also spent time with Nancy this week doing some dye painting.  She could not find the color she wanted for one of her works and decided to paint to get what she wants.     I am proud of her.


IMG_3785  Through this door is the studio.  I think it is very important to have a place of your own to work.   I have a wonderful converted garage space for my studio.  I has had several lives before it became my space.  I served as a bedroom for two different  boarders, my daughter and  young  grand kids and then for  Eric and myself.      Now it is my refuge for creative work.  It has a wonderful bay window in the front and a door out side on the east wall. A long four foot deep closet in the back with book shelves is were I store most of my fabrics, yarns and papers as well as my felting machine.     I have filled the space with  my stuff and it suits me well.  Studio 
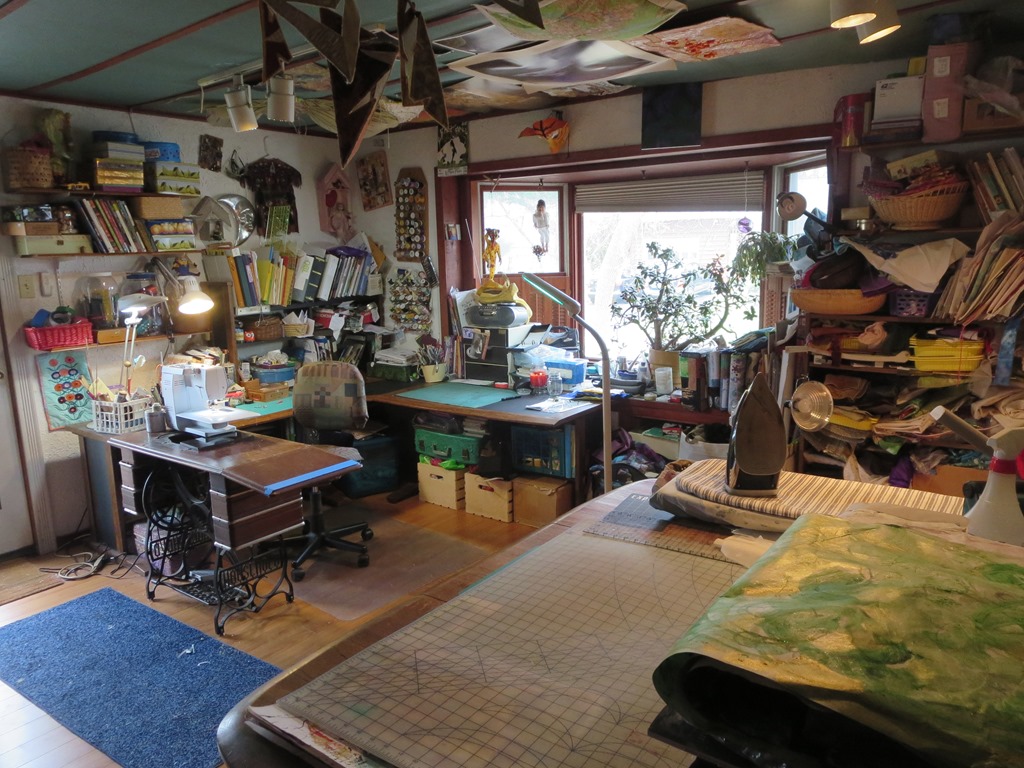
This first shot  is from the door looking toward the front of the house.       My desk/ sit down work space is a U in this far corner.  I enjoy using my Grandmother Ruth’s sewing table as a work space for my own machine.     That is one leg of the U and the desk its self is the other two sides.desk

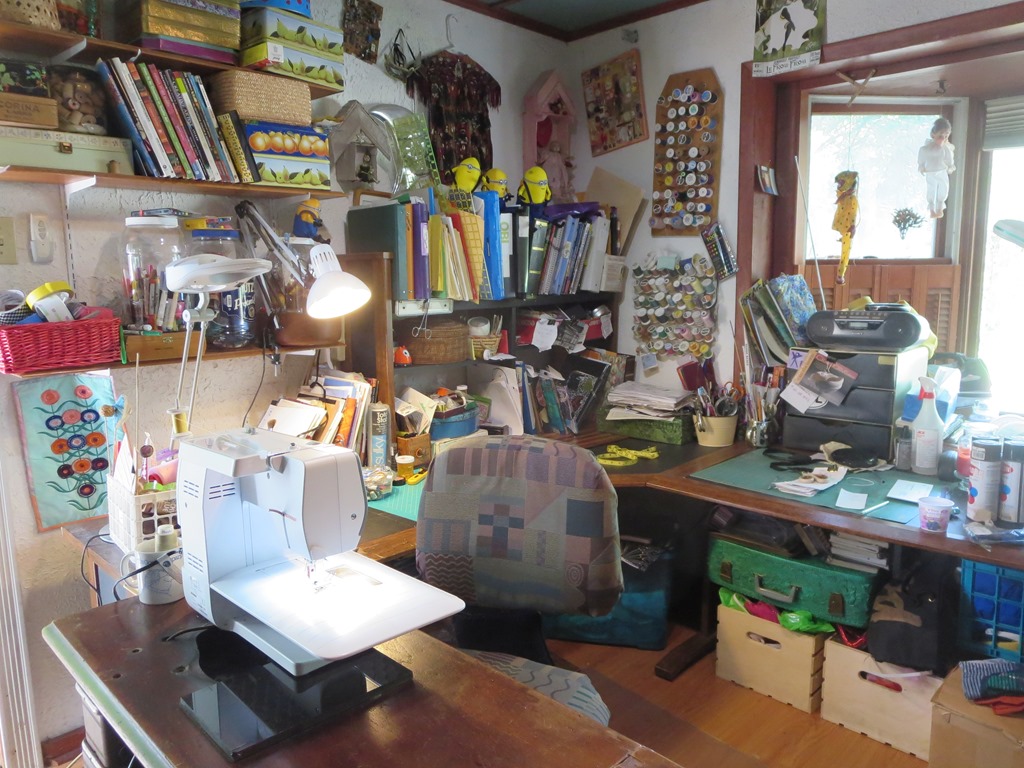
I spend most of my time working in this area of the room..By walking strait across the room from the door and looking back this shot shows the view.form the door  
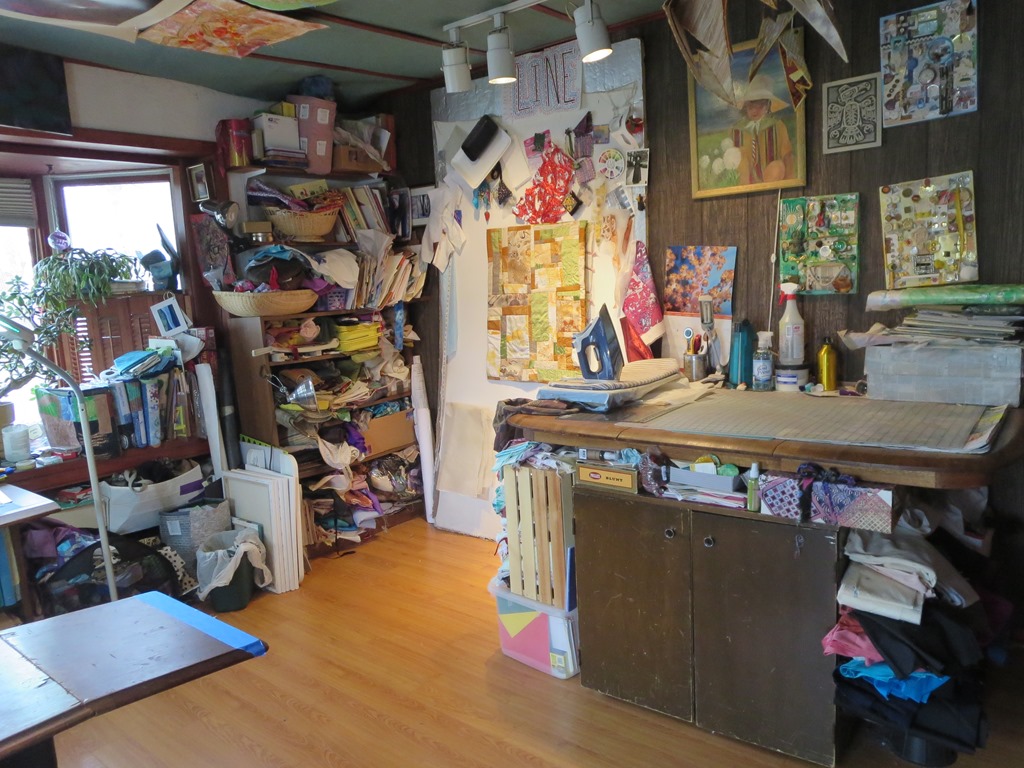
Here is my cutting table with a small ironing board on the top at the far end.   The pin wall is also along that wall.  Next to that I have a book case that is full of projects in progress as I like to keep materials all together until I have completed an idea.  northeast corner
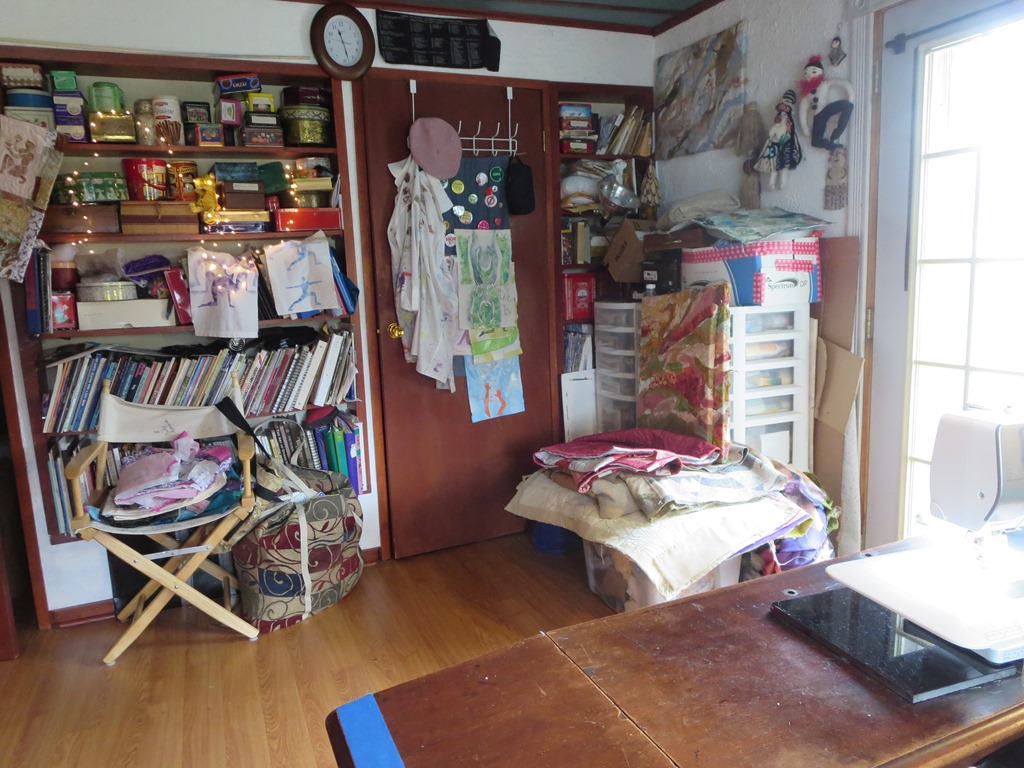
This view is achieved when one walks diagonally  from the  point of view of the second shot into corner I just described  and  look back. ( the end of the sewing machine is on the lower right )  Here one can see the book shelves.  The have lots of quit books and reference materials as well as my tin container collection.  They serve as storage for sequins, oils sticks, markers,  special fabric bits and small items that I find inspirational.   In the corner the  plastic drawer unit  is full of beads, paints, buttons, lace trims and other attachments.   My guest chair, also shown,  often serves as a staging area for hand work that  will be done outside the studio.    I feel fournate to have such a wonderful work area and I enjoy it almost daily.

 Modeled surface 
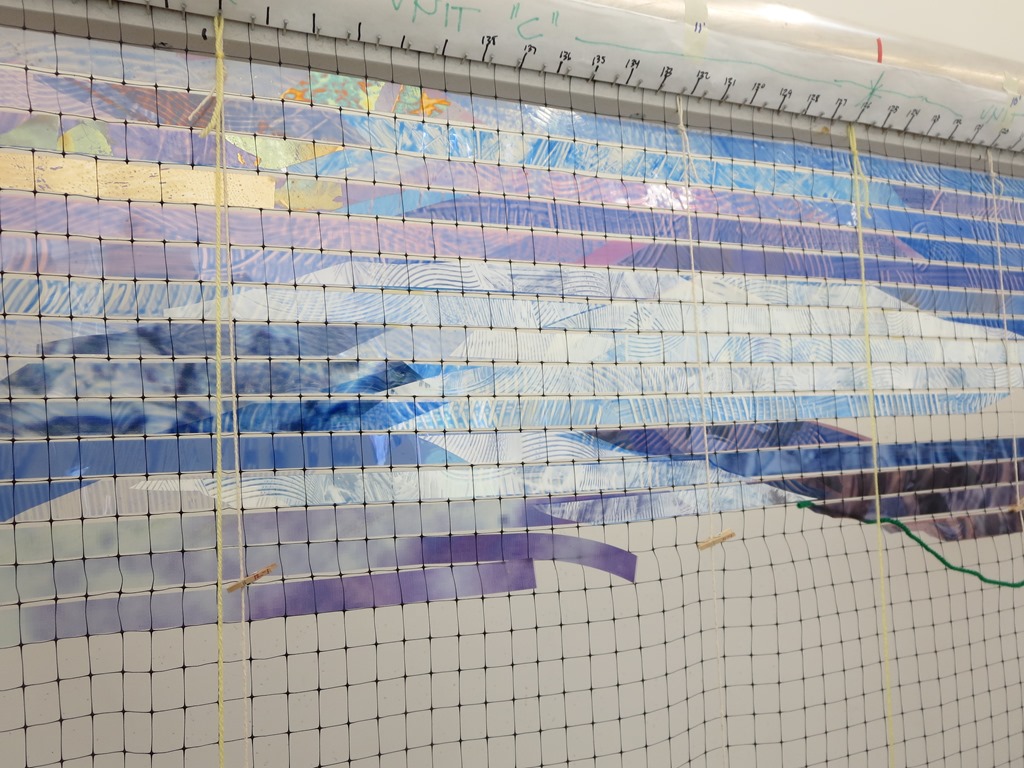
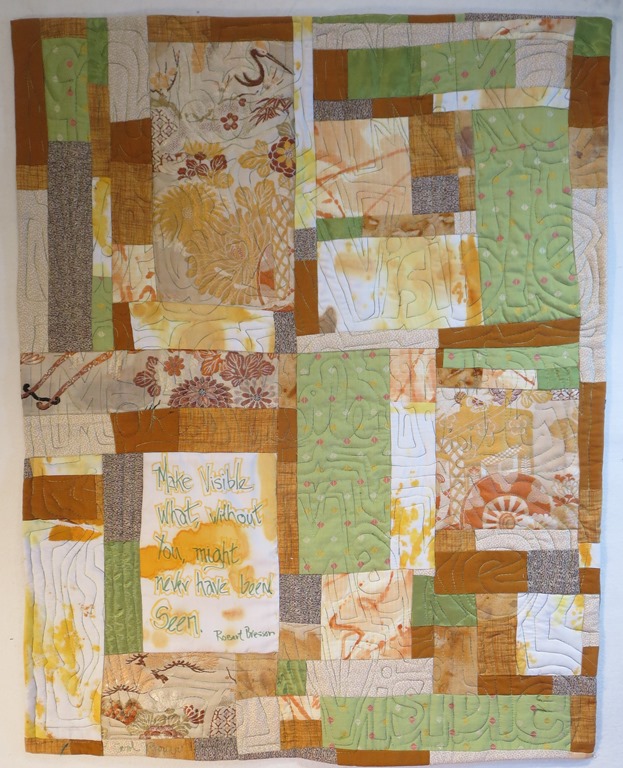
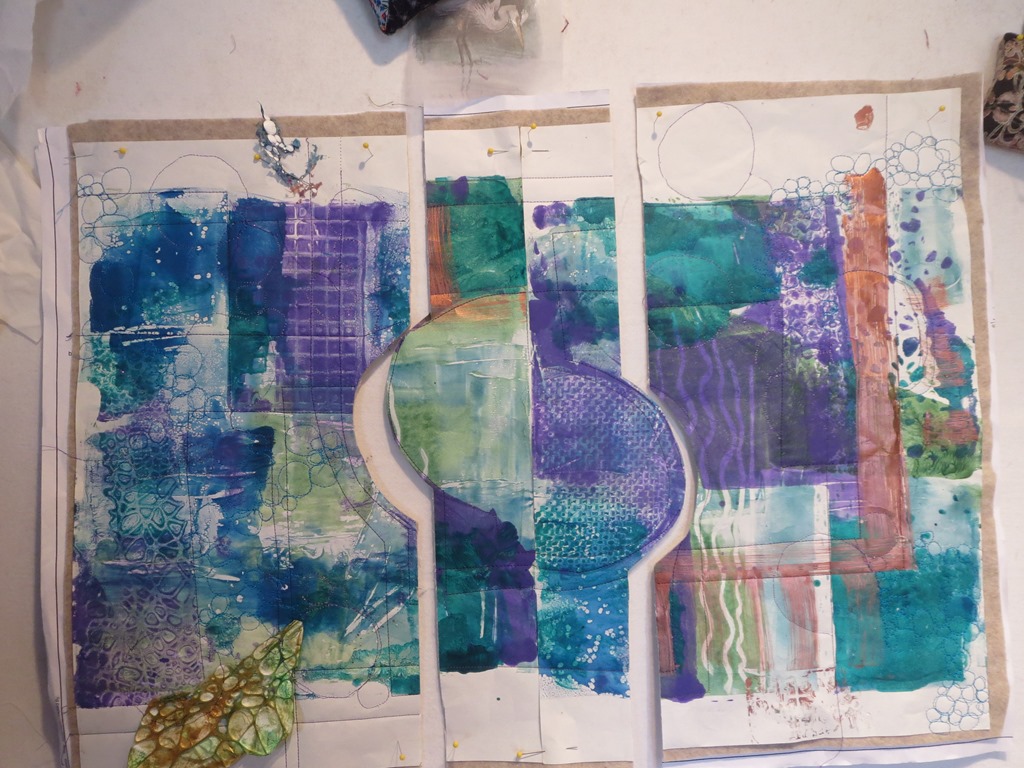
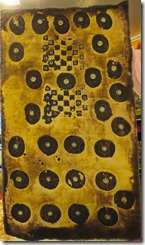
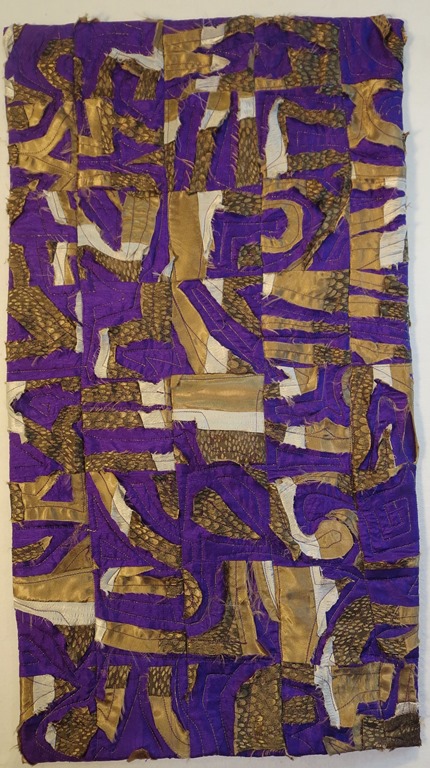
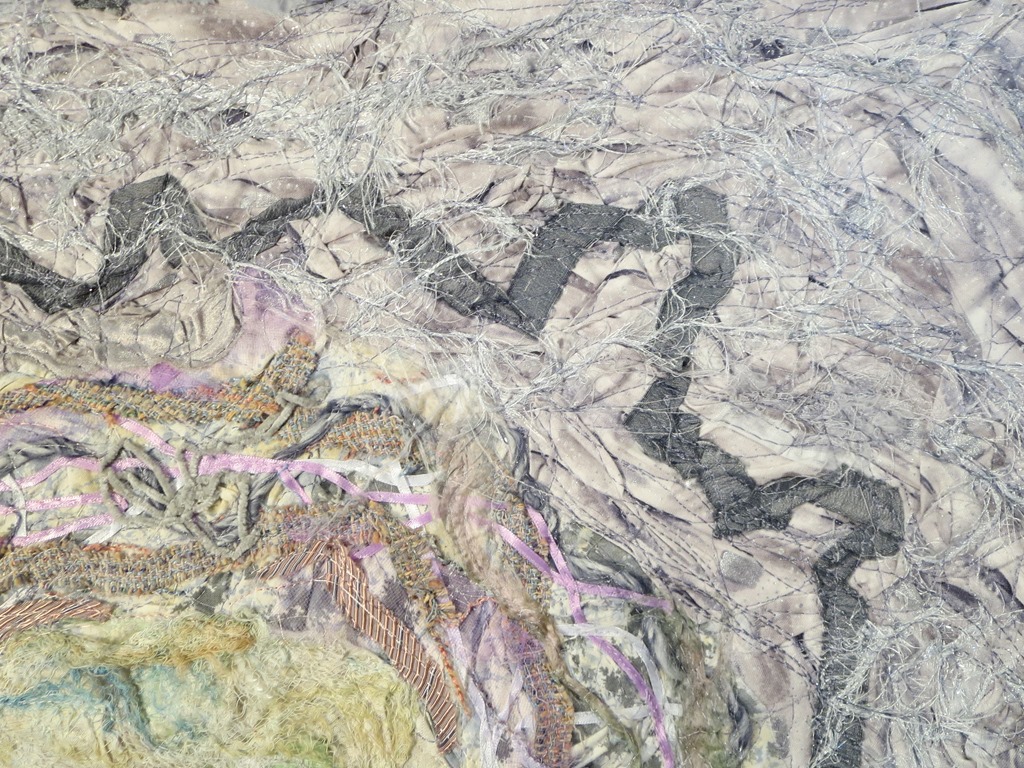
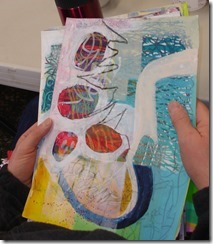
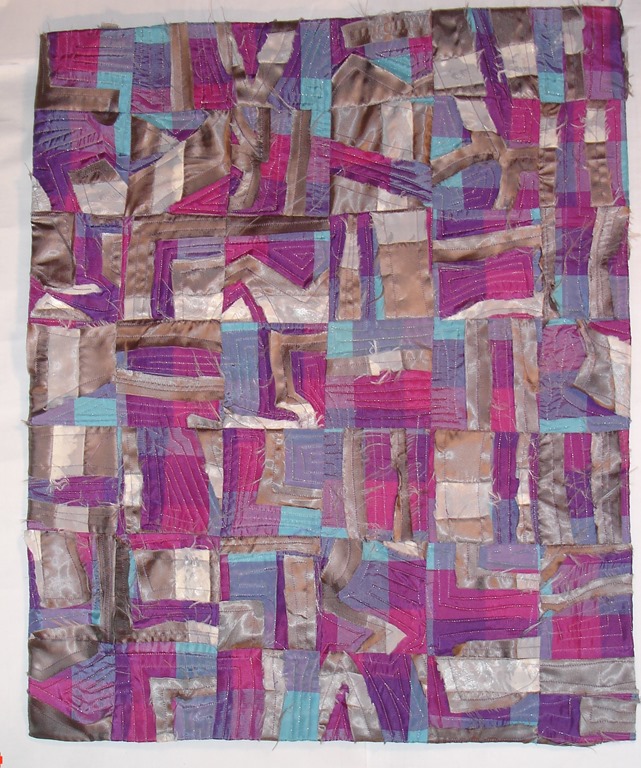
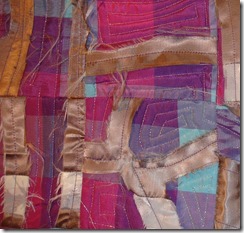
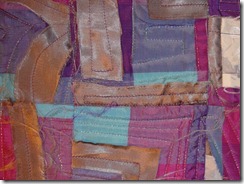
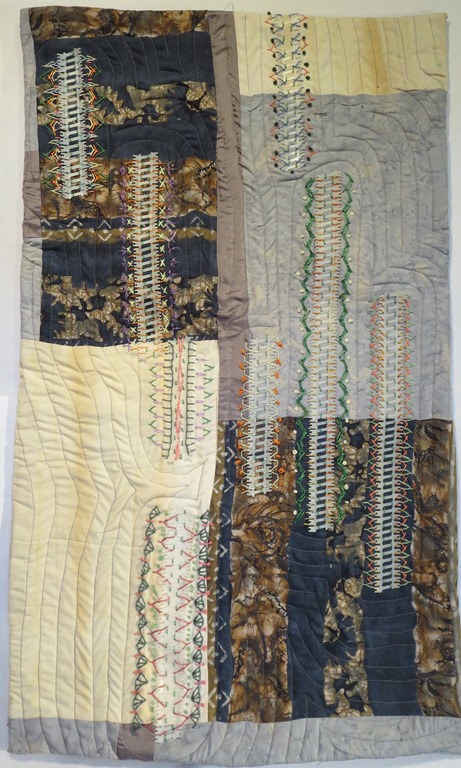
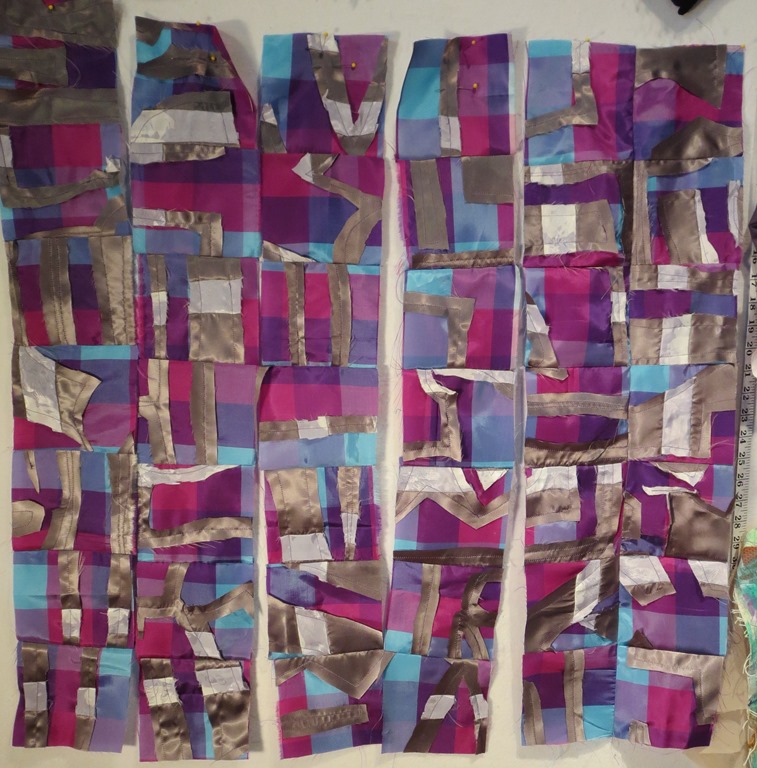
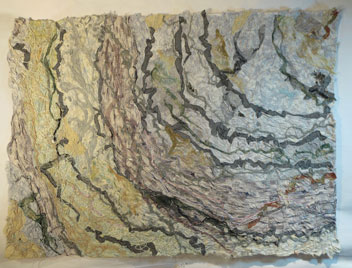
Progress Report ;  Modeled Surface    I used lots of surface altering techniques on this work. This red purple section is from the Deconstructed Screen Printing class from the fall.

IMG_3773 
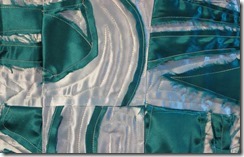
The light blue is from some dyeing I did with the QuEGs  group last spring.  IMG_3780
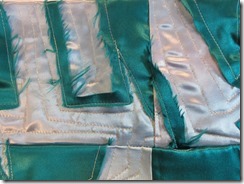
This dark blue is from a day I spent playing with paint in my own studio.  I was doing tape resist on the fabric and then running the roller over it. IMG_3775
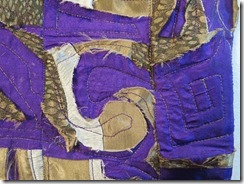
The left side of this images shows printing on an old table cloth and the right side is a double print of a silk screen.  It was a fun challenge to use only fabrics that I had altered myself.
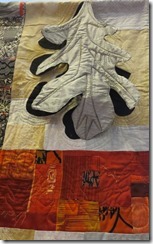
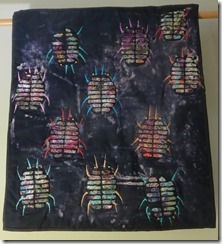
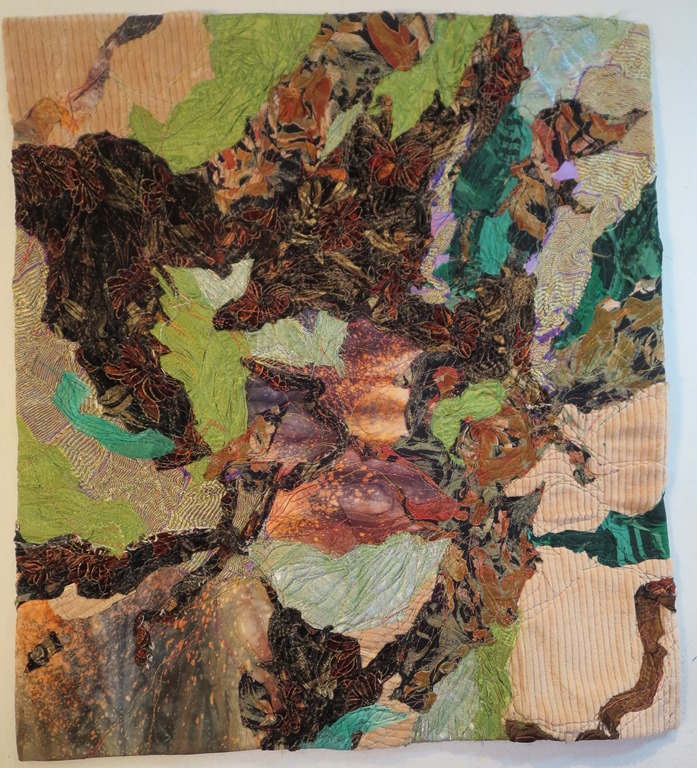
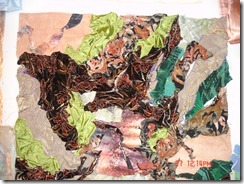
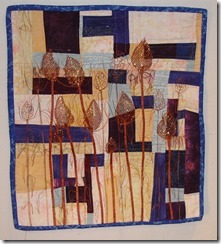
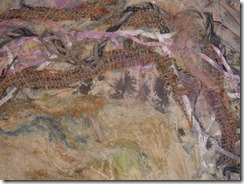
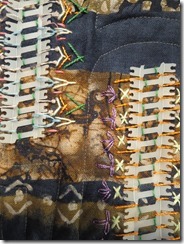
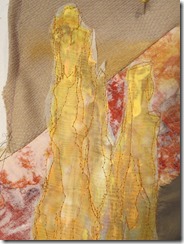
Insect OlogyIMG_3769I am still working on the free motion part of this work.   I so liked the shapes of these leaves  that I used them several places in the quilt to fill in the sections.   I like finding inspiration from the fabric for my free motion work.

Flag
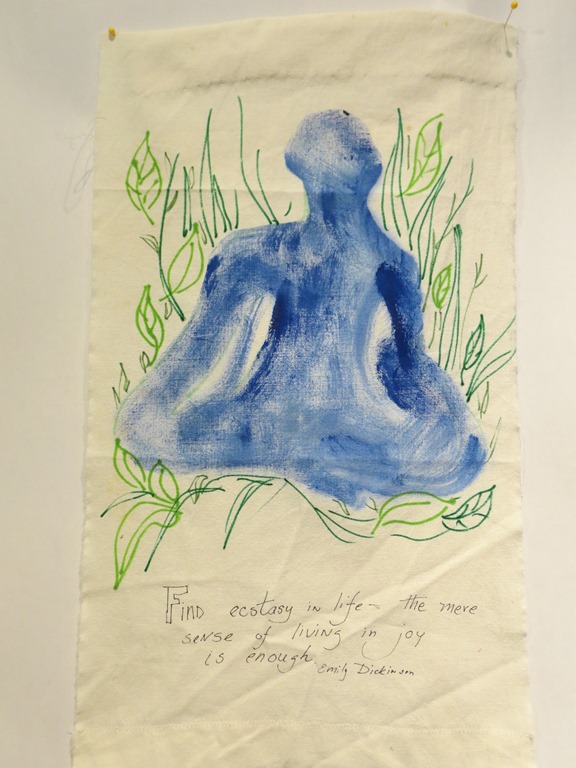
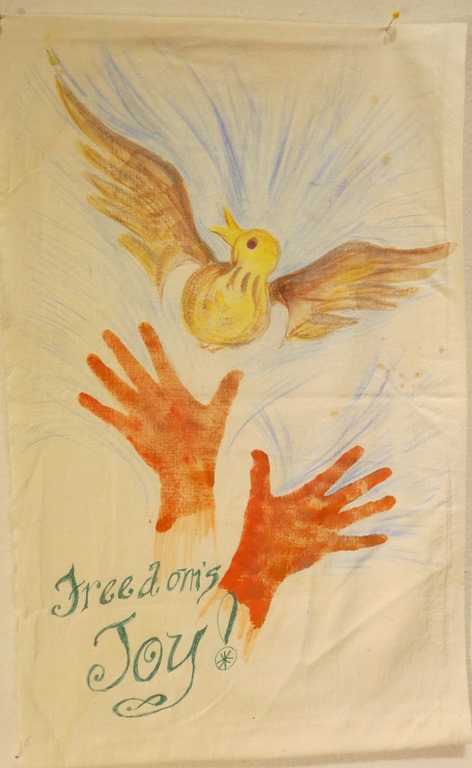
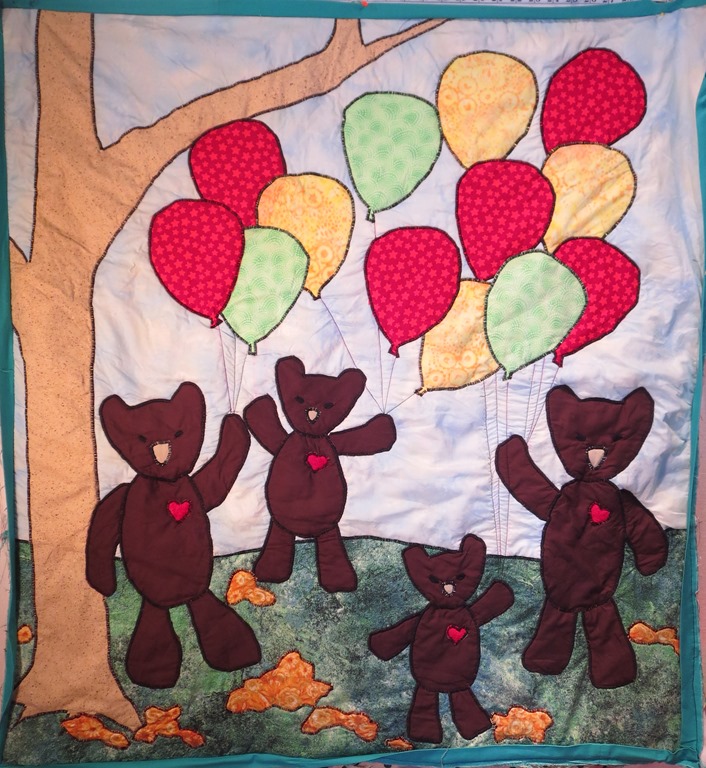
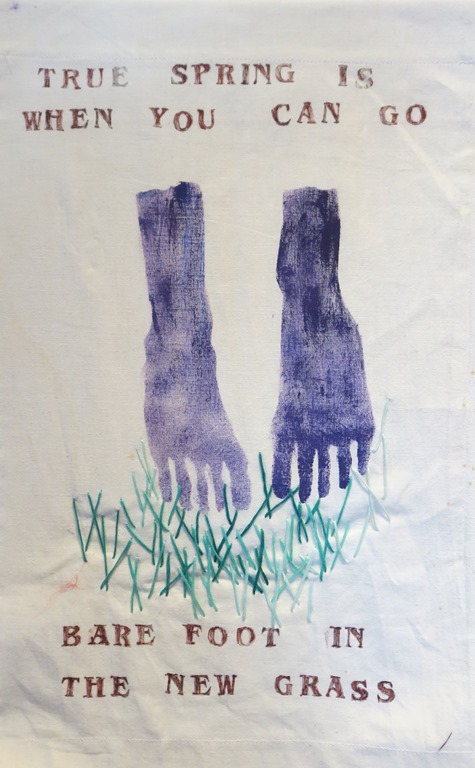
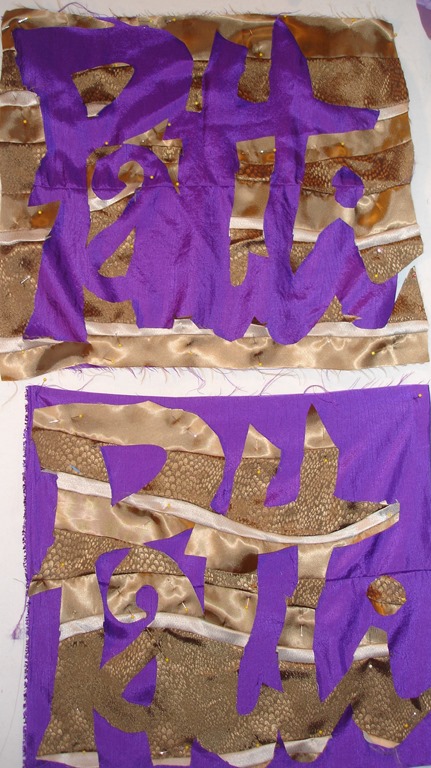
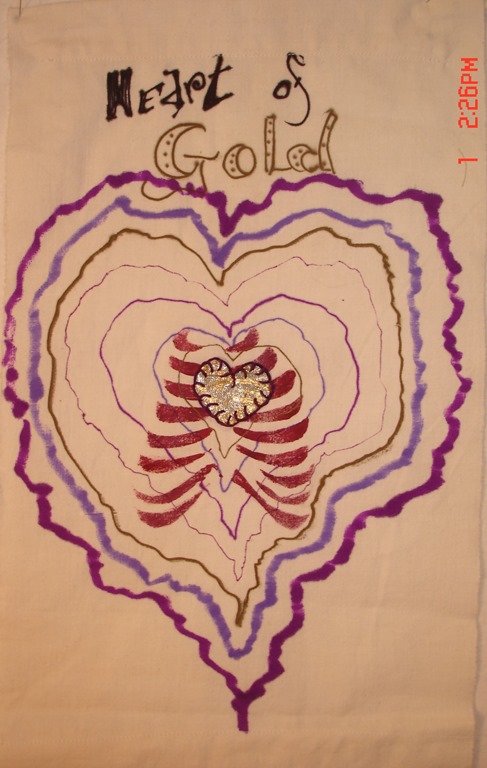
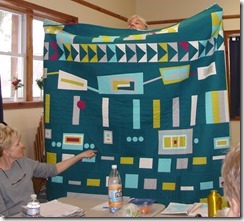
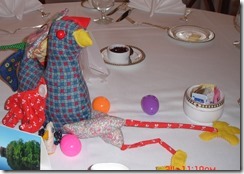
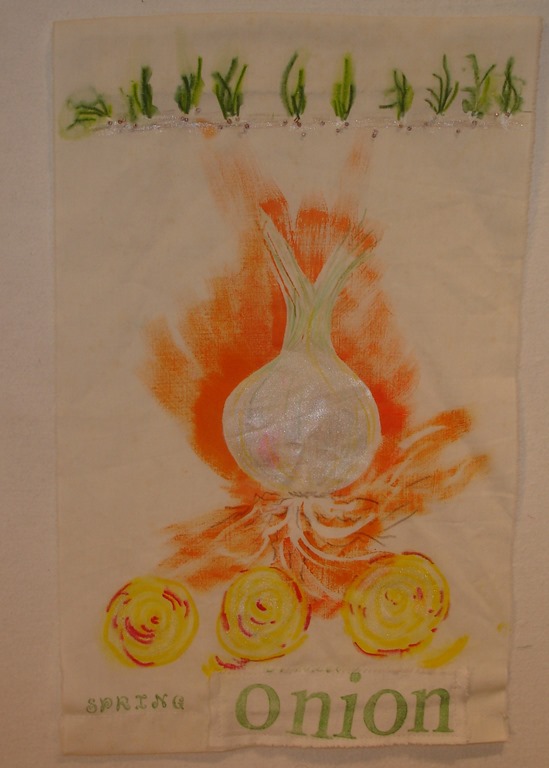
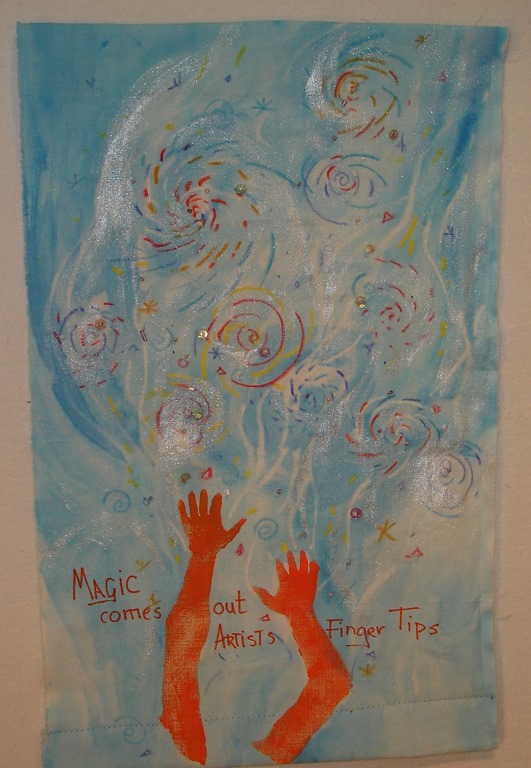
Flag-Continue I only finished one flag this week.    This one is Susan’s design and her quote too.   I just added the flowers.   Now I only have five to finish before Tue next week so that project will get lots of my attention.


IMG_3758
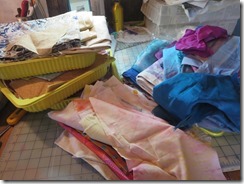
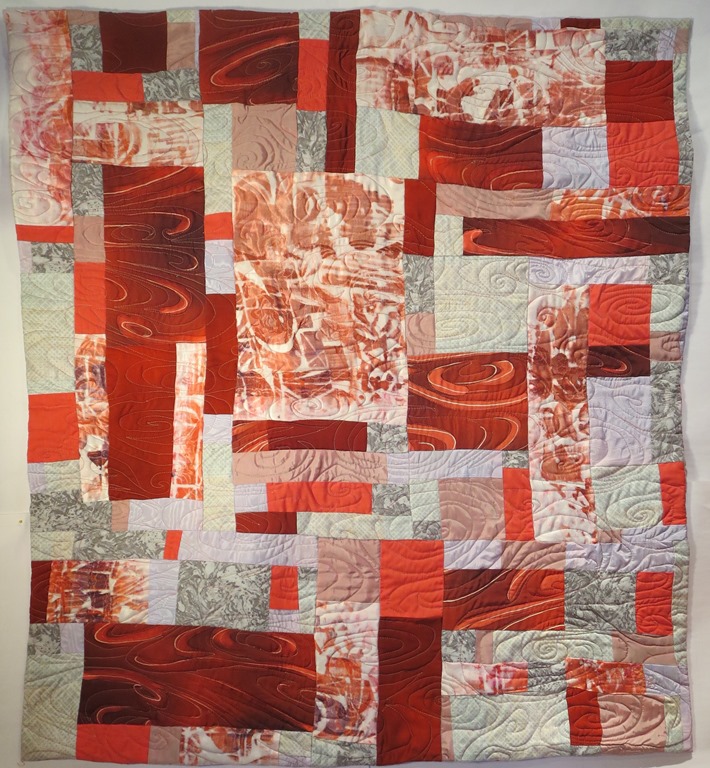
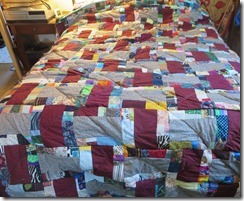
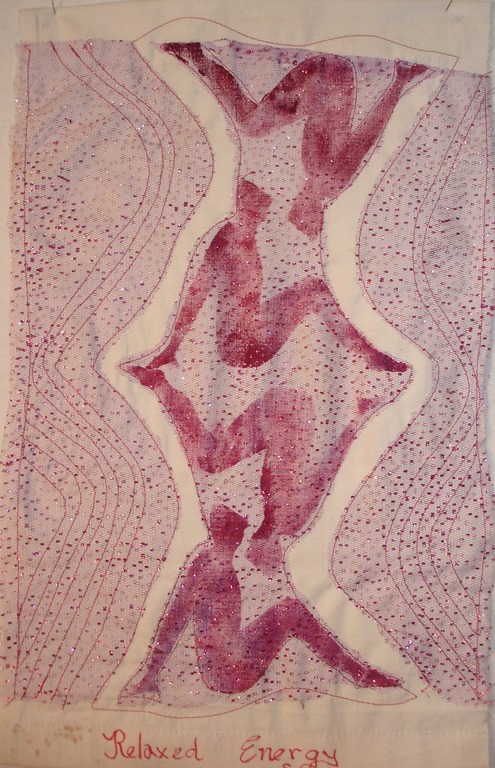
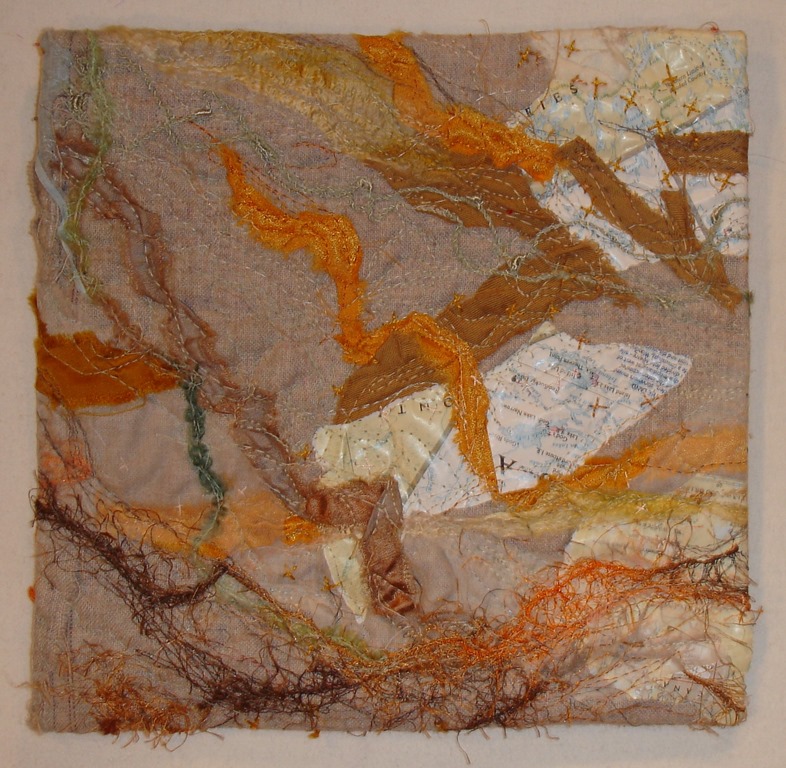
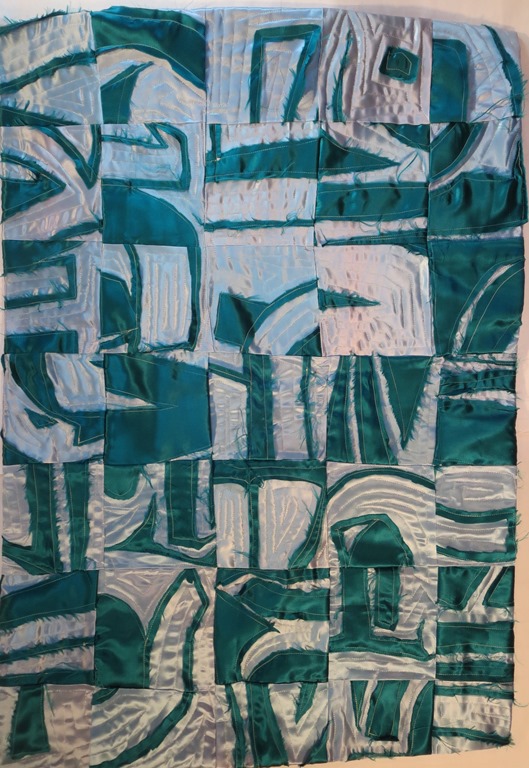
New Work  True to the way I work I have pulled out a new patch of fabric and pinned it to the wall.    I always like to audition  fabrics before I use them.
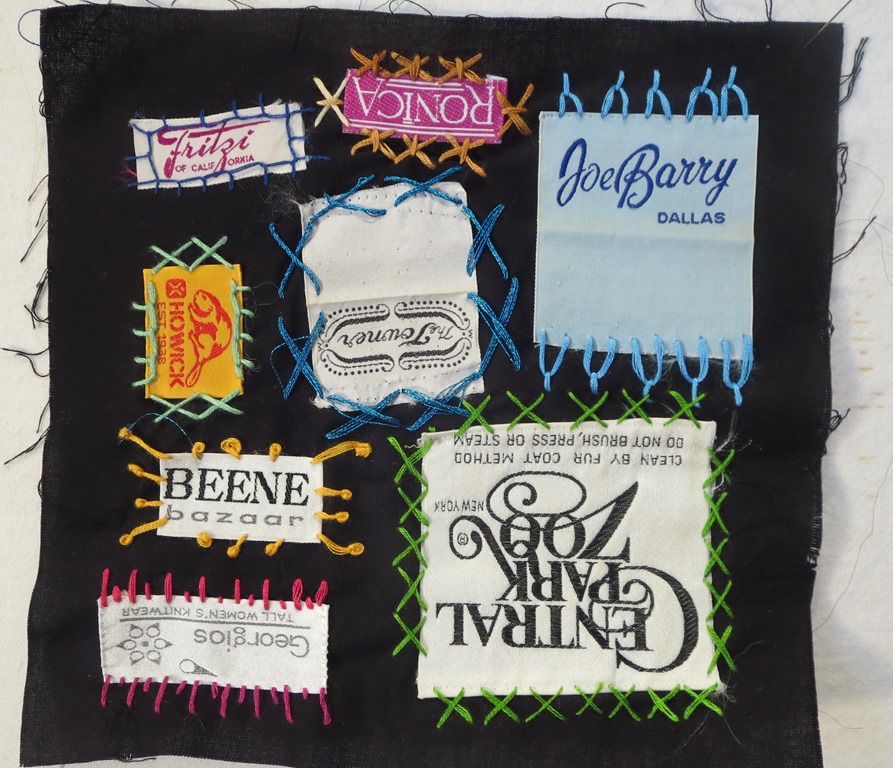
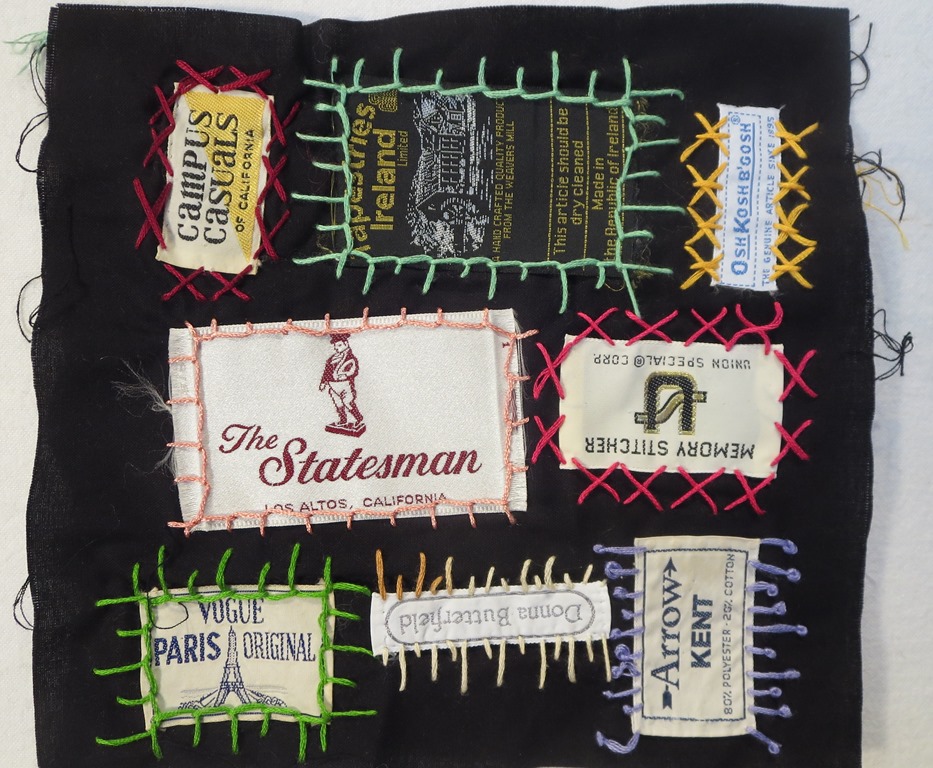
Label Block

IMG_3784  
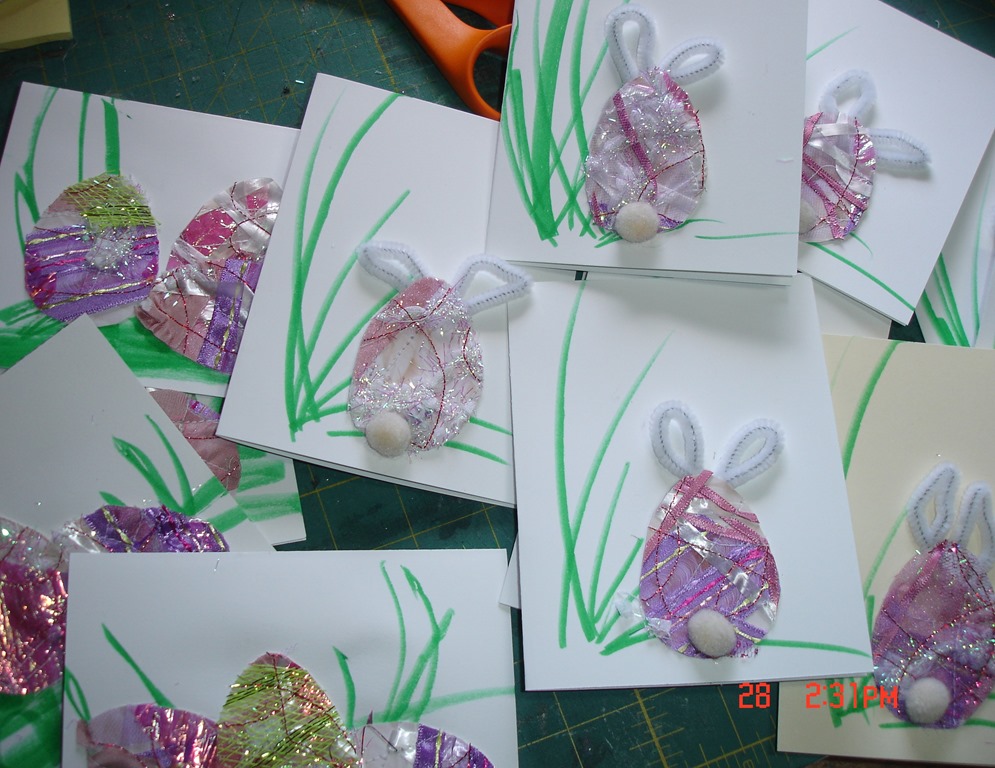
Two more are now completed.

Keep Creating

Carol

Travel Log


Barb's TulipsHello,

I am home from a wonderful trip and I still seem to be flying along with lots of new experiences.     Maine was/is beautiful as it too awakens to spring.    I enjoyed the tulips in Barb’s yard and took lots of pictures.   There are so many wonderful colors.  IMG_3703We visited two artists with studios on this trip.   The first was Elizabeth Busch’s place.   She is working on a new commission for  the state capital building in Augusta. IMG_3699 This is a shot of the models.    She is building in her wonderful weaving on bird netting.IMG_3680She carefully explained how she used her photos of different parts of Maine to build the landscape that she wanted for the project.  She refers to them often E- full wallas she works with the weaving to keep the colors close to the natural look she is building.  She has  a large collection of printed and painted strips of plastic to choose from when she is working.  Elizabeth IMG_3693 sometime weaves as many as four strips into one section to create theIMG_3692 color she wants for rocks, trees, water and other  natural elements.       She is working on all three panels at one time so they will flow into one another as they spin from the three eye beams in the lobby.    The job needs to be More weavingcompleted by September so she will have a busy summer.

The second Studio was that of Nanci  Kohn  She is a photographer and paper  Mache’ artist.   Nanci Kohn She too was very willing to talk about her process and work.      I really love this song bird that is covered in sheet music.

IMG_3734We then stopped and looked at a welded sculpture of an Osprey on a bridge on our way to Portland.     It was an enjoyable and stimulating trip as travel always seems to be for me.

IMG_3740   Tuesday the FAB group meant here.  Patti had nearly completed this   happy little wall hanging.  I like how she used buttons and beads for the eyes of the kittens.

Judy was busy working IMG_3742on a new sweater.  She is doing hand embroidery stitched flowers on it now to add more interest.  I like the soft colors she is using.

ConsiderationProgress Report:  Paper Quilt- Consideration

I am done working on the surface of this project.  I want to add a sleeve in a different manner than I have with previouse paper quilts,because it is so wide.  I want to make the slat removable for this one.     The papers that I started with were from a Gelli print play day last fall.   I have enjoyed doing all the  stitching on this one and adding textures

IMG_3747IMG_3750 I added painted and melted tyveck for that texture.  I used both sides so some areas have the bubble up and some have the bubble down.

IMG_3751.jpgHand Bag  I made a new hand bag out of some of the wonderful fabric that Regina gave me a few weeks ago.   It is time to switch to a summer color so I put the old one( it was browns and blacks) away.

Place Mats  When   I was sorting through the material for the hand bag I pulled fabric for place mats too.  These are the newly  finished  batch.  I have stacks  two more  sets setting on the cutting table.

IMG_3753

Pock Marked IMG_3757  I am working on the free motion portion of the quilting on this project.  It is going slowly as I am trying to find lines to follow for all the stitching and it is very complex in some areas.

Insect Ology   I am to the Insect Ologyfree motion quilting on this project too.  It is a much different process than Pock Marked- much more a reflective process.   It is good for me to switch from one type of free motion work to the other.

IMG_3755Flag – Rejoice   For the experiment on this  flag I drew on the surface with magic markers and then stayed it with rubbing Alcohol.  I hung it on the line so it would run down as it dried.   Not all the makers ran because they were different types of markers.     The “Sharpies” rand the most.   The quote is” Rejoice  in the common place.” from an unknown source.

Flag- Find Ecstasy  Rerjoice This flag does not have much in the way of experimentation.  But when I found this quote  l knew I had to use it.    It is from Emily Dickenson:  “Find ecstasy in life – the mere sense of living in joy is  enough.

IMG_3662More Minions  I  am now finished with the last four minions.  I will pass them along to friends who need a lift as I come across them.

I hope summer is on everyone’s door step.

Keep Creating

CarolTulips 2

Buds Opening


IMG_3599 Hello,

I have noticed as I have been walking this week a daily change in the environment.   Not only is the grass growing but flowers are up.    I also see  that spring  flowers are different here than in  mid west.   These white violets are a good example.  ( I have purple ones in the yard too)   Every day the shadows cast by the trees changes as the buds explode out into the sunny world.  I find it exciting to see the major changes from one day to the next.                                                     Cheri I spent Monday playing with Cheri in her studio.   She was busy creating freezer paper stencils, ironing them down  and then painting over them  them.   While she did that I worked IMG_3617on adding a layer to the puppet heads that I made at  Varna  last month.     I added paper clay over the two human heads and the dog head as I was happy with the forms.    I then built up the  bird head with more paper Mache’.       I moved from that to building aIMG_3615 mask with a cardboard base.    The mask seemed to take on a life of it’s own as I started out trying to create a lion- but it seems I have a horse instead.    Cheri suggested a different type of Mache paste and  so I added the paper  layer on top of the cardboard.    I like what is happening even though  it is not were I thought I was going.  IMG_3619  Then the third 3-D project this week was to start to create a new batch of Minions.    I seem to be exploding with my own creative push as I also pulled out and sorted stacks of fabric for six new projects this week.Stacks  This shot shows four of the  piles.    I only have eight yellow tubs for separated  projects and they are all full, that  along with the 3-D stuff and I have a lot on my hands to work at for  a while.


Make Visible 23"X 29" $235.00
Make Visible
23″X 29″
$235.00

Progress Report:  Make Visible I am done with this quilt now.   This project started last summer when Susan and I were playing with allIMG_3607 her different  mark making  tools.   I did several different quotes with the  tools and I am now getting around to finishing them off. I quilted the IMG_3609words Make Visible seven times on the surface of this quilt .  Some times I did them in block letters and some times in cursive.   IMG_3608Then did reflective quilting to finish it off.   I used the obi that I got from Ginny in this project too.

Regina’s Blanket IMG_3612This project is made from some of  the wonderful designer samples that Regina gave me a few weeks ago.  It was fun to try her techniques with her fabric.  It is great to snuggle under too.

IMG_3583 By The Shore  I was looking at my photos of the trip to Arcadia  with Barb and Marty from a few years ago.  Among the pictures was a great shot of the basalt along the shore.  So I decided to use it as the start of my next Foundations piece.     This is just the pin up.Paper quilt

Paper Quilt   I came across some papers I had done   as Gelli plate prints.   Two of them seemed to go together so I started this work in the Carol Weibe technique.   It has two cuts in it.  IMG_3589  I had also melted the tyvek that Cheri and I had painted from the week before.  Now there is lots of that to play with  and I may add a little of that  texture to the surface of this paper quilt too.

IMG_3585Flag- Arches   I am using these flags as a place to really play with things I do not normally try.  In this case I used Caran D’ache water soluble crayons to add color.  Then I spritzed it with water.   The word “Arches” is written in  broad line Liquid  Copper magic paint marker by Deco Color.    It did not bleed when I sprayed it with water.

Flag Freedom’s JoyFreedom's Joy With this project I stamped a bird with a foam stamp that I had made several years go and then I used colored pencil on top to enhance it .   I also used the colored pencil in the lines to add motion.  The words are done in permanent marker.

IMG_3601Label Block  I am doing my daily stitch work with this project.    Every little bit adds up.

Keep Creating

Carol

Victories


Carolyn Hello,

This week has been a week with several little victories.  The first was last Thursday evening when I went to the Prevention Network banquet.    Just by chance I sat next to Carolyn and she wanted the quilt I had donated to the cause.  As this picture suggests she was successful in her pursuit of that goal.  I was as delighted with her achievement of that goal as she wasVictoria's woek and the Network got the benefit  too.       Friday was the Towpath Quilt show and I attended that event.   This is Victoria’s finished work.  I have watched her struggle with this piece and I think her solution is great.

IMG_3530 Another   event in my week was a trip to the SAQA meeting on Saturday.  The group was small but full of  exciting ideas.  My friend Chris showed two of her framed works.  It made me think again about working in that direction.Regina's work

On Monday I went to visit with another quilting buddy Regina.  We had not seen each other sense fall so she had lots of new works.  I really like this one were she used discharged paste and then embellished it with lock washers.  She had also completed four works from the IMG_3550

Carol Soderlands class in Soy Wax printing that the both of us were in at QBL II.    This shot is of the wonderful potato smasher that she brought to class and we all used to print with wax.    This shot is a work in  progress but sheIMG_3551_thumb.jpg also had four  she had completed.   They were wonderful insect type pieces that I truly enjoyed.      Then because I just can’t seem to get enough play time with other creative soles, I went to play with Cheri yesterday.  IMG_3576We had fun painting   on Tyveck.  I now have a new pile of  altered material to add to my stash.  I will do the melting of some of the surfaces tomorrow.  Ans as Cheri suggested one does not need to melt all the Tyvec to use it.

The Big success  of thisBaby quilt week was saving the Baby quilt I had ruined.  At the  Towpath show I talked with Angela about the problem of my marker marks.   I told her of the methods I had tried and she listened very sympathetically.  Her suggestion was I try Oxi Clean.   I stopped on the way home and got some at the grocery store.   It did not take all of the marks out on the first run( the fifth wash) but it didIMG_3565 diminish them.  I air dried it and Sue Ellen looked at it on Sat before we went to the SAQA meeting.  She said they barely showed and suggested I repeat the process again.  So I did.   To my delight when I went down and took the work off the line yesterday it was clean.   I only took six washes to do the trick.  I will give the quilt to the expectant mother and tell her that I know it will withstand lots of washing.   I am so very thankful for my encouraging friends.   They pushed me forward on this project until it was a Success.

Running Red 39" X 46"
Running Red
39″ X 46″

Progress Report:  Running Red   I am delighted with how this quilt finally came out.    The curving quilting did prove to be a big IMG_3571challenge for me, but I think it works in the end.    I used a variegated thread and that proved to be a good idea as well because some times it faded into the background and other times it stood out.  

I used  silk from an Obi, taffeta,  IMG_3572and old table cloth I had done deconstructed screen printing on and cotton in this work.    The quilting pattern of the swirls came from the Obi.   IMG_3569

 IMG_3553 Make Visible   I had so much success with the circular quilt pattern in  Running Red that I tried a  variation on that idea with this quilt.  I am going to write the words in the quilting pattern on the surface.   This shot is of the letter patterns I will be following.

Flags: Stretch  DailyIMG_3555I am working away on the flag challenge too.   What a great place to try new things and explore.  This time I did a little trumpto on the dark green figures.  I added green plastic to  give more interest and I cut new bigger stencils that I then spray painted on the work.  Lastly, I added the letters.  They are cut from a photograph and stitched down.      My talk with Susan made me feel that adding paper to the work was okay.

IMG_3554 Flags: Dive In  With this flag I took the paper idea even further.  The week before I had been dyeing with Ethel and I put paper under the work so the wax would be absorbed and I left it under when I dyed too.  So I had several pieces of beautiful papers on the desk when I was playing with this project.  I traced the painted sections of the flag on the papers and cut them out.  Then I stitched them down.  Ribbon Work

Ribbon Work    This work is moving along- but I have hit a snag with the fact that I have used the whole spool of yellow ribbon now.     I need to live with it before I decide what will be my next move.

IMG_3578 Label Block  The nightly work goes on with this project.

Keep Creating

Carol

Mistake- Lesson Learned


064  Hello,

I have had a mixed week.  I spent Friday morning last week helping my friend Nancy and her Grand Daughter Jaelyn  do a little stencil work.  They were making a back pack and Jaelyn wanted her name on the flap.  We had a pleaset time stenciling  and as soon as she was finished, Jaelyn  pulled out the feather weigh and was ready to get back to assembly.

The  upsetting thing this Bears-001.jpgweek was a gift project.   I was making a baby quilt for a friends grandchild and I was nearly done.  I only had to add the strings for the balloons that the bears were holding and I would be complete.  I thought I really wanted to the strings to be strait so I pulled out a marker and drew the lines on to follow.  I was excited as I could see the end of the surface work for this project.081  I did not take time to test the marker and that was my down fall.   When it came time to wash out the marks I found that I had picked up the wrong tool and the marks will not come out.    I have tried several of the ways various folks have suggested from the inner078 net, but no success.    The quilt is ruined as a gift of course.   The pens do look similar, but that is an excuse.  I can go and purchase a gift, but some how that will not be the same.  I have no one to blame but myself for my haste.  I am disappointed with myself.  I am certain I will not make that mistake again.

Name Game III Patti Progress Report: Name Game III- Patti     This quilt is 14” X 26” .   I am so enjoying this processPatti- close up 1 as it really challenges my design skills when it comes to putting the blocks together.  One change in direction can 093change the whole movement of the work.      I like all the texture of the raw edges too as they seem to add a different type of movement to the final work.     There is also the challenge of using letters as a starting point because the shapes of letters involve strait lines and curves in ways I do not think ofPatti before cut drawing usually. This shot is of the work before I cut it into pieces.    I am dreaming of a new challenge using more then one name.  This could add to the spice of the project.

Vernal Equinox  Vernal Equinox This work is  22” X 25”.    I call this building process fabric collage.  I used lots of fabric textures in this work. 097 There are velvets, valures, satins, cottons, corduroys, and brocades here.  The 098wading and folding adds its own texture to the end product too.  I was trying to fill the surface with visual interest and I feel it was successful.

Running Red085I am to the quilting stage of this project so I am only showing a detail this week.  I used the  pattern on the red silk as my inspiration for that quilting pattern.  As it is turning out the double knit on the  old table cloth( on the left here) has some woven patterns in it that are similar to the swirls of the silk pattern.

077Make Visible is the title I have chosen for this new work.    I spent and afternoon with Susan last summer trying out all her mark making 076tools and  in doing that I wrote lots of different quotes.   I had pulled out a bunch of fabric last week and this piece seemed to go with one of the collections.  This shot shows how I star the assembly of this type of quilt.   I lay out were I want the big blocks and then I begin to fill in the spaces around them to create the top  using 2.5 ” and 1″ strips.

075.jpgFlag- Spring Grass   I got a call from Susan this week.  She too is struggling with this flag challenge that we created.  We agreed that for both of us, starting with the central image or center of interest  first- is not the way either of us works.   I am not comfortable filling in around the graphics we are both working with.  But I will persist as that is how growth takes place.  I only finished this one this week.  I am still struggling with the text as a part of this challenge too.

Label Block083  The beat goes on with this project.

Keep Creating

Carol

Spring


Tree againt skyHello,

The trees are still bare, but the sun is shinning and I have spotted several Robins while I have been out of doors, and   I even ate my lunch out side today.   This shot not only shows the tree but is also shows an aspect of line.  A line can change its thickness as well as it’s direction.   The more I pay attention to lines the more I am aware of how vestal they are.   Lines can be used to express a wide array of emotions.    They can be sad, nervous , silly angry, graceful, calm, excited  and dancing to name a few.   Our culture  uses them  to communicate with words and images.      They are every were when one starts to look for them.

I made Easter Cards Easter cArdsone day this week.  I took a heavy card stock and on top of that I placed ribbons, yarn and plastic twist.  I kept the pallet limited to light spring like colors and  then stitched in many directions across the surface to attached the materials.  When I felt that the surface was  strong enough I cut out the egg shapes.  I added pipe cleaner ears and a pome-pome tail  to create little rabbits.  Then I glued them down to the cards were I had drawn some grass with a green marker.  I did leave some of the eggs as just eggs    and   glued them into nests so I had two different cards.  I had a good time and I hope  my friends enjoyed my spring fling.IMG_3414.jpg

Progress Report: Whip Shock Hill II   I am still working away on this piece.  I like adding all the texture to the surface of the work.  It makes for nice soft color changes is some areas.  I am sure I will complete this piece this week.


Scrap Happy  6 &7   Scarp Happy 6 The only thing I needed to do to complete this quilt this week was add the binding.  That takes me about an hour.  This one has center blocks that are all in grays and black and whites, with a few center blocks that have browns in them.

Scarp Happy 7


I also completed  Scarp Happy # 7.   This one  has deep red center blocks and gray center blocks.  The scale of the prints is much smaller than # 6 so it is not nearly as busy.


Vernal EquanoxVerna Equinox This is the newest piece using the Fabric Collage technique.    I am trying to add lots of different fabric textures along with the wrinkle and wad stuff that I have been working on.  This piece has cotton, valure, taffeta, silk, double knit,  organza,  grow grain ribbon,   and wide whale corduroy  in it.  The fabrics alone are lots of textures.   I hope I can make it work. Patti

Name Game  III – Patti   This shot shows the first  cut  from the brown and gray fabric.   The top image is the negative in brown and the bottom image is the positive in brown.   I have been very careful in my documentation of this process this time and I will put up a tutorial of the process this next week.  Hopefully I will be finished with the work too.


IMG_3408.jpg


Ribbon Work      I stared this new piece trying to play with the same ribbon application technique that  was on a piece of  red fabric that  Susan gave me.   Susan's scrap The process is slow and I cannot seem to work  with the closeness the example has– but I do like the effect.    My ribbon is much  wider then the example.  I am still trying to stay true to my New Years resolution of not purchasing any thing new so I will continue to work with the ribbons I have here.

heart of gold


Flags:    Heart of Gold     I am continuing on the  Susan’s   Flag Challenge.  This week I tackled the purple stencils.  Susan did  the rib cage that is on this work.  I  added more color with various fabric markers. The heart is a small bit of gold fabric that was remaindered from some other project as it was just pinned to the wall.

.

DSC00693.jpg Flags:  Relaxed Energy    This is my purple stencil.  I selected this pose from Susan’s book because I was surprised that many of the exercises that the physical therapist gave me for my back are also Yoga poses.    I added a beautiful glittered nylon net that Susan had purchased in Mexico and given me as a part of this flag.    I was also thinking about negative space when I made the stencil and when I cut away some of the netting.


Label Blocks 1 &2    Blocks  I need to have a hand work project for my evenings.  So I stated doing these label blocks again.    I did my last label quilt in 1988.     Some of the labels I am using are left overs form those works.  But I will soon be using only current labels.  They are much harder to find now because many IMG_3411.jpglabels are printed on the fabric as apposed to added units.  If you have any you can send them my way.

Enjoy the days as they get longer and warmer.

Keep Creating ,

Carol

Mud Puddle Luscious

ClownsHello,

My world is headed toward spring.  I heard and then saw   geese flying north yesterday on my walk.  Today it is raining and I am reminded of a line from an e e cummings poem were he described spring rain  as creating a world that is “ mud puddle luscious  and the goat footedNoel balloon man wanders far and wee” .   I will  not be walking today for that reason- too much mud in every direction.   This week has been as full  Saturday I went to a play day were all sorts of things were going on.  Noel and I worked on making puppet heads out of paper Mache’.   Some folks painted like Annie while  others sew  on Anniequilt projects and dolls.


At noon we had a little show and tellJune were June showed off this fun doll.  She was working on it the last time we got together.  I like the use of the antique wood block as the front of the body.   The hair is cool too.


Group quiltThis quilt is a group challenge project by the Modern Quilters.  Each person go the same colors and the background fabric.  They all made a row that they then assembled.   Marie showed us what she has started last time too from the online class she is taking called 100 Sheets of Cheep Paper.   This is one of the works she did.Marie's paintings

DSC00655The Social Art Club had a art  show this week and the work was  wonderful.  This piece is a fiber work by Kathleen  Simpson.     I  displayed my chickens as a part of the table decorations for that affair.    Chicken


I gave two quilts to my local Public TV Station this morning.  One was one of those  Scrap Happy Golden Weedsthat I  have been working on sense January and the second was      Golden Weeds.  I will be watching the auction and hoping to see the sales of both works.


This is also the time of year that

Quilt Surface Design Association  calls for donations for their auction so I did a work for that too. DSC00659.jpg

This work is a small 12″ X 12 “.   Easy Flow is ready in the box for shipping and I will go to the post tomorrow and send it off.

Name GameII - Lexi Progress Report: Name Game  II – Lexi,     For this quilt  I used my Grand Daughter’s nick name  as my starting point.  I used the same sew and cut method that I employed last week with Carol.  The big change this time was that Close up 1 lexibackground fabric was a plaid taffeta and that added a different design problem.     I did the quilting on the background just like before with silver thread.      This time I also made the work bigger  before I cut it into blocks.   As a result I have  squares that I did not use for Close up 2this quilt so there may be a smaller one later. I want  to try this type of construction  one more time  so I can try for a writing text instead of a printed letter form.


Whip Shock Hill II    This workWhip Shock Hill cl 1 is to be a partner with the first Whip Shock Hill and is based on a second shot of the same rock face just further north.   This images is a close up as I do not think the full work is very interesting at this point.


Susan’s Flag Challenge: Spring Onion   Susan and I both have  a DSC00664.jpgdozen flags with the same images on them.  How we choose to finish the works will be a fun comparison study when we get together again in June.   There is crayon drawing on this work and some beads were added to represent soil under the plants.   I learned that one can not add stamped letters over a seam and get a smooth image with this project.   The word onion had to be stamped on  a second cloth and added on top.   Experimenting with new materials and methods is one of the goals of this challenge.   The stamped letters on fabric  is a new thing for me.

MagicFlag Challenge-   Magic   This flag uses my stencil of hands .   I added the crayon drawing of the  swirls and stars then pressed the fabric.  I then washed the whole thing in the blue.     My test this time was done with magic marker.

DSC00656 New work    This work is the next one in the fabric collage series .  There is not a stitch on this one yet- just lots and lots of pins.  It will morph and change as the stitching  and addition of ribbon, yarn and paper goes forward.    I look forward to working on this one.

Keep Creating

Carol

Warming up

IMG_2696.jpg  Hello,

We are starting to see the melting of the snow  around here.  It is beautiful in its own way.  But it can become very dirty and discolored before its gone.    With the longer days I find myself spending more time cleaning and sorting.  I seem to have the  clutter rule  of  “ One   thing in one thing out” well under control in my closet and dresser drawers.   But that is not the case in my studio.     I have piles of stuff all around and I need to do some serious culling.   I know that a clean and clear space helps one get going on the creative work and I do love to walk into that sort of setting.  But I have been traveling and working with IMG_2701_thumb.jpgothers so much of late, that I have let the materials pile as I rush from one play date to another.    I have done a good job a voiding going out and spending money on new supplies and materials however.   I have kept my spending sense January at less then $35.   Not bad for two and a half month I think.  But   it is the gifting of stuff from those friends that is getting me into trouble.      I did spent yesterday with my friend Ethel doing screen dye printing.   It was great to play with the rich colors.  Now I have all the rinsing andIMG_2699_thumb.jpg washing to do today.  She also gave me a couple of yards of white duck…… I am hopeless!

I did work a little on the  Challenge Project Susan and I started in   Florida.  I added a blue wash to this piece and think I have decided on the text that I want to add.  I can  already see that the word part of this challenge will be the most difficult for me.    I plan to add some beads tomorrow when I go to see my friends at Turquoise Street studio.

IMG_2706.jpgProgress Report:  Nail Castings   This project started as a  result of  finding the white  plastic units that hold nails in electronic nail guns.  I was fascinated by the shapesIMG_2710_thumb.jpg of the things.  I have enjoyed working away  with thread out of Grandmother Ruth’s needle  basket  and exploring differentIMG_2711types of stitches.

Name Game 1-Carol IMG_2713.jpg Now I know I say that words are not my strong suit- but I do love the shapes of letters and the spaces around them.    To build this top I first printedClose up of Name game out my name in very large letters.  22″ tall  and 22” wide in fact.  Then I stitched around the letters and cut away the negative space.  I stitched the negative spaces shapes to a second pieces of light blue that was also 22” X  22”.    I found that the letters them selves  created  units of the turquoise  that were too big. So I cut just inside the stitch lines close up 2and  then added those new shapes to the negative space piece on the second fabric.  Next I cut both pieces of fabric into 5.5”  squares and began playing with the blocks.  Some I turned side ways or even upside down, always paying attention to the relationships of one square to the ones next to it.   This play part took me a long time and several days.   When I was happy with it I sewed the blocks together.  This is such a fun and challenging design project I started a second as soon as I had the top  all assembled.

IMG_2698.jpg

Name Game II – Lexi    This  second   top went a lot faster as I knew were I thought I was going.  I made this one more complex by using a plaid taffeta for the background fabric.     I also made more blocks and will not use all of them in this project.    I think this will create a stronger piece in the end.   In this shot some of the blocks are sewn to one  another.  

Memory Map- Canyon de Chilly  cose up of  spider woman I added the Spider Women’s Towers to this project.  I really enjoy working on these Memory Map projects, but they as all very slow in there development.    The ruins are  also attached now too.IMG_2705I am still trying to decide what other elements I want to add to the work.

Whip Shock Hill II      I wantclose up of Wip shock hill  to enter a show where one needs two quilts that relate to one another.    I have been thinking about how much I enjoyed the work on Whip Shock Hill.  The first project shows less then half of the hill so I though I would use this challenge to do the second half.    This is just the roughed out

Whipshock Hill Foundations XXI 44" X 35"
Whipshock Hill Foundations XXI
44″ X 35″

stage.   But I do not think I have shown this step before when it comes to these type of  collage projects that I do.   The base  fabric is only pinned to the buckrum at this point and no stitching has been applied.   This second shot is of the first piece.

I am keeping myself busy as the Spring season gets going.

Keep Creating,

Carol