I feel so Positive when I think about my work. I did a solo trunk show yesterday for the North Syracuse Art Guild titled
Out the Window 16.5″ X 21.5″ $125.00
” Your Art /My Art”. In that lecture/ trunks show, I compared my work to the many styles and types of work that the members use. In doing so I really realized how much I draw from the other art categories to get my ideas across. I draw directly on the fabric with pencils, crayons and markers. I use my machine as a drawing tool too. I Paint with acrylic,water color and dye on the surface when I need to create a special effect. I print on the surface using silk screens, stamping and stencils to get images I want on the work. I use some weaving techniques like felting, silk papers and frapping. I often use collage techniques to build up my surfaces with
Red Nebula 18″ X 24″
textures and transparencies and different already textured fabrics like velvet and satins. I even embellish with old jewelry on occasion. I am thankful that I get to use from all the different art areas to full fill my creative drive. I realized too that I have been using my experiences and interests to fuel my work for most of my life. Doing a presentation like this is a good way to reflect and re evaluate oneself.
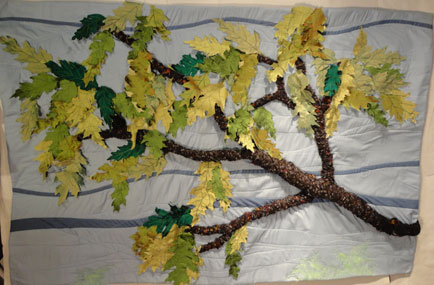
Oak Leaves 45″ X 30″ $ 350.00
I now have the monster job of returning all the work back into the category packs that I store them in. I feel so very thankful that I am working in so many ways to fulfill my creative ideas.
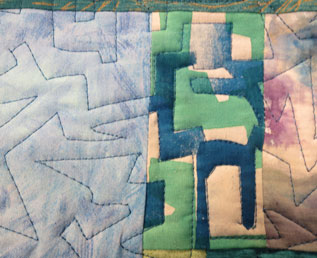
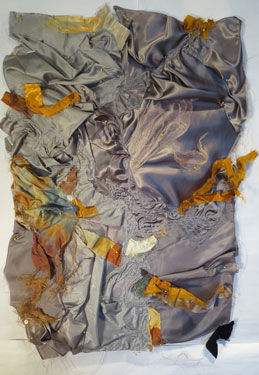
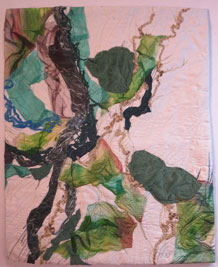
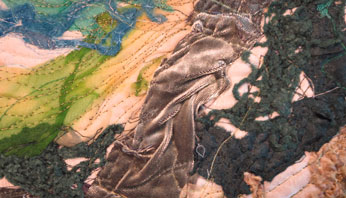
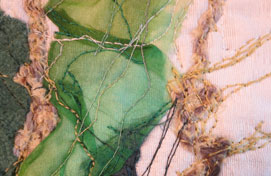
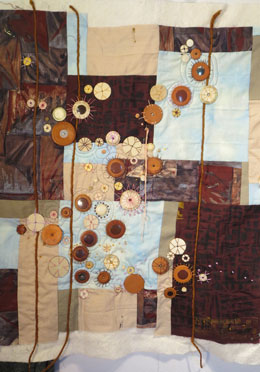
Acanthite: Foundations XXIV 18″ X 23″ $ 150.00
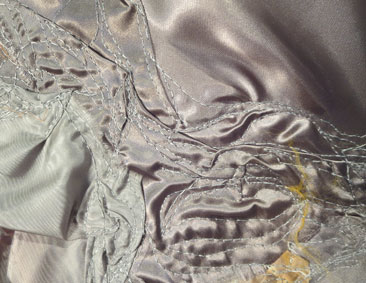
Progress Report: Acanthite :Foundation 24 This quilt is went together very quickly for me. This stone added some problems as some of the areas where a sold white. I wanted to be sure to use velvet and now whale corduroy on this work to show the wonderful textures they add to the surface. There were also lots of cracks on the surface that added interest to this one.
This shot also shows some of the chenille yarn( dark green) and some silk paper( blue- near the top).
Broadcasting I am enjoying doing the hand work on this piece. Most of the saxaphone pads are stitched down now and I am adding beads and french knots to the surface. I have added some reflective quilting to the surface too. This work is going along well at the moment with each actions leading to the next.
Yellowstone The ease that Broadcasting is a great contrast with my slow process on this work. I think I finally have the map portions the correct size and location. I will do the paint step for that and then I will move forward. I also realized that the piece is too pale. Yellowstone has lots of forest and I want to project that feel too so I pulled out dark green organza ( pinned to the left) and adding that will help me go forward I hope.
The Blues This work just needs time as the hand work is a slow thing. I am playing with three of different types of stitches- the chain stitch, the blanket stitch and the fly stitch. I am varying the size of the stitches to add interest.
Caramelized This is a new work that is still in the shifting and pinning stage. I melted the Tyvec that I painted in the fall colors last week, with the iron between sheets of parchment paper. The melt results are so much fun because they are uncontrollable. Mixing them with silk paper makes me think of carmel and melting butter. That is were the title came from. I am enjoying the play.
Spring is really here! I went for my walk today with out a coat. I even ate my lunch on the patio today. It was around seventy and the sun was shinning. It made me feel glorious.
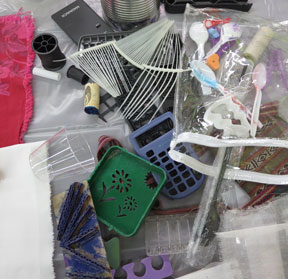
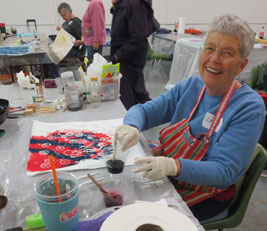
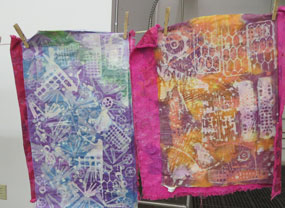
I had a busy week end as I took at three day workshop with Carol Soderlund( www.carolsoderlund.com) called Waxing Eloquent. It was about how to use soy wax and build up layers of dye on fabric to create great depth. We had a grand time and the three days flew by. In this first shot the teacher is holding my experimental piece. I had tried this before several years ago and I am more excited about it on this second attempt. I sewed the prepared fabric with to two layers of batting and normal thread on the top and a wash away( water soluble ) thread in the bobbin. Then I painted the soy wax on the “mountains” of the project and painted the dye in the valley’s. ( the work is at that stage in this first photo.) We all brought along a big supply of tools to apply the soy wax to the fabric. I enjoyed the old calulator plastic and the empty spool a lot. After the wax was dry we applied the dye to the fabric . This shot is of Linda who was setting across the table from me. We worked all afternoon at adding wax and color to the pieces we had started. This shot is of my pin wall in the middle of the afternoon. By the end of that first day the floor of the room looked like a magic carpet shop where the pieces “batched” all night long. We then added more soy wax to the surface. Things were really getting lucious at this point. This piece is by a new friend, Peg. The big circles in the wax were created with a sponge that had a hole cut in the middle. To fully use the dye, Carol had us layer the fabric in two and three stacks. I folded over several of my pieces and so I had softer second pieces and there was much less dye to mop up when the pieces were picked up off the plastic sheets.
There is a little problem with the water soluable thread- the dye also causes the thread to disolve. So before I put on the second layer of wax I had to cover the valley area of the surface to keep the white.
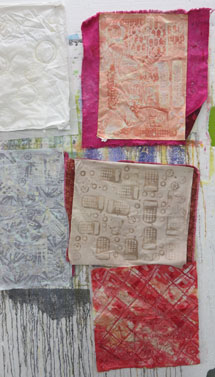
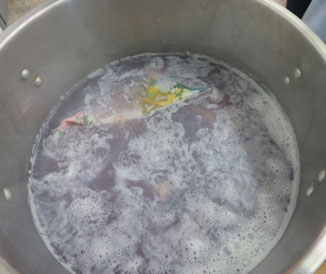
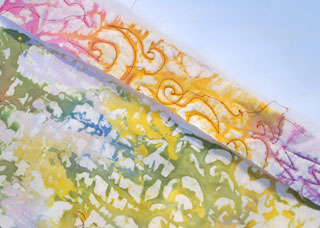
There are several ways to remove the soy wax from the fabrics. One is to iron the fabric between two pieces of newspaper and this should always be done first. This process was done with my work and then it was placed in a boiling kettle of water. All the milky color is the soy wax in the pot rising to the top. The water is then carefully poured out of the pot and the fabric is ready for a hot was in the machine. It is OK to pore the water soy mixture down the drain because the soy wax is a natural product and will bio degrade. I was surprised by the color change. This photo shows some fabric( at the top that did not have the color washed out and the thread is still attached) and the bottom is the final color of the washed and ironed fabric. The green color came from the blue dye added over the yellow dye of the day before. It will still be a fun piece to do hand stitching work on top of.
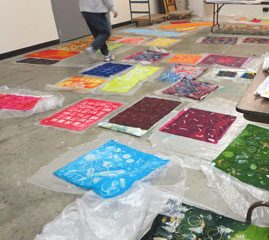
This shot shows several of the fabrics that I washed out at home on Monday.
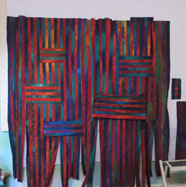
Then on Wed I went off to visit my friend Ethel and we did more soy wax work. She has a wonderful electric Jaunting tool and I used it on just about all the pieces I worked on yesterday. I wrote several bits of poetry as well as drew with the tool. Great fun! They are still batching and will be on the blog next week. Ethel is working on a wonderful piece on her pin wall. It is about 50″ wide and 60″ long at this point. I love the intense colors she is playing with here.
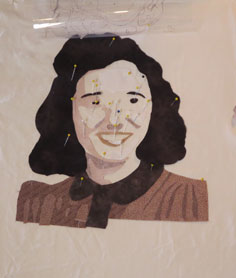
Then the FAB group meant at my house this morning. Patti is doing this wonderful portrait of her mom. She is still in the building stage without any of the pieces stitched down, but I am impressed. She told us she is using the front and back of some of her fabric to get the tones and shades to match her photo.
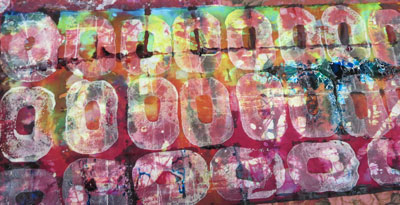
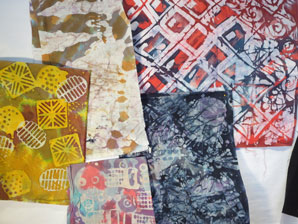
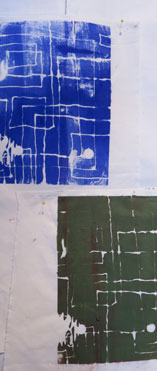
Then we did a little work with the silk screen so the gals could get the hang of using acrylic that was thinned with GAC 900. ( a Golden product especially made for use with fabric.) It was also a chance to play with a deconstruced screen as I had used Elmer’ s school jell on the screen to create a pattern. These are Nancy’s prints. I will continue to print with the screen until the image is mostly gone and I can show the others the effect at our next meeting.
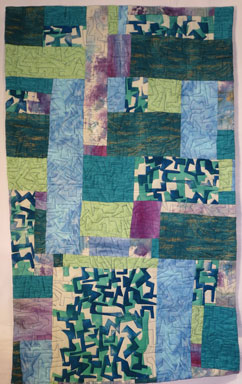
Electric 19.5 ” X 31.5″ $215.00
Progress Report: Electric I finished this quilt last evening. All the stopping, changing direction and starting sewing quilting patters made this project take a lot longer to quilt then I expected. I used the images I had created with the silkscreen print as my inspiration. I started quilting around them first to get a feel for the shapes. After I had done this it was a bit easier to create similar shapes on my own in the other areas of the quilt. The fact that my machine as a needle down position for the stop helped with this process. But there still is a lot of quilt were the printed images is not avaiable for a guide.
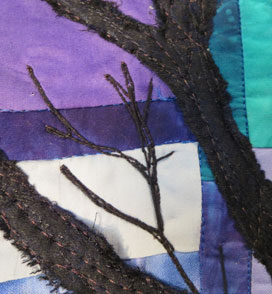
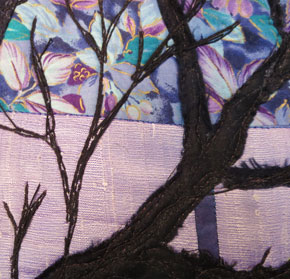
Out the Window This is my solution to
Out the Window 16.5″ X 21.5″ $125.00
the quilt that I cut in half two weeks ago. Last week I had decided to add the tree and I tried it in several locations before I decided on this final resting place. After I had stitched the wool tree to the quilt I loaded my bobbin with black embrodery thread, and drew in smaller branches from the back. The whole picture makes me think of looking out my friends window in Brookline where the next building was so close there was hardly any space between the two. But a young tree had grown up there anyway. The nine patch from the origional quilt looks like a near by window too, so it adds to that feel.
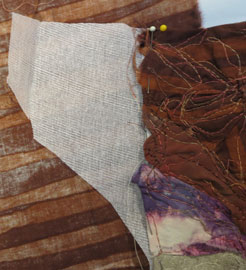
Foundations XV- New Directions I have been struggeling with this work for a while. When I took it to the Diva meeting last week Alice asked ” Why are you keeping these Foundations pieces square?” After considering that idea I have decided to try to alter the shape. Hense the new name on the end. Here is the process I am now trying to see if I can grow from an existing rectangle format.
First I add some additional Buckram in the shape I think I want to add. (I put the brown fabric behind so to allow the Buckram to show up.) Then I build up the fabrics on top being sure some crosses over the original surface and i sew it down as I normally do. I like the fact that this method allows me to change my mind a lot as I work. I already know I want to change the left hand side and the top edge. I will know better what the piece needs as I look at the progress.
Grove I did not do a lot of work on this project this week. There has been too many other things demanding my time. But one more unit was completed. It is also at the back of the stack of work pinned to the pin wall so I run out of time before I unearth it many a day. I only have one more tree to create here before I need to move onto the next step
New Work
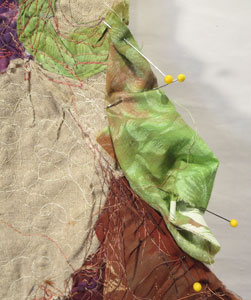
I have pinned the fabric to the buckram for this new work. I have the detail to show that when I begin the stitching down of the piece I start near the center and do not totally finish even that area until later. That allows the work to change as I progress through the work. I had cut the buckram before I decided to try the new shape, so I will at least start out with is as it is and let the piece grow with the work.
Daily’s I seem to be doing more stitch work with the Daily’s as time goes along. It is still enjoyable and something that I look forward to every evening.
 Hello,
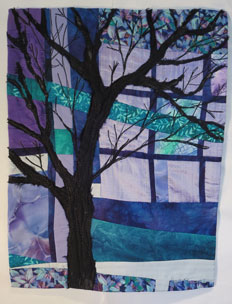
 Paint with acrylic,water color and dye on the surface when I need to create a special effect. I print on the surface using silk screens, stamping and stencils to get images I want on the work.
 I use some weaving techniques like felting, silk papers and frapping. I often use collage techniques to build up my surfaces with
 pads are stitched down now and I am adding beads and french knots to the surface. I have added some reflective quilting to the surface too. This work is going along well at the
 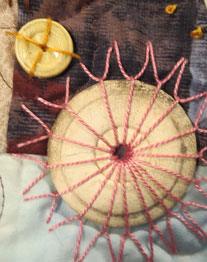 moment with each actions leading to the next.
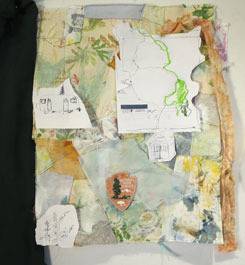 Yellowstone The ease that Broadcasting is a great contrast with my slow process on this work. I think I finally have the map portions the correct size and location. I will do the paint step for that and then I will move forward. I also realized that the piece is too pale. Yellowstone has lots of forest and I want to project that feel too so I pulled out dark green organza ( pinned to the left) and adding that will help me go forward I hope.
 just needs time as the hand work is a slow thing. I am playing with three of different types of stitches- the chain stitch, the blanket stitch and the fly stitch. I am varying the size of the stitches to add interest.
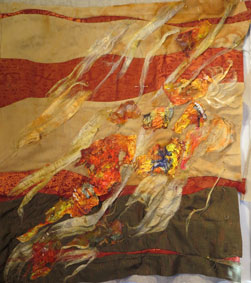 Caramelized This is a new work that is still in the shifting and pinning stage. I melted the Tyvec that I painted in the fall colors last week, with the iron between sheets of parchment paper. The melt results are so much fun because they are uncontrollable. Mixing them with silk paper makes me think of carmel and melting butter. That is were the title came from. I am enjoying the play.