Category Archives: Tutorial

All of the tutorials

Quiet Times

Hello,
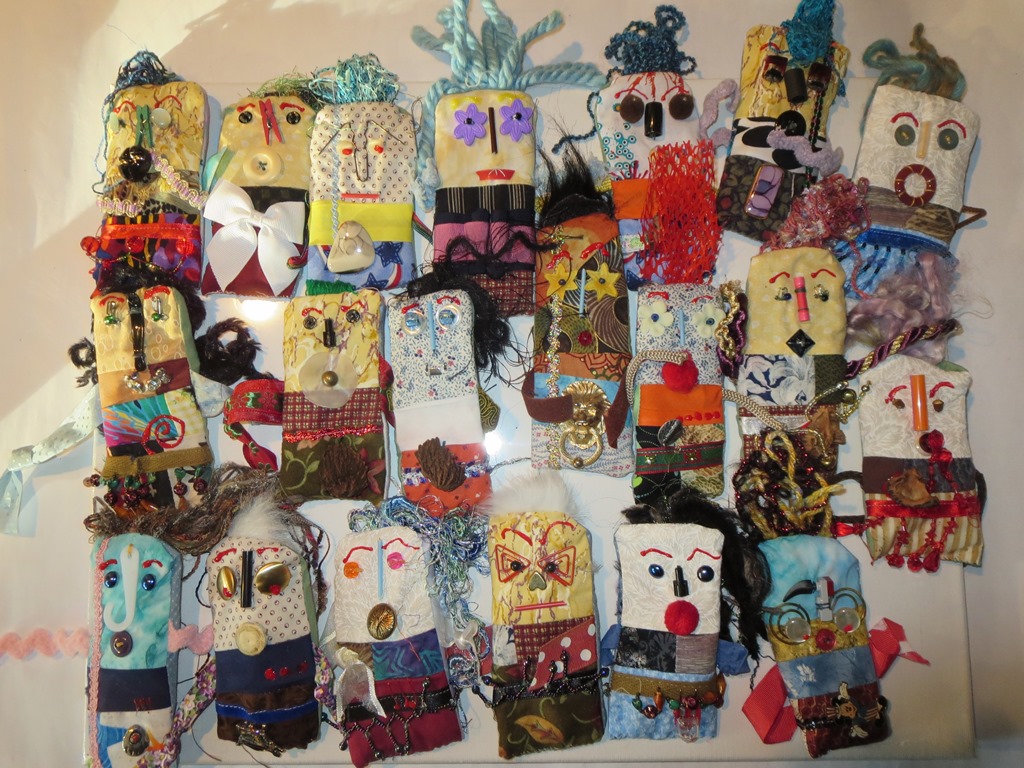
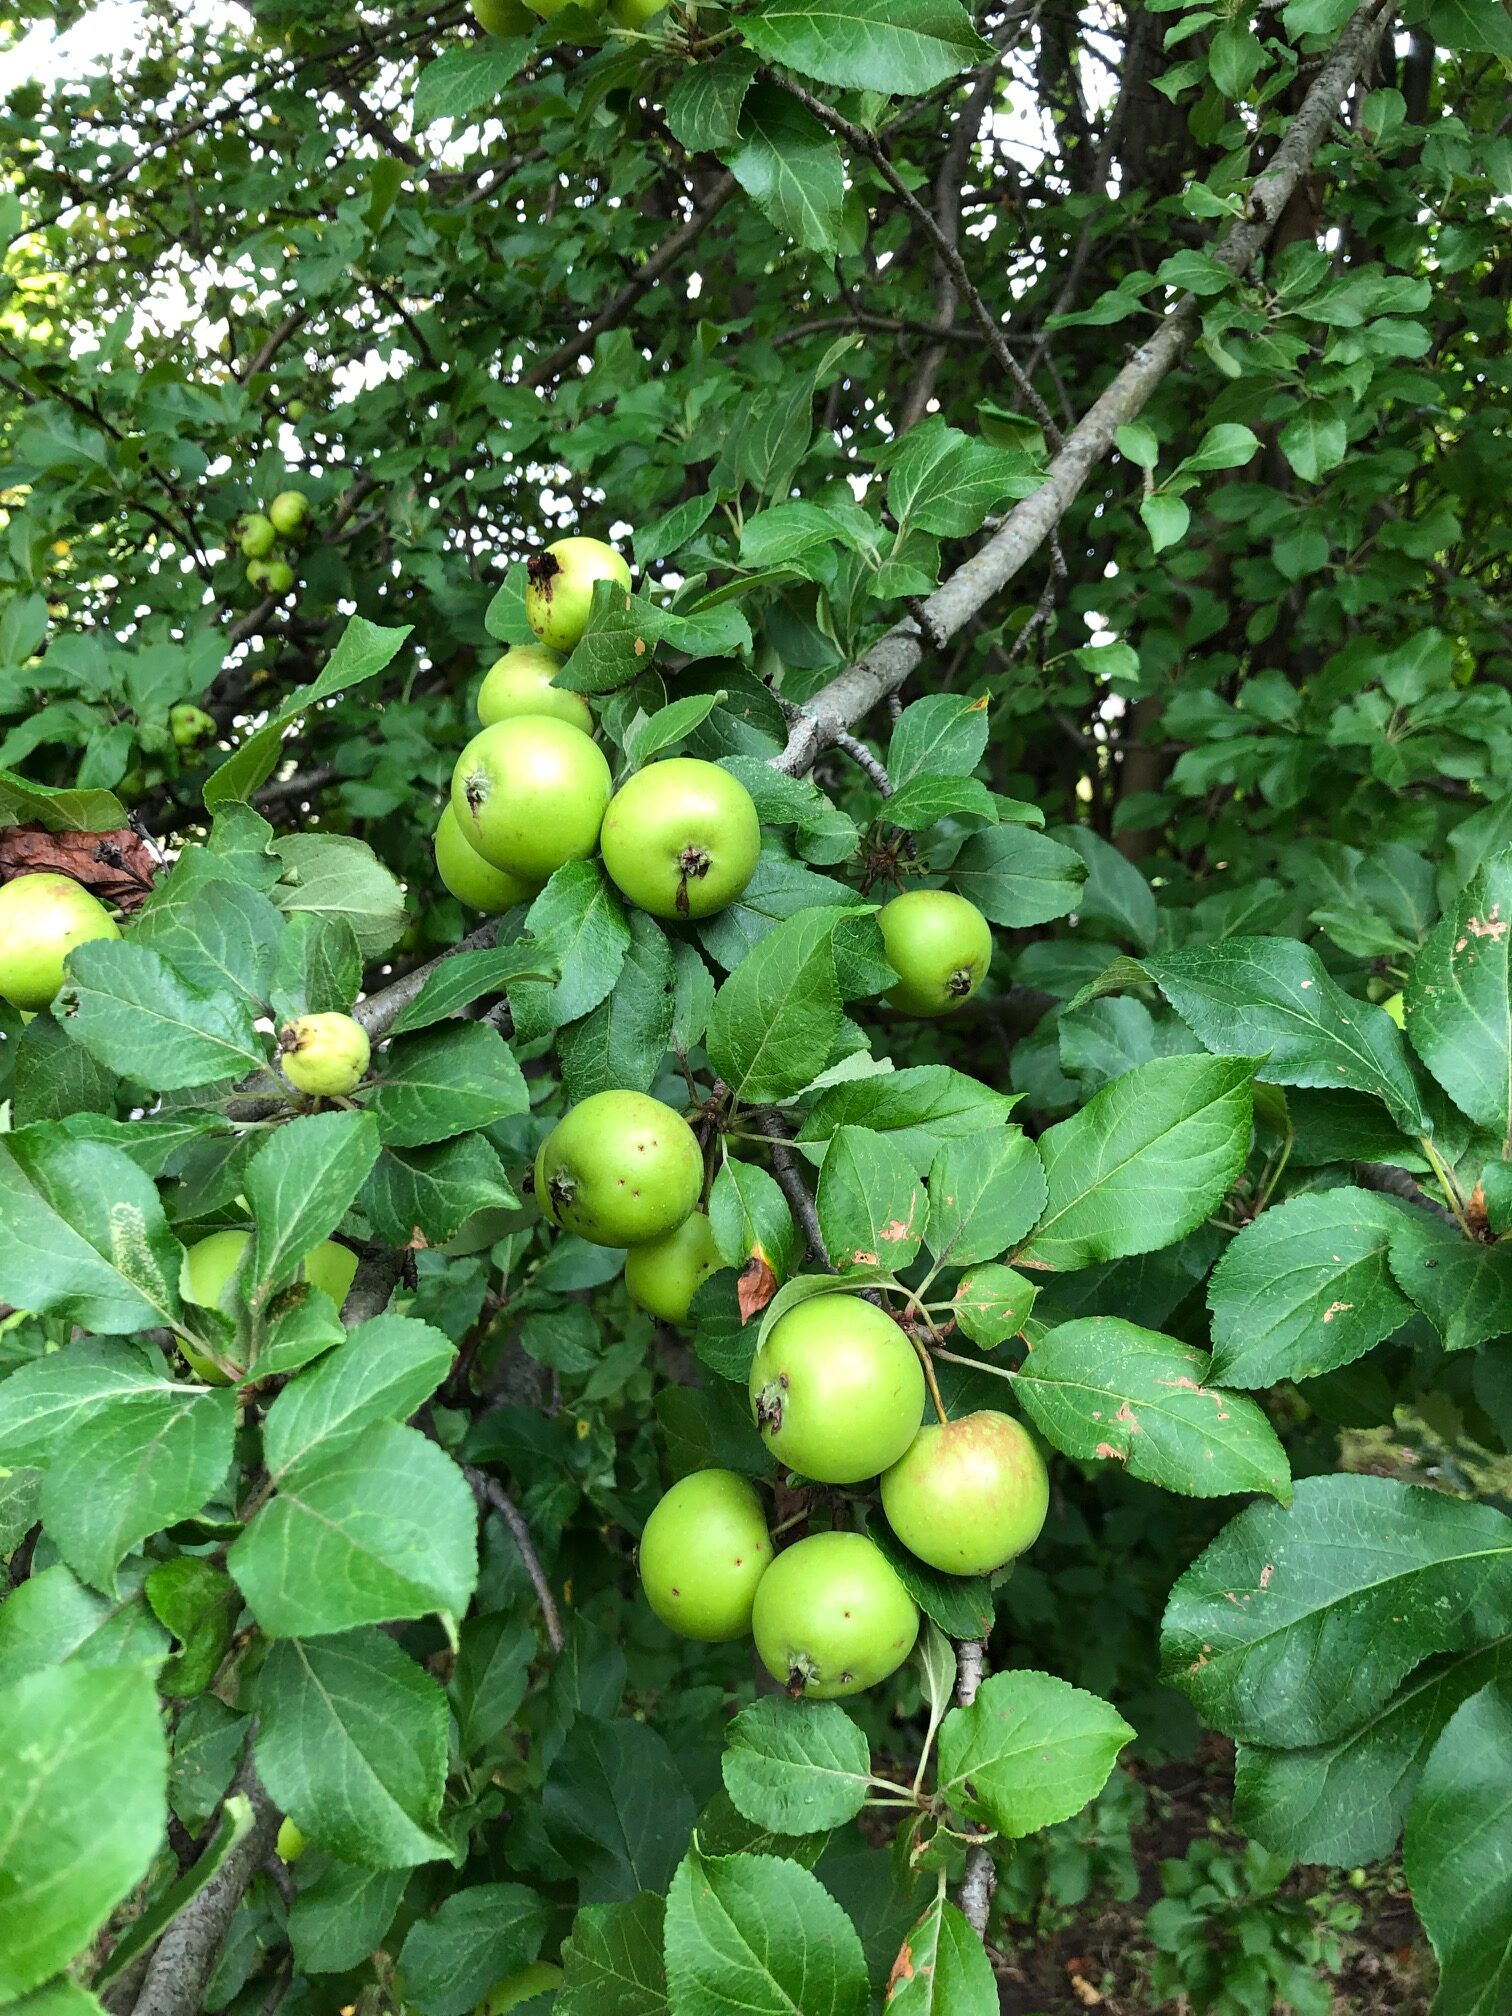
Summer keeps putting forth her bounty. I was captured by these forming apples that I noticed on my walk today. It seems like the blossoms were on the tree just a few weeks ago. It has been a quiet week this week with only the Pixie meeting. Even that was short one member due to the fact that she is in the hospital. We are all sending good vibes in her direction for a fast recovery. This week however was one with lots of studio time and so I finished up lots of work.

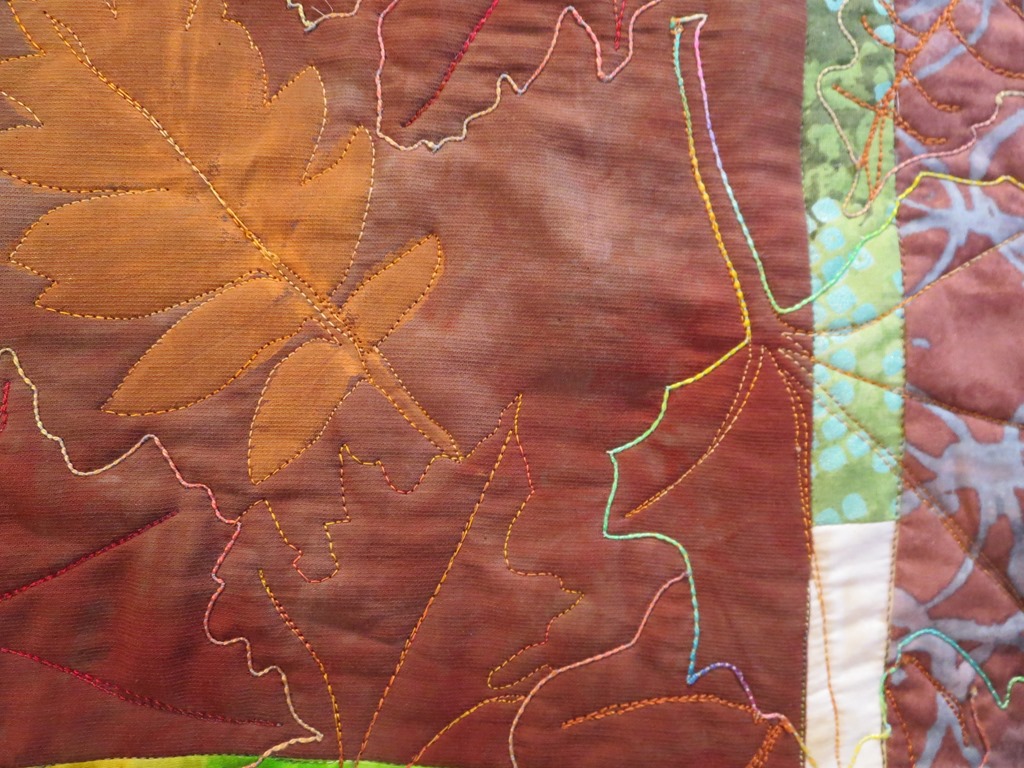
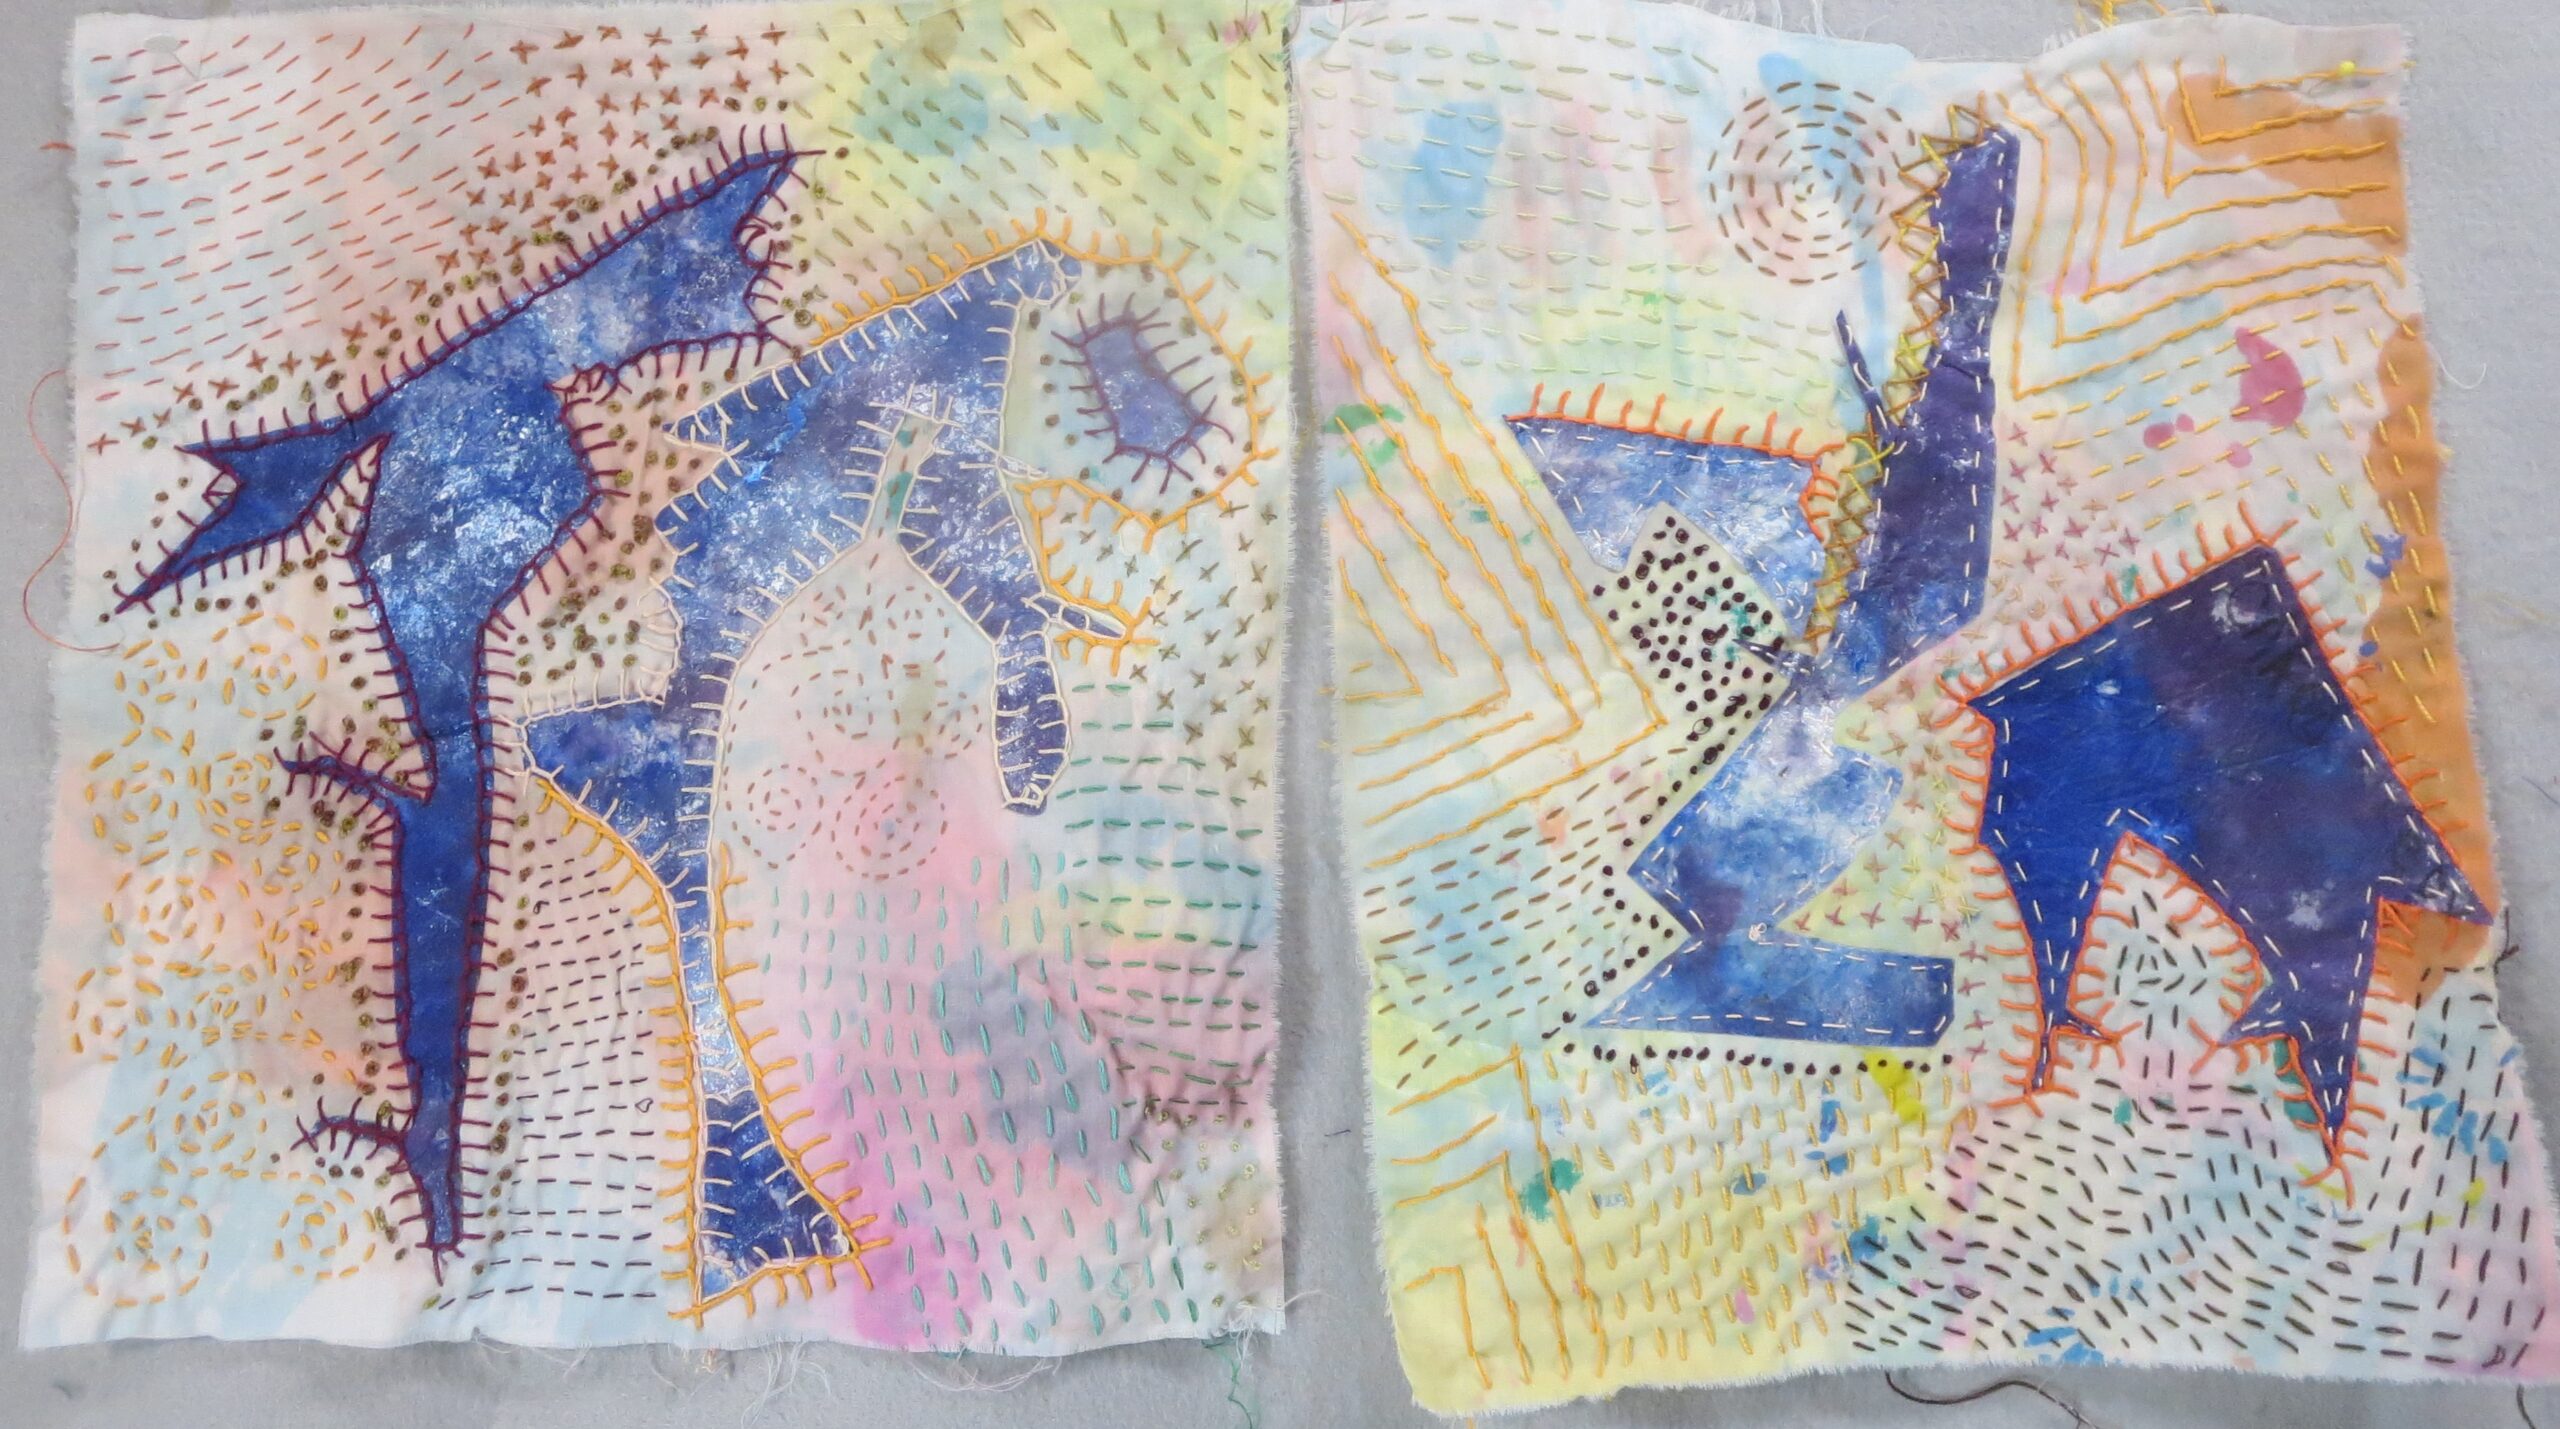
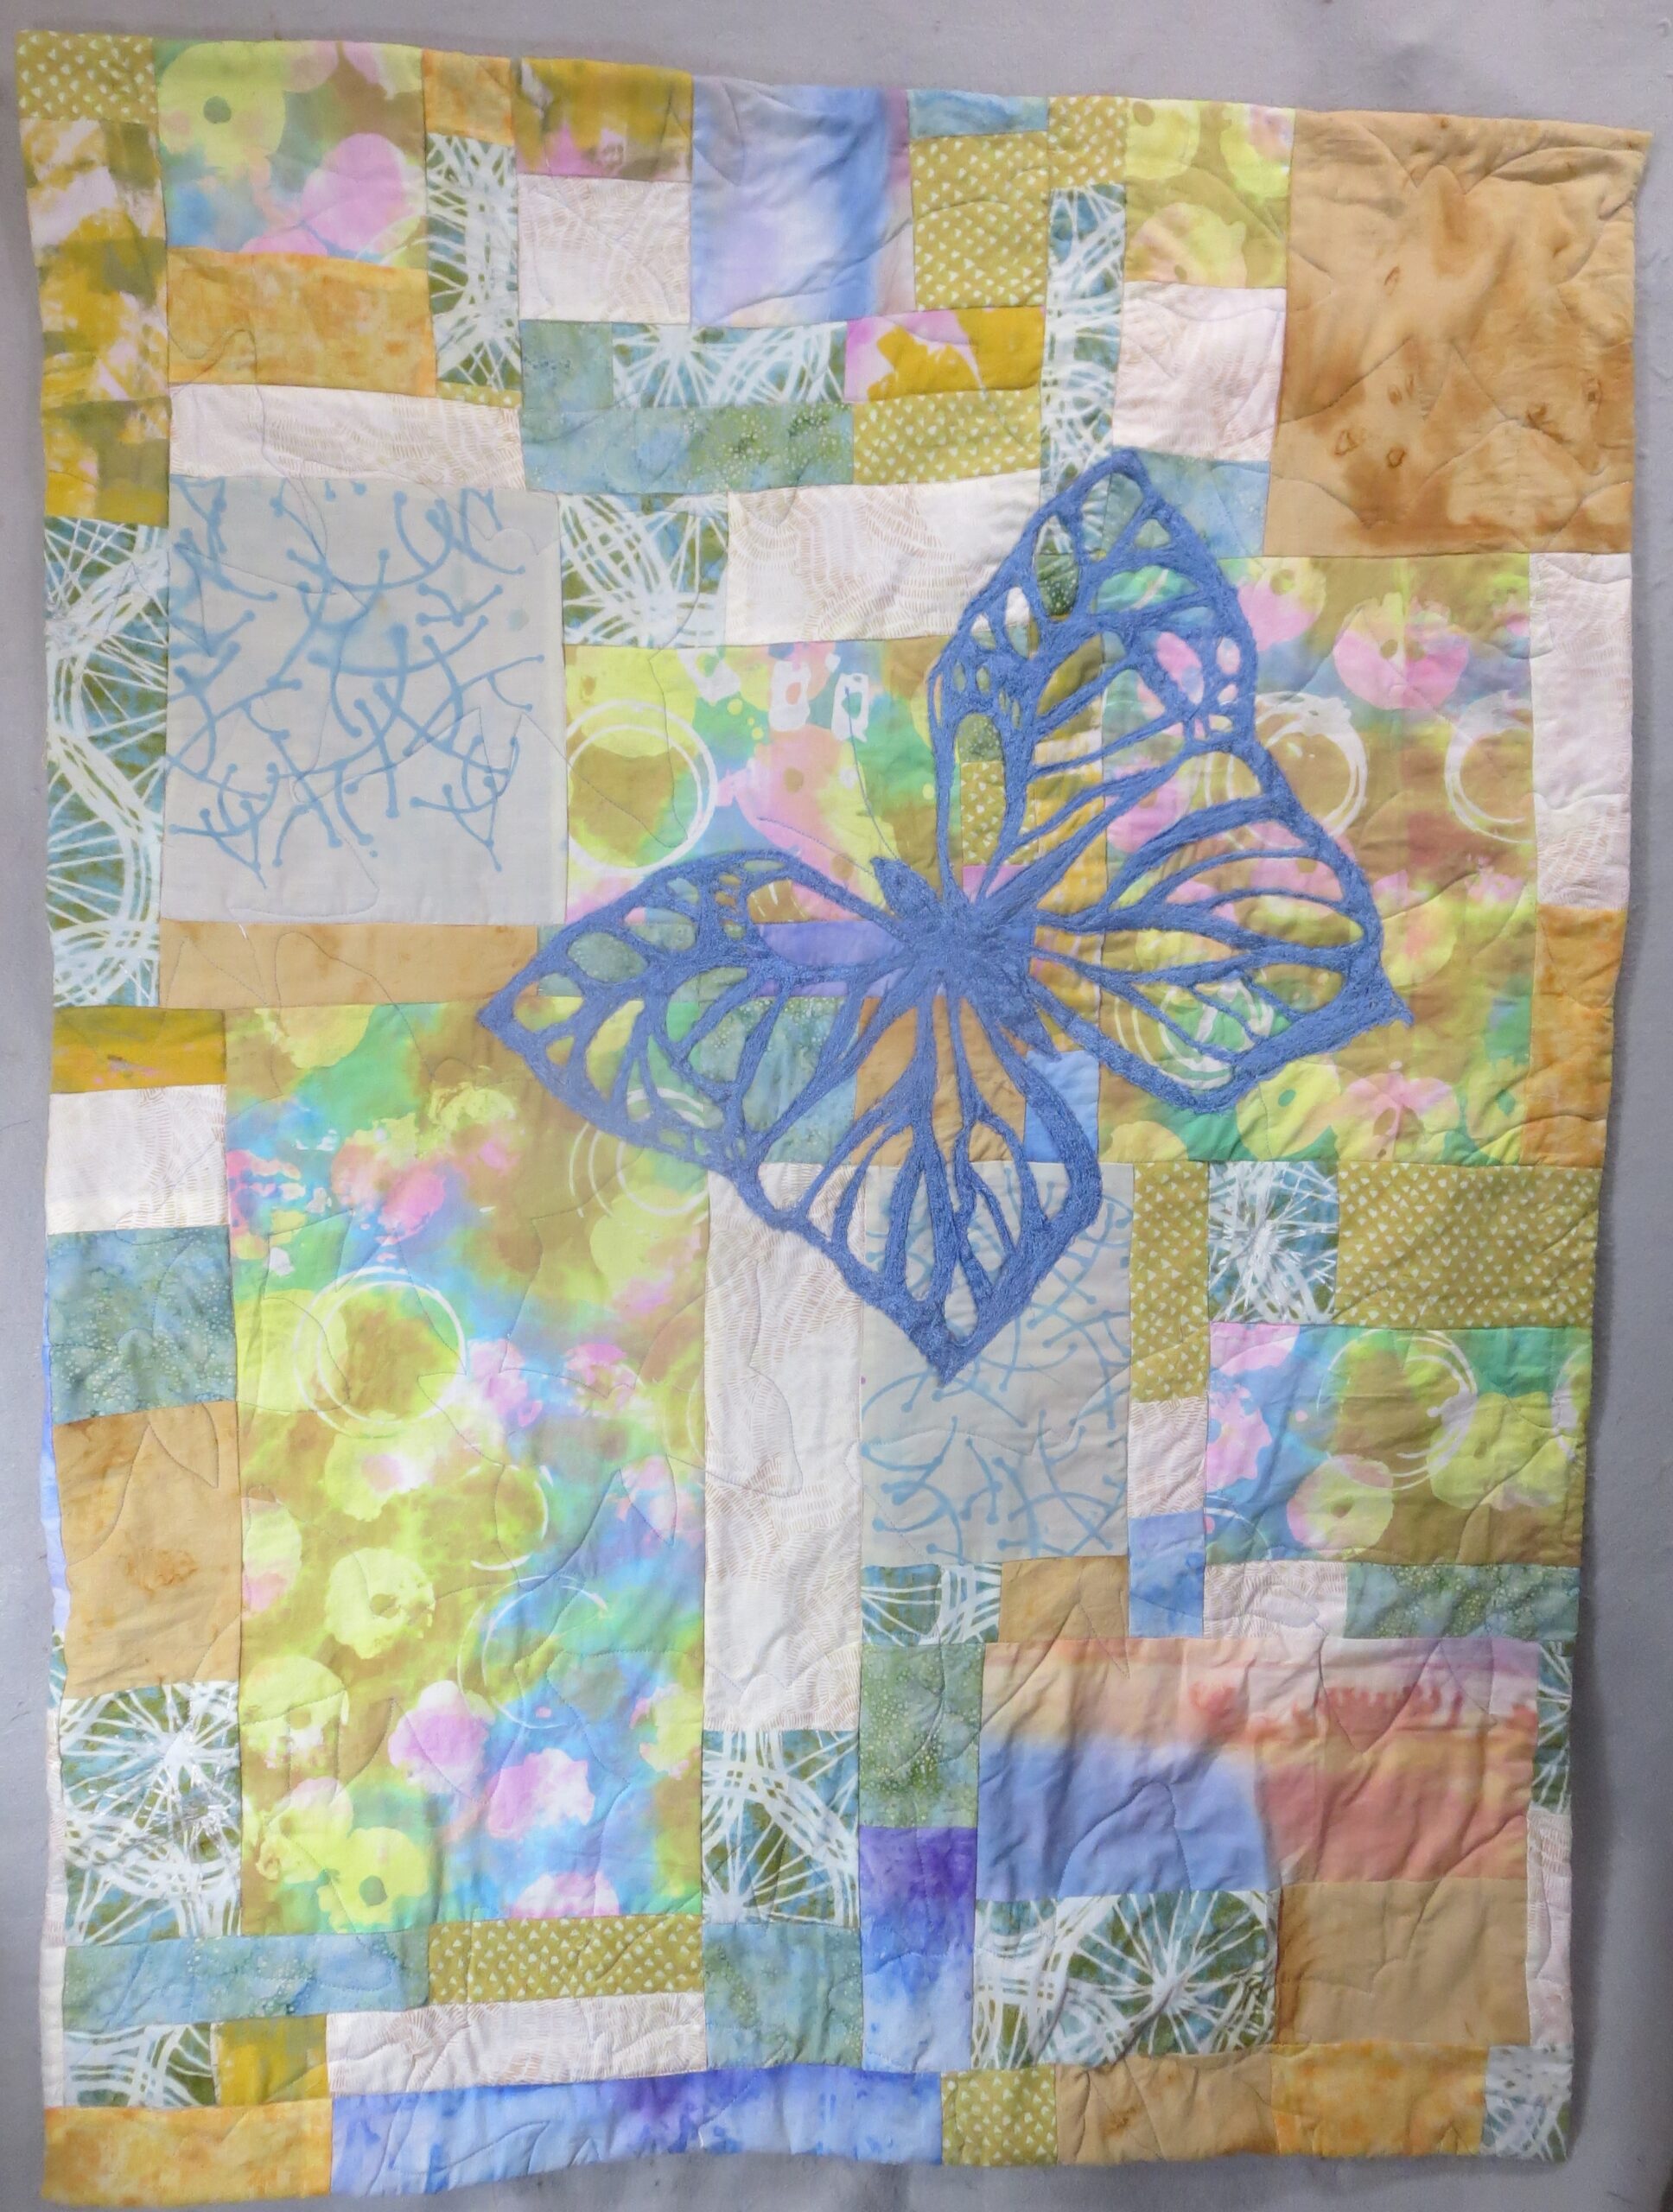
Progress Report: Blue Butterfly This work is 37″ w X 50″ l. I changes my mind on this work after I had started it. I like the hand altered fabrics to much that I decided to add the butterfly on top turning it from a lap quilt into an wall piece. I did the insect on wash away so that the fabrics would still show through. Then I added more quilting after watching Joe Cunningham’s Face Book post were he was suggesting that the quilting was an additional 
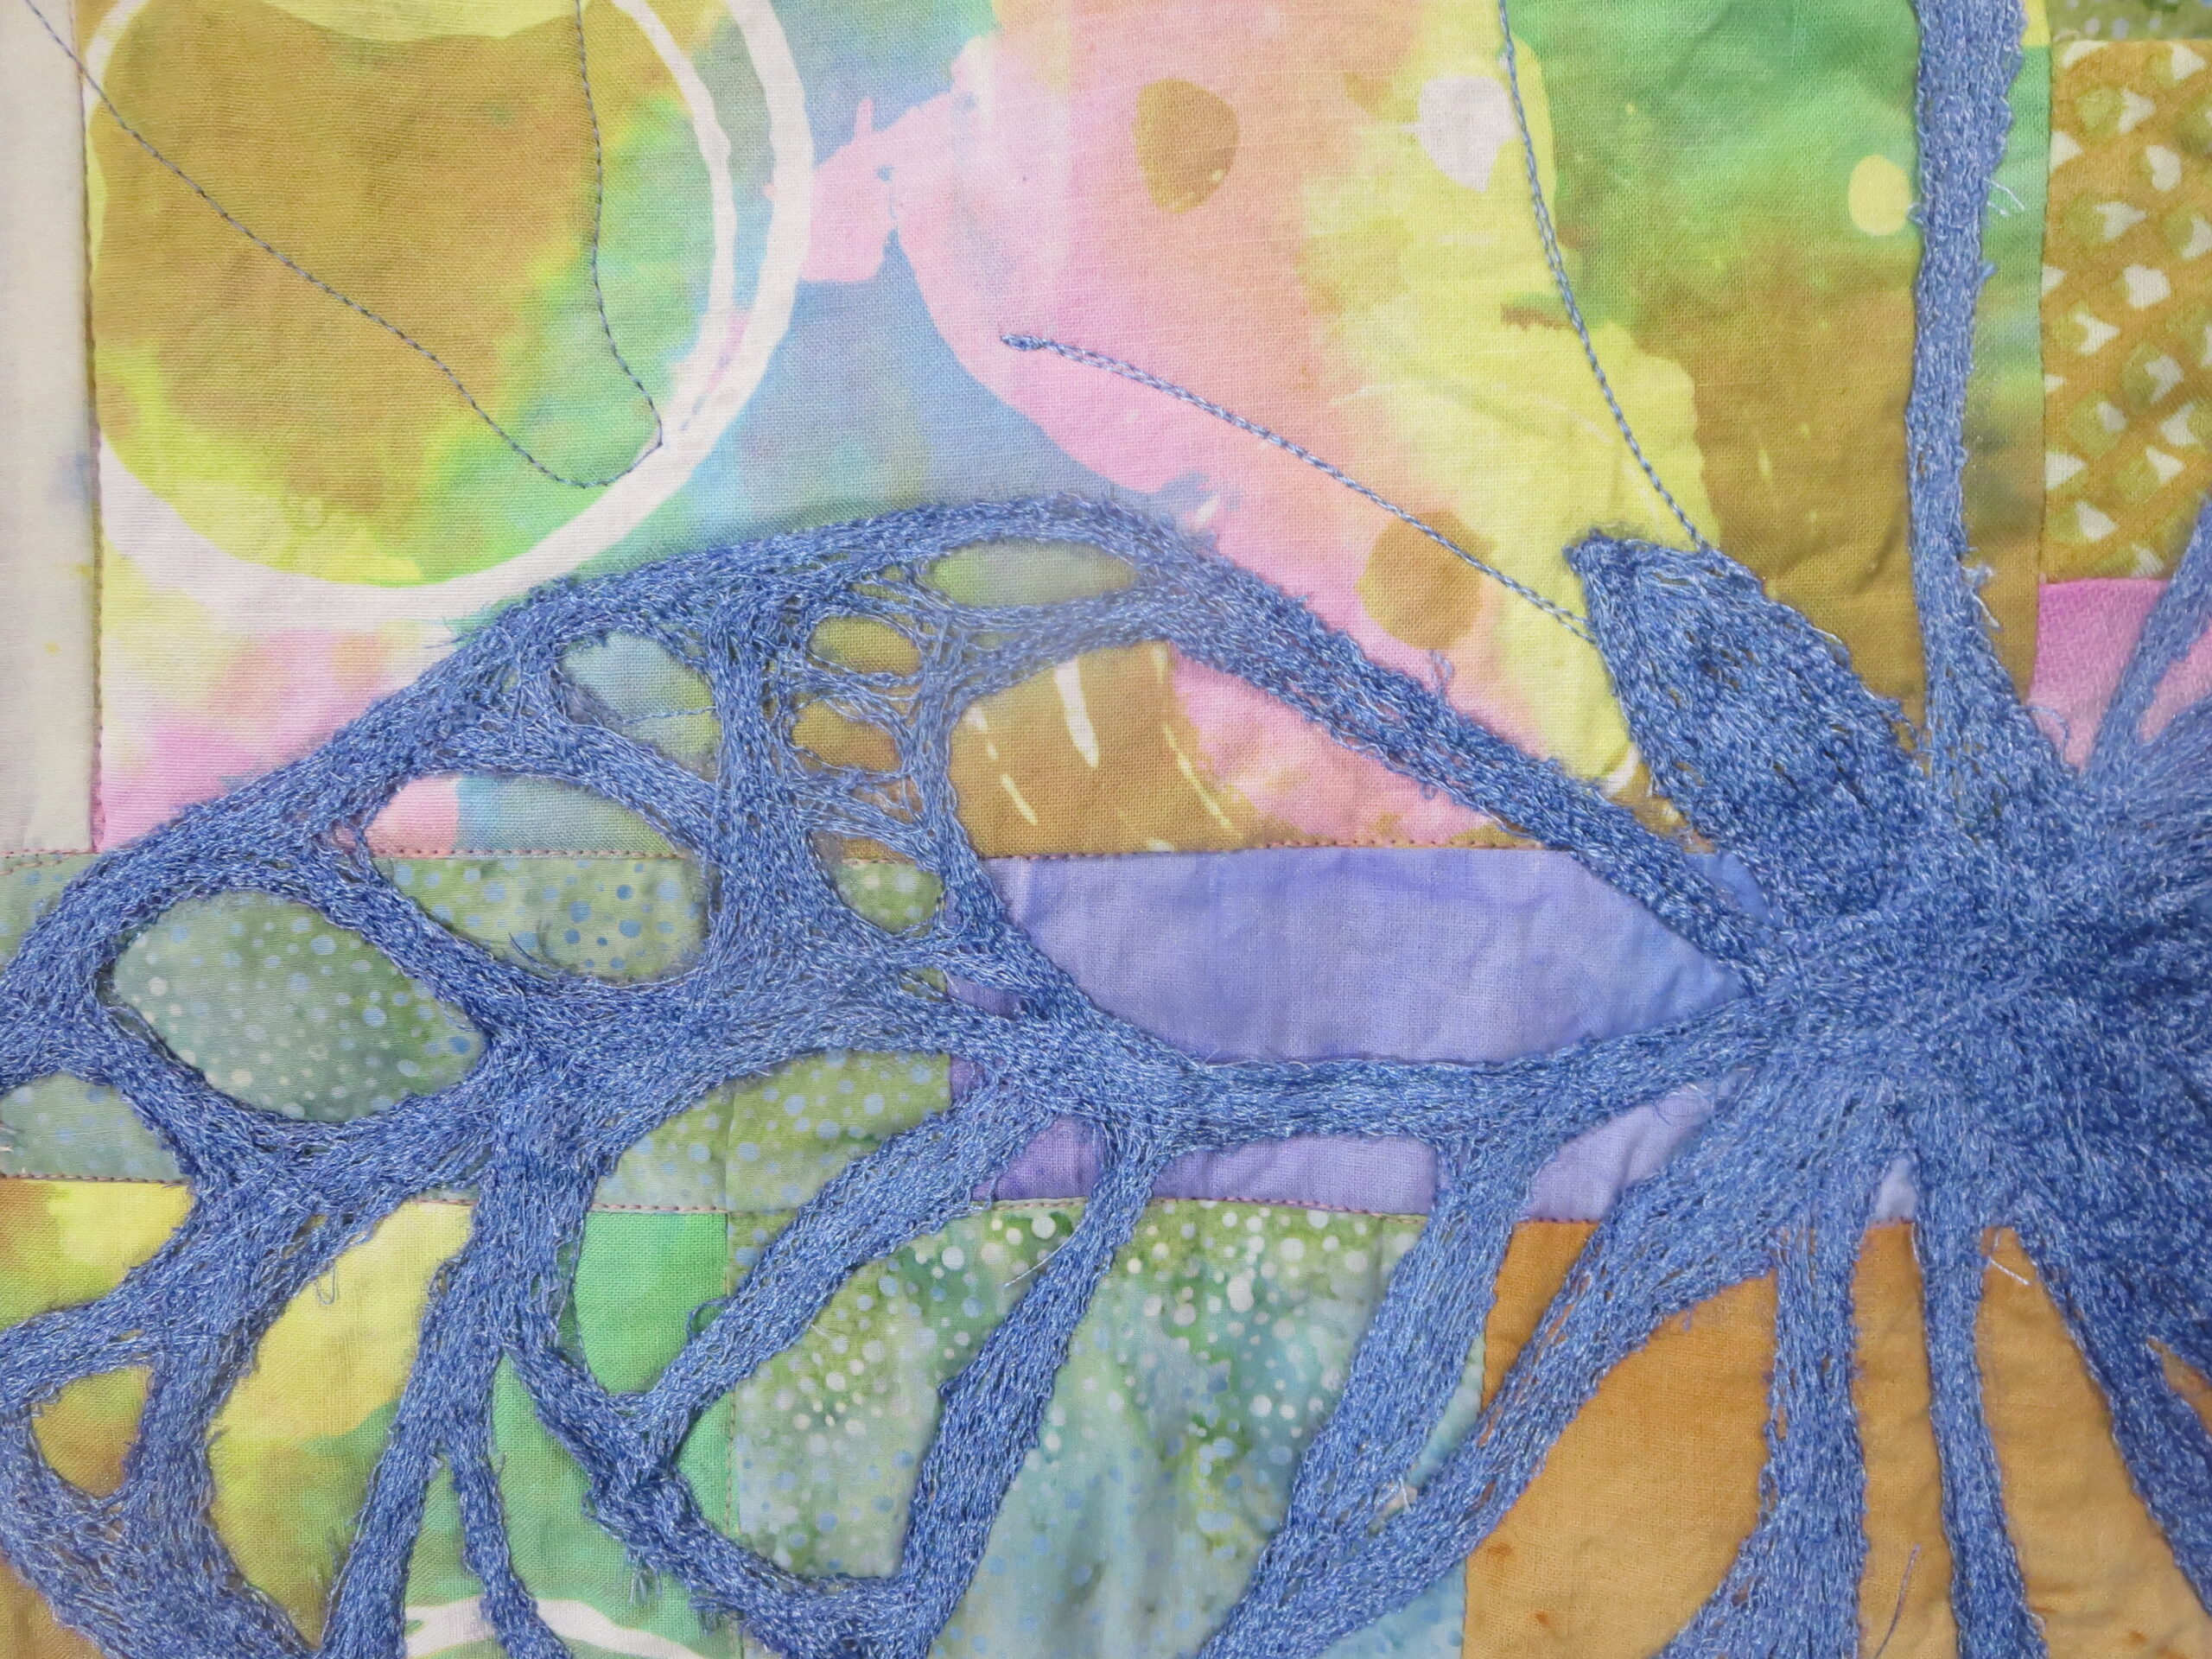
design space to use to add interest to ones work. So I quilted in more butterflies.


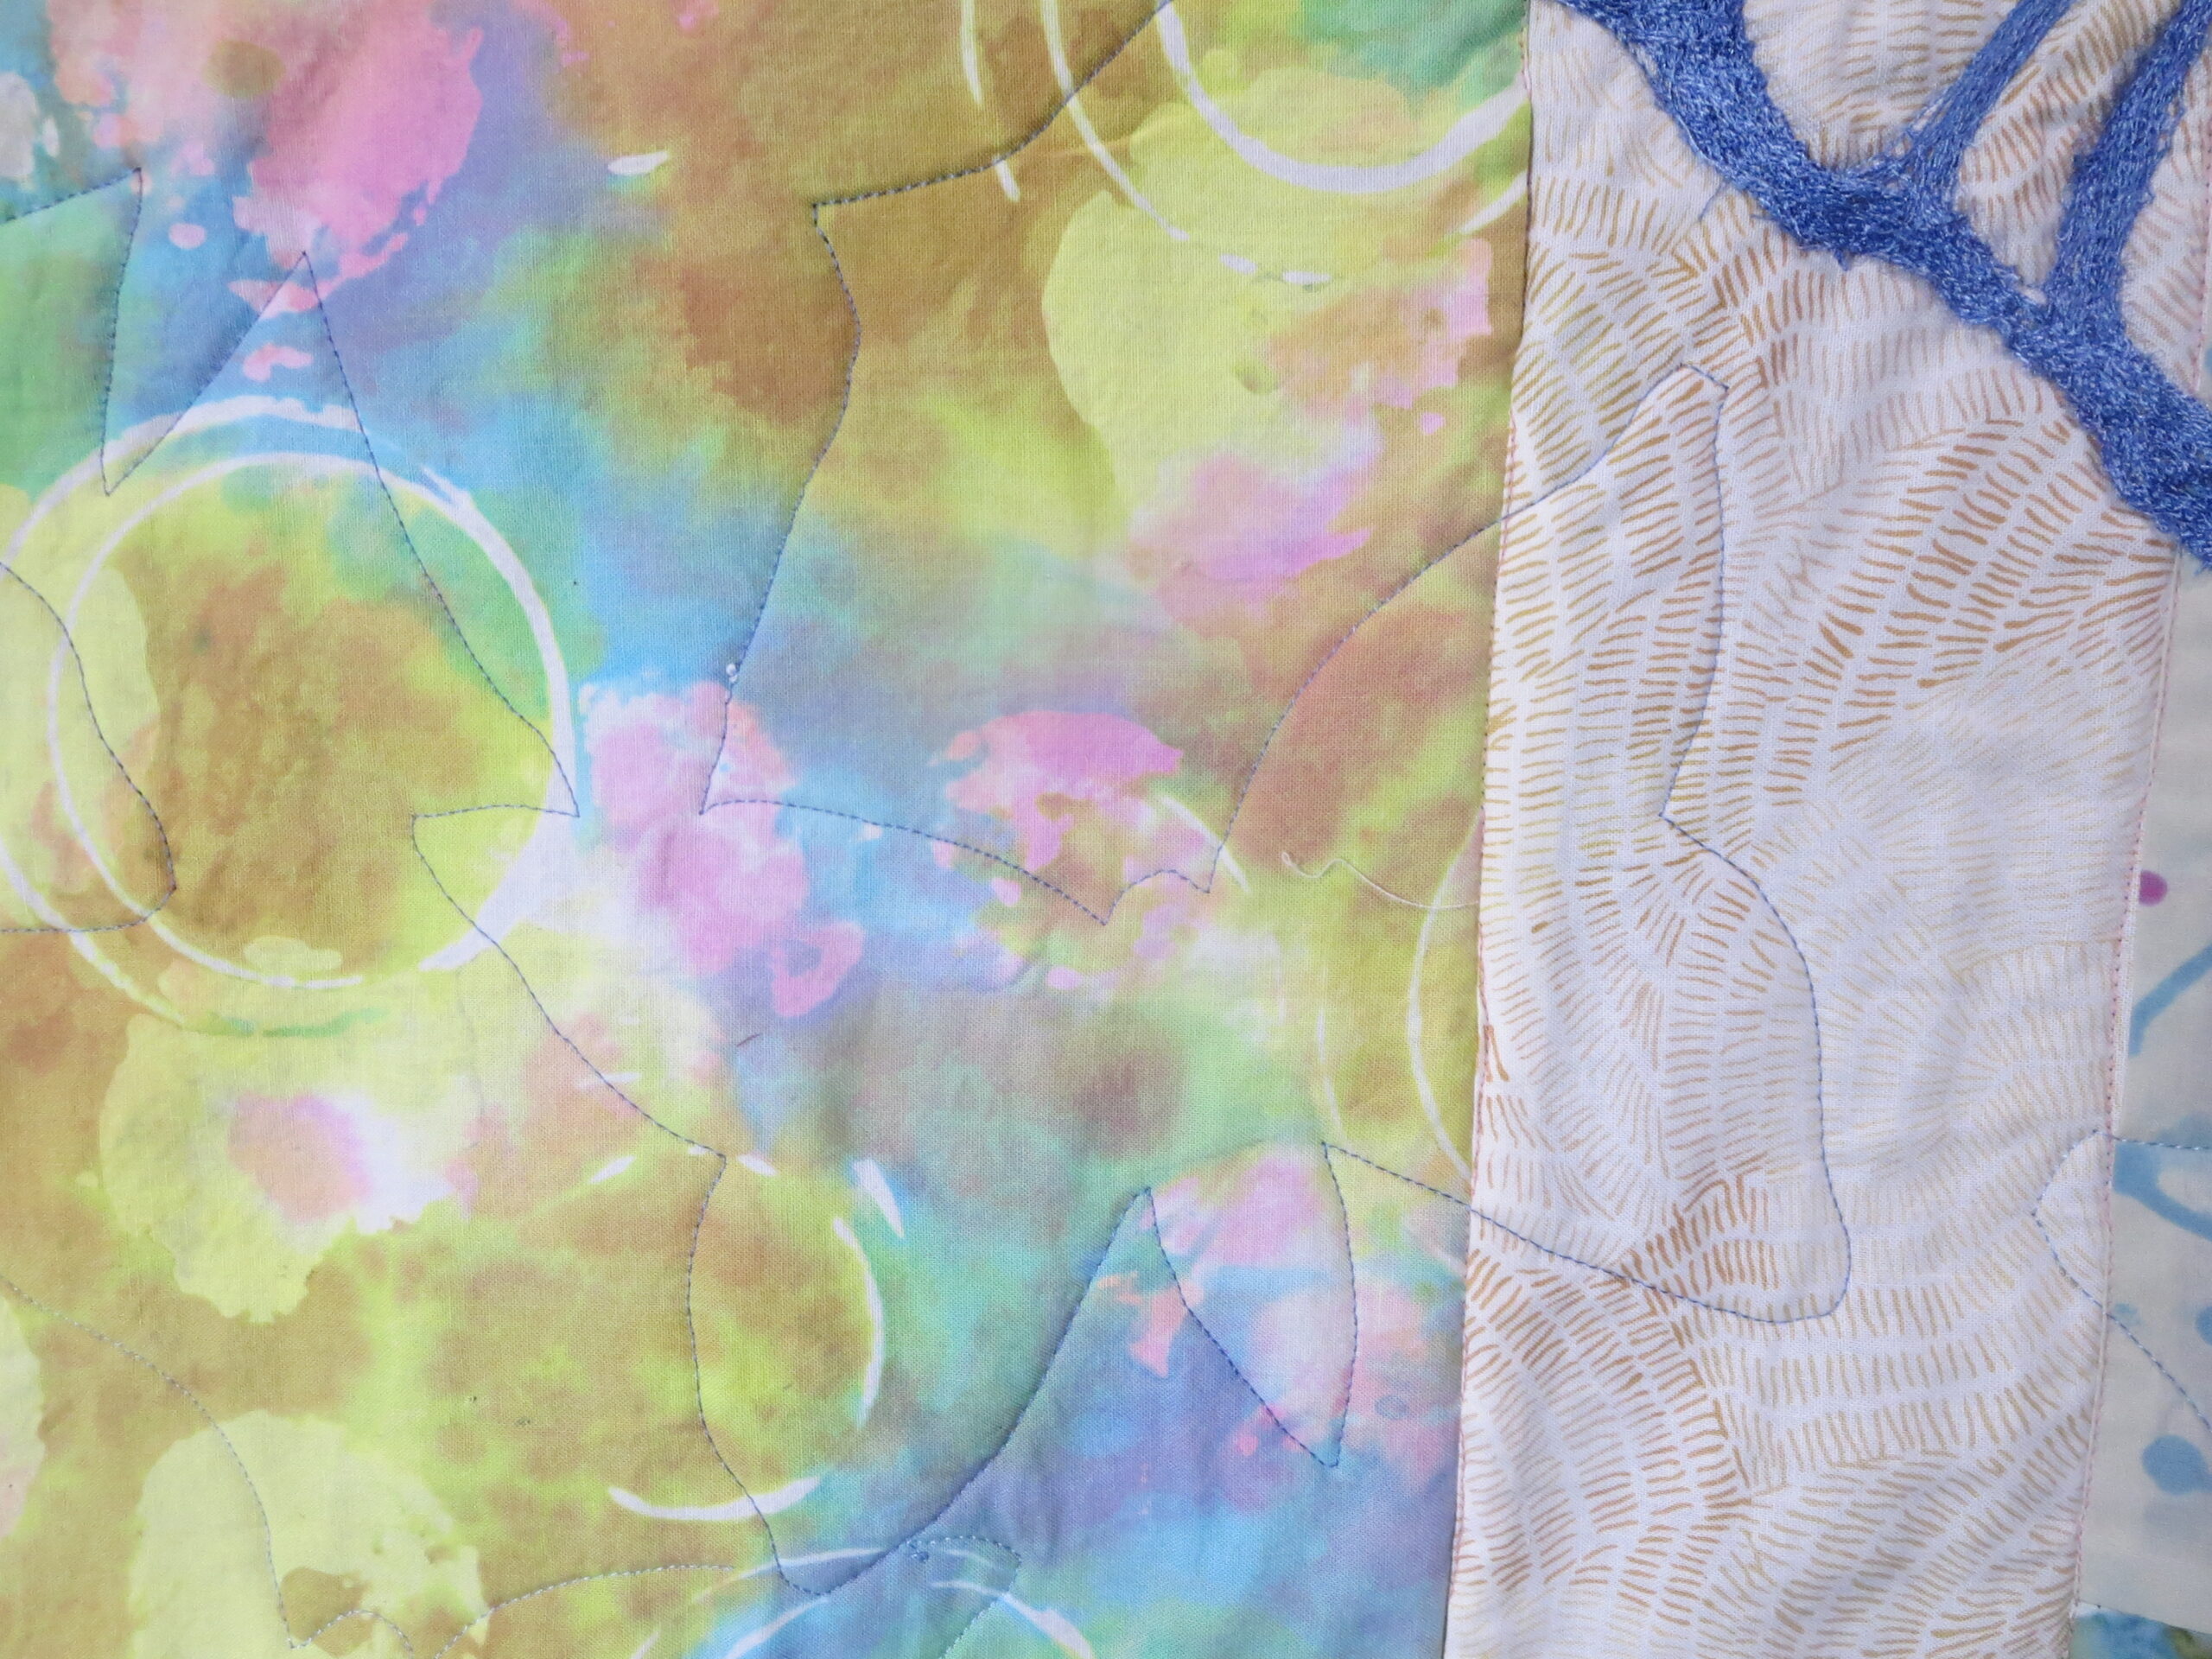
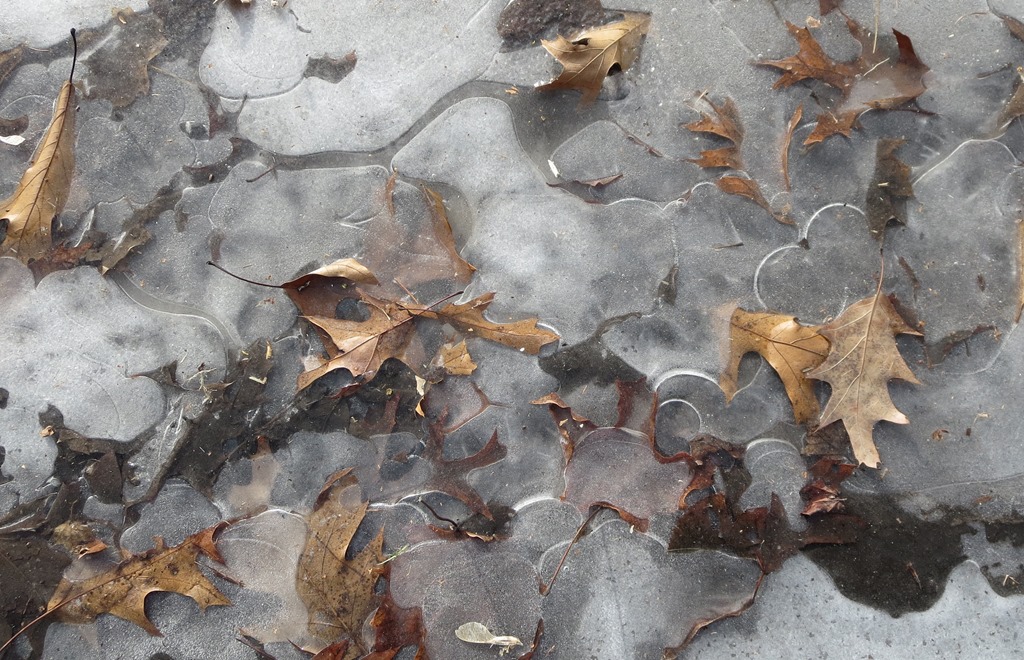
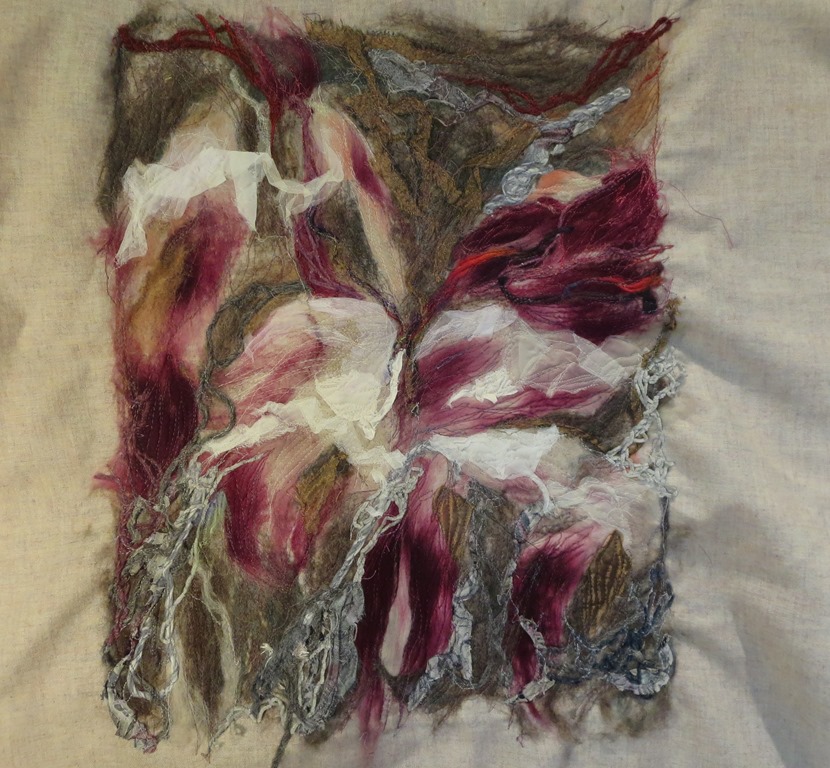
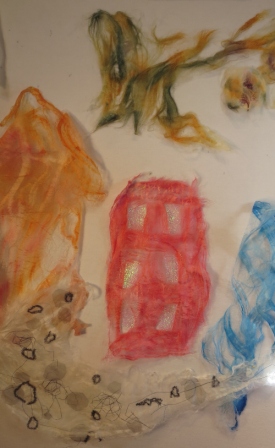
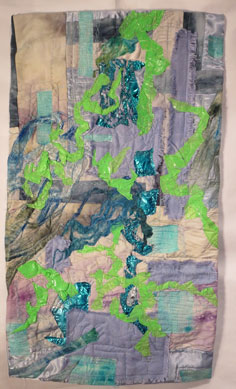
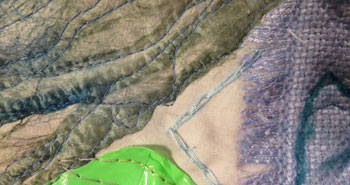
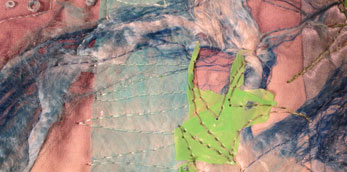
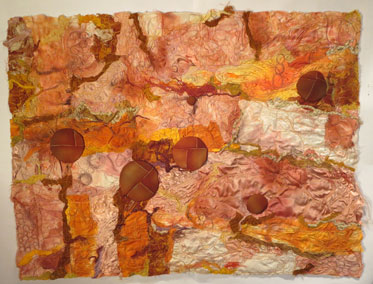
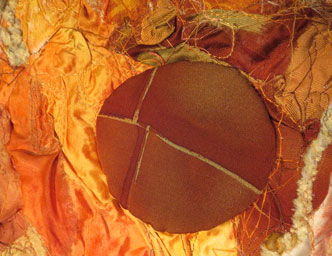
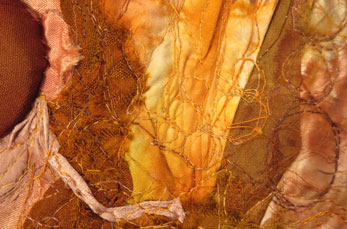
Smoldering This work is 33.5″w X 40″l. This work in my sad response to the new 80+ wild fires burning in the west. It is so heart breaking.
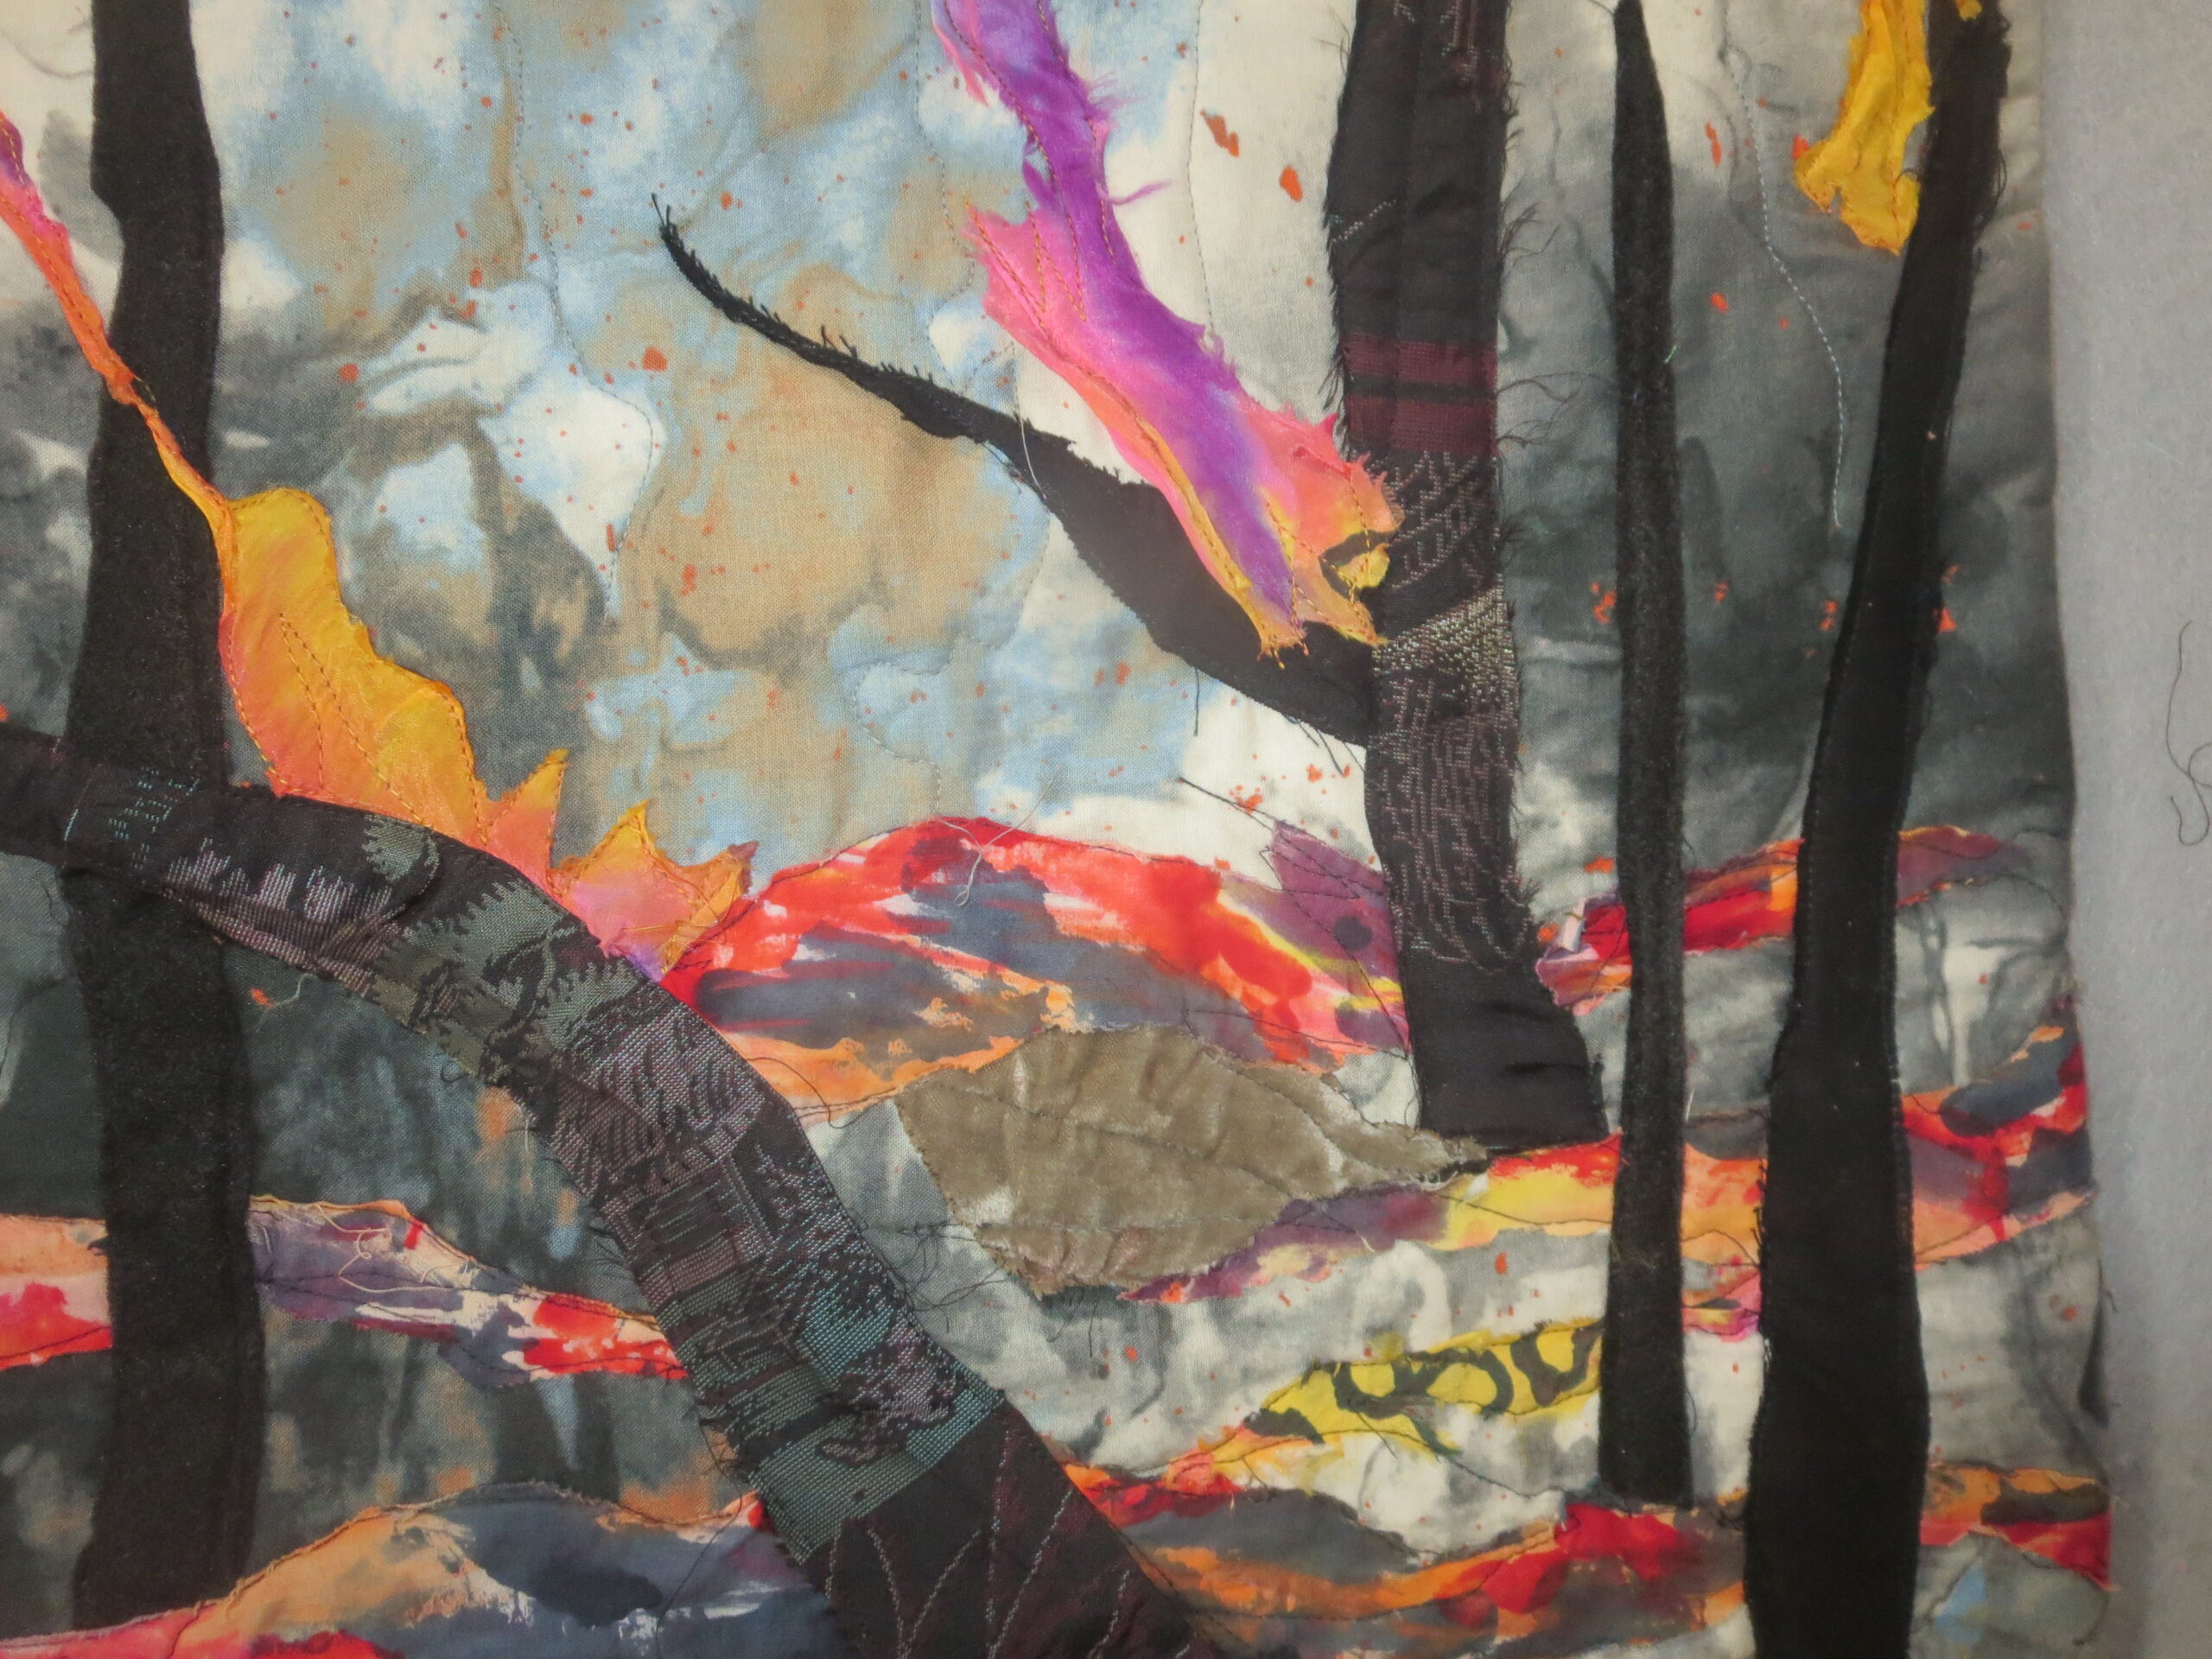
I hand dyed the smoldering ground fabric last summer. It did not work in my piece on the wild fires that I did last year, so this time it was my starting place.


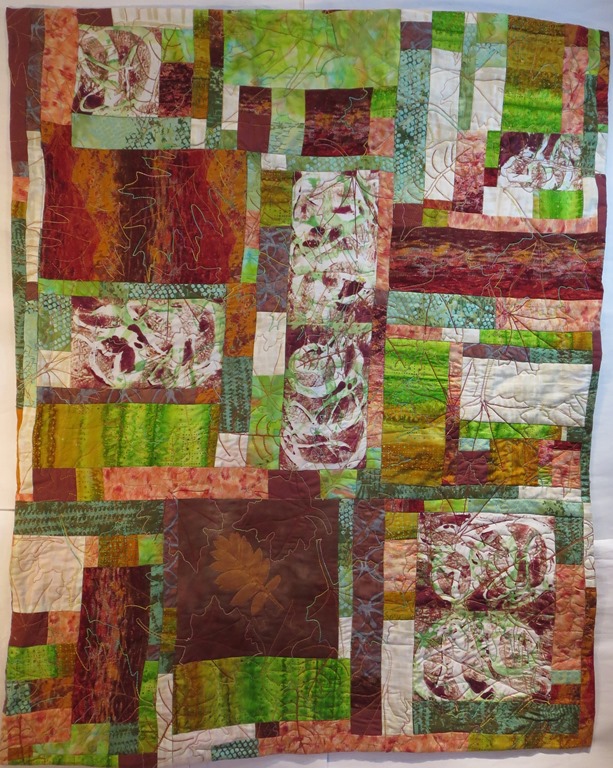
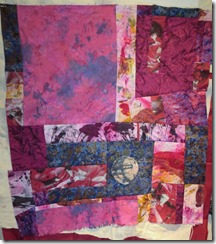
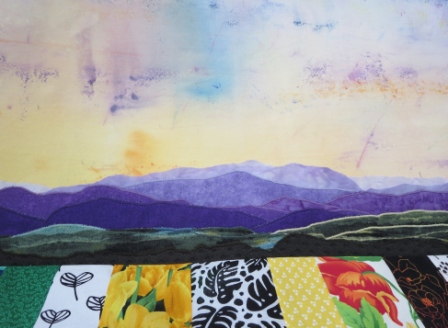
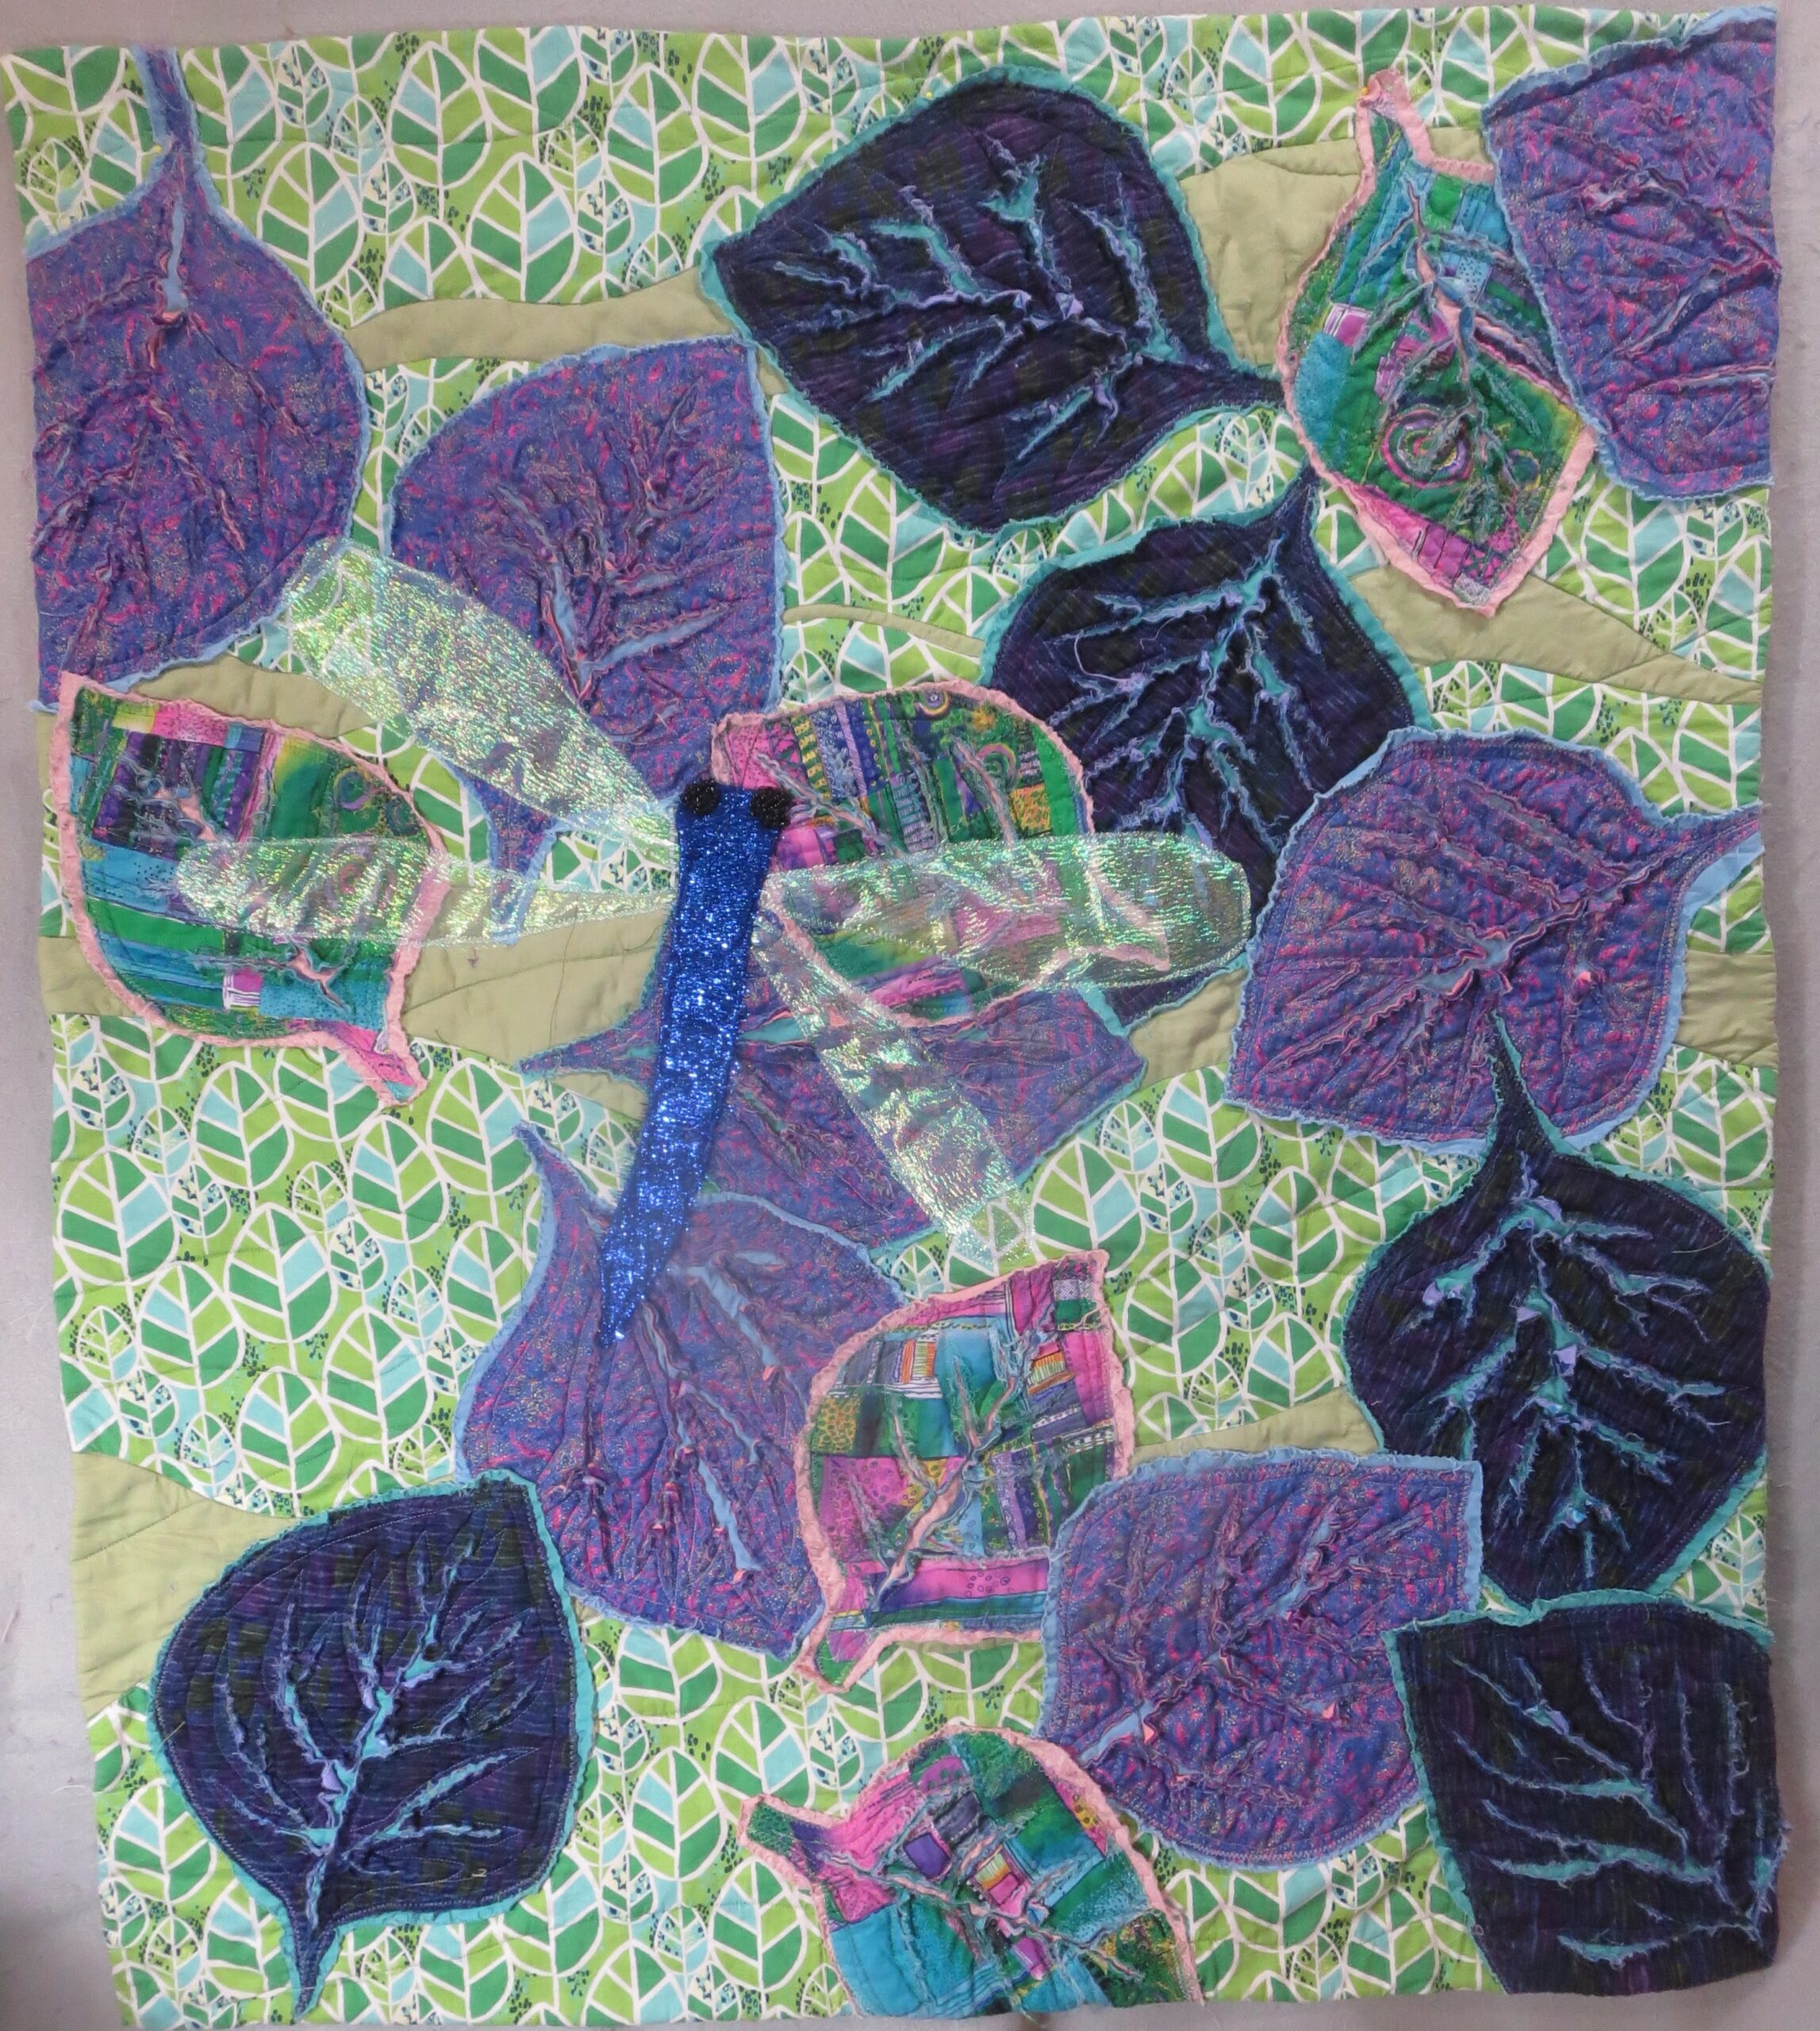
Fallen This work is 30.5″w X 43″ l. I thought this work was finished last week, but after a second hard look I realize it did not do the job. I added the dragonfly to make a strong center of interest.


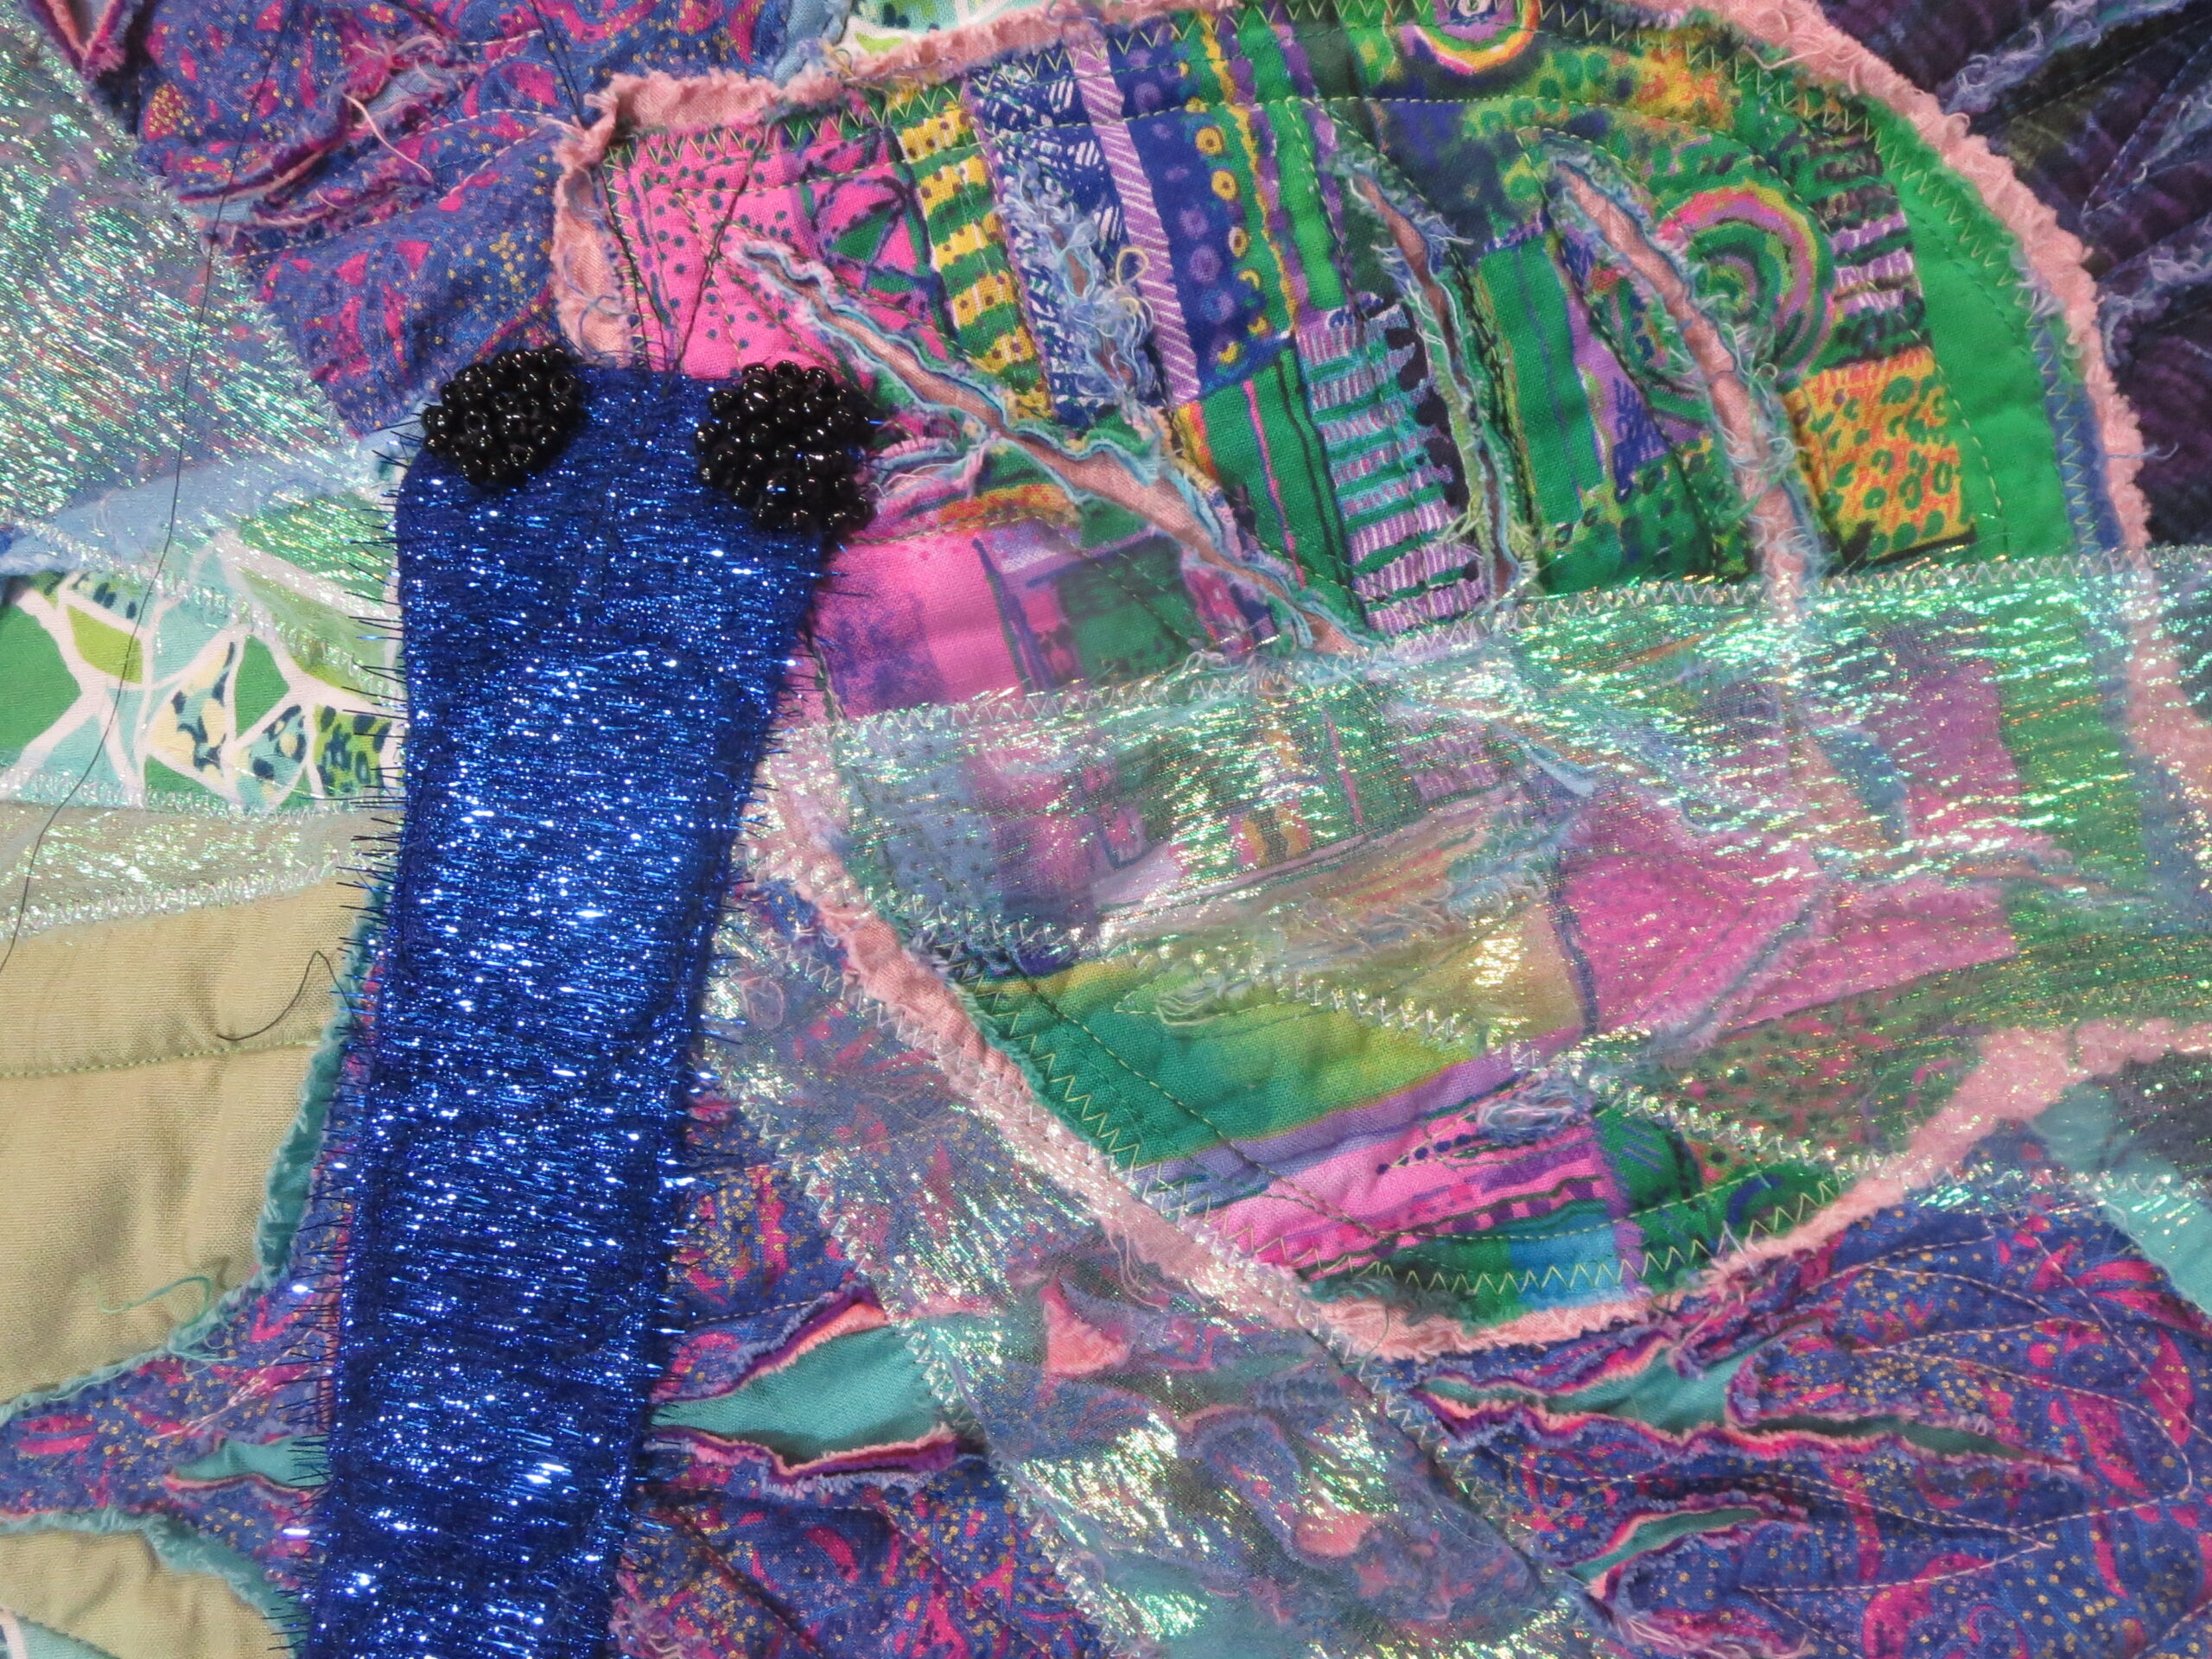
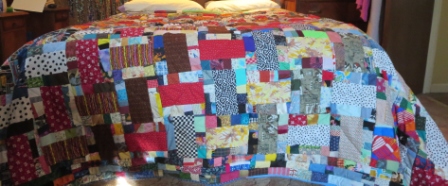
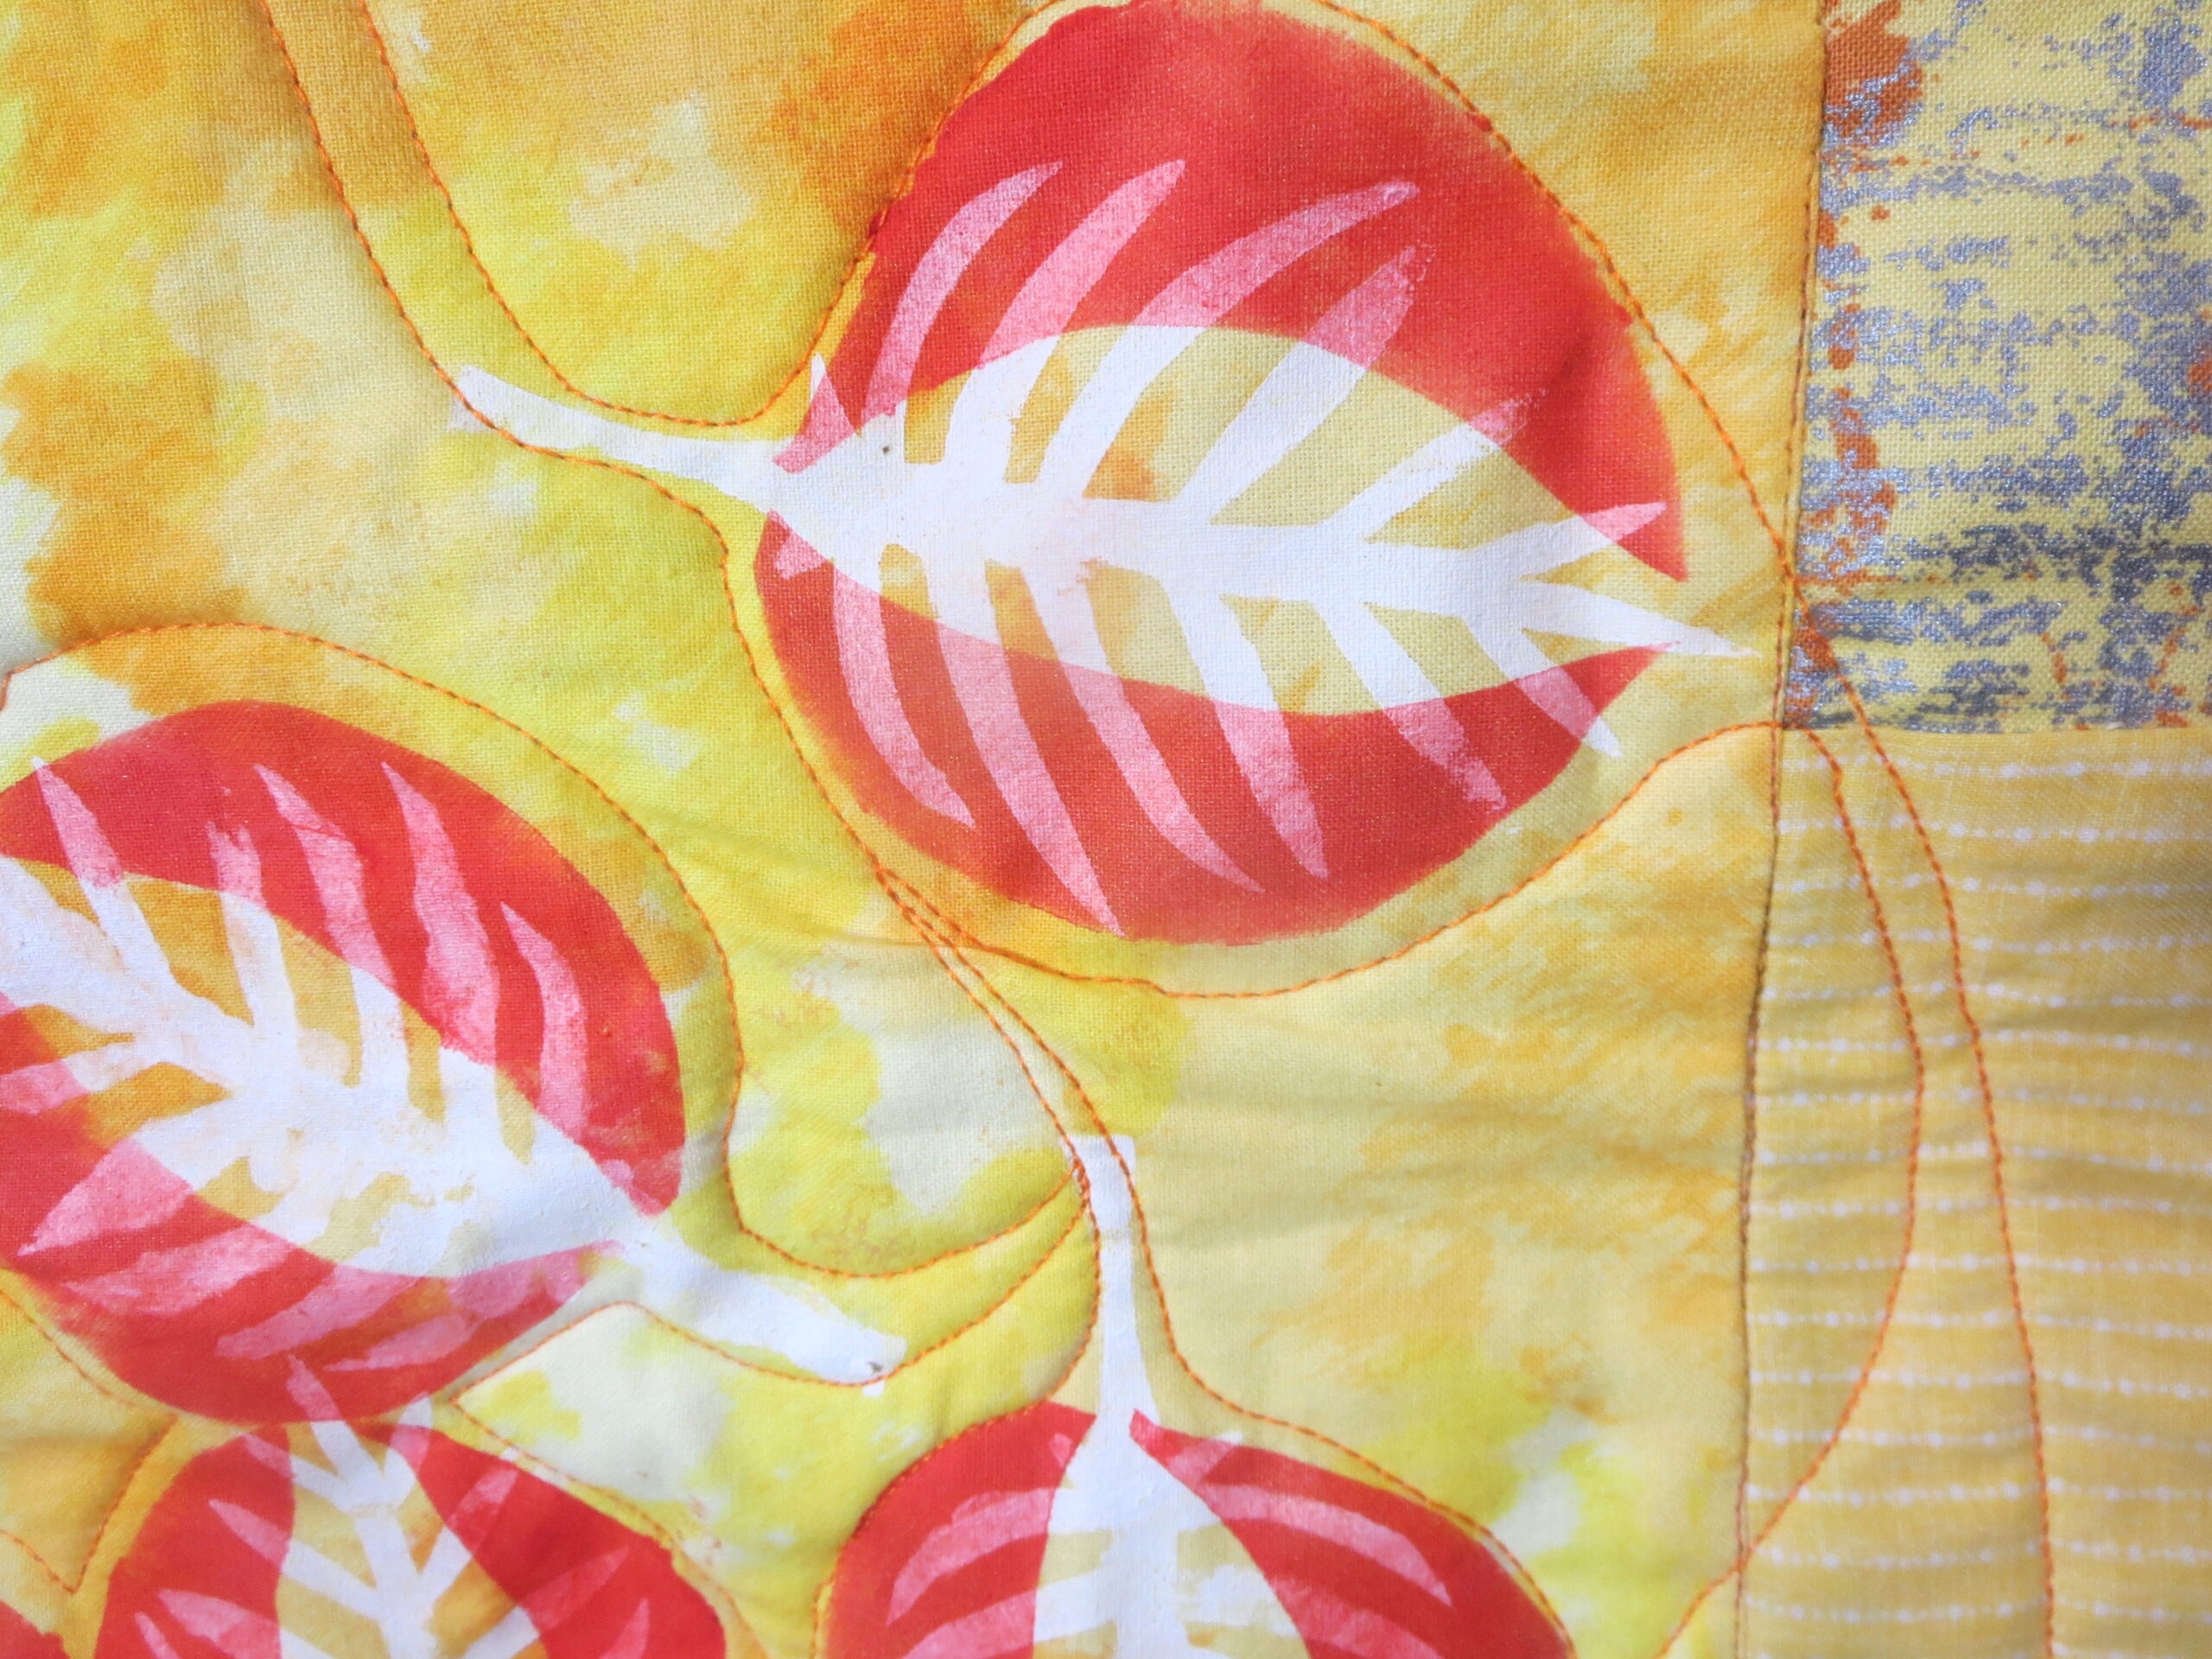
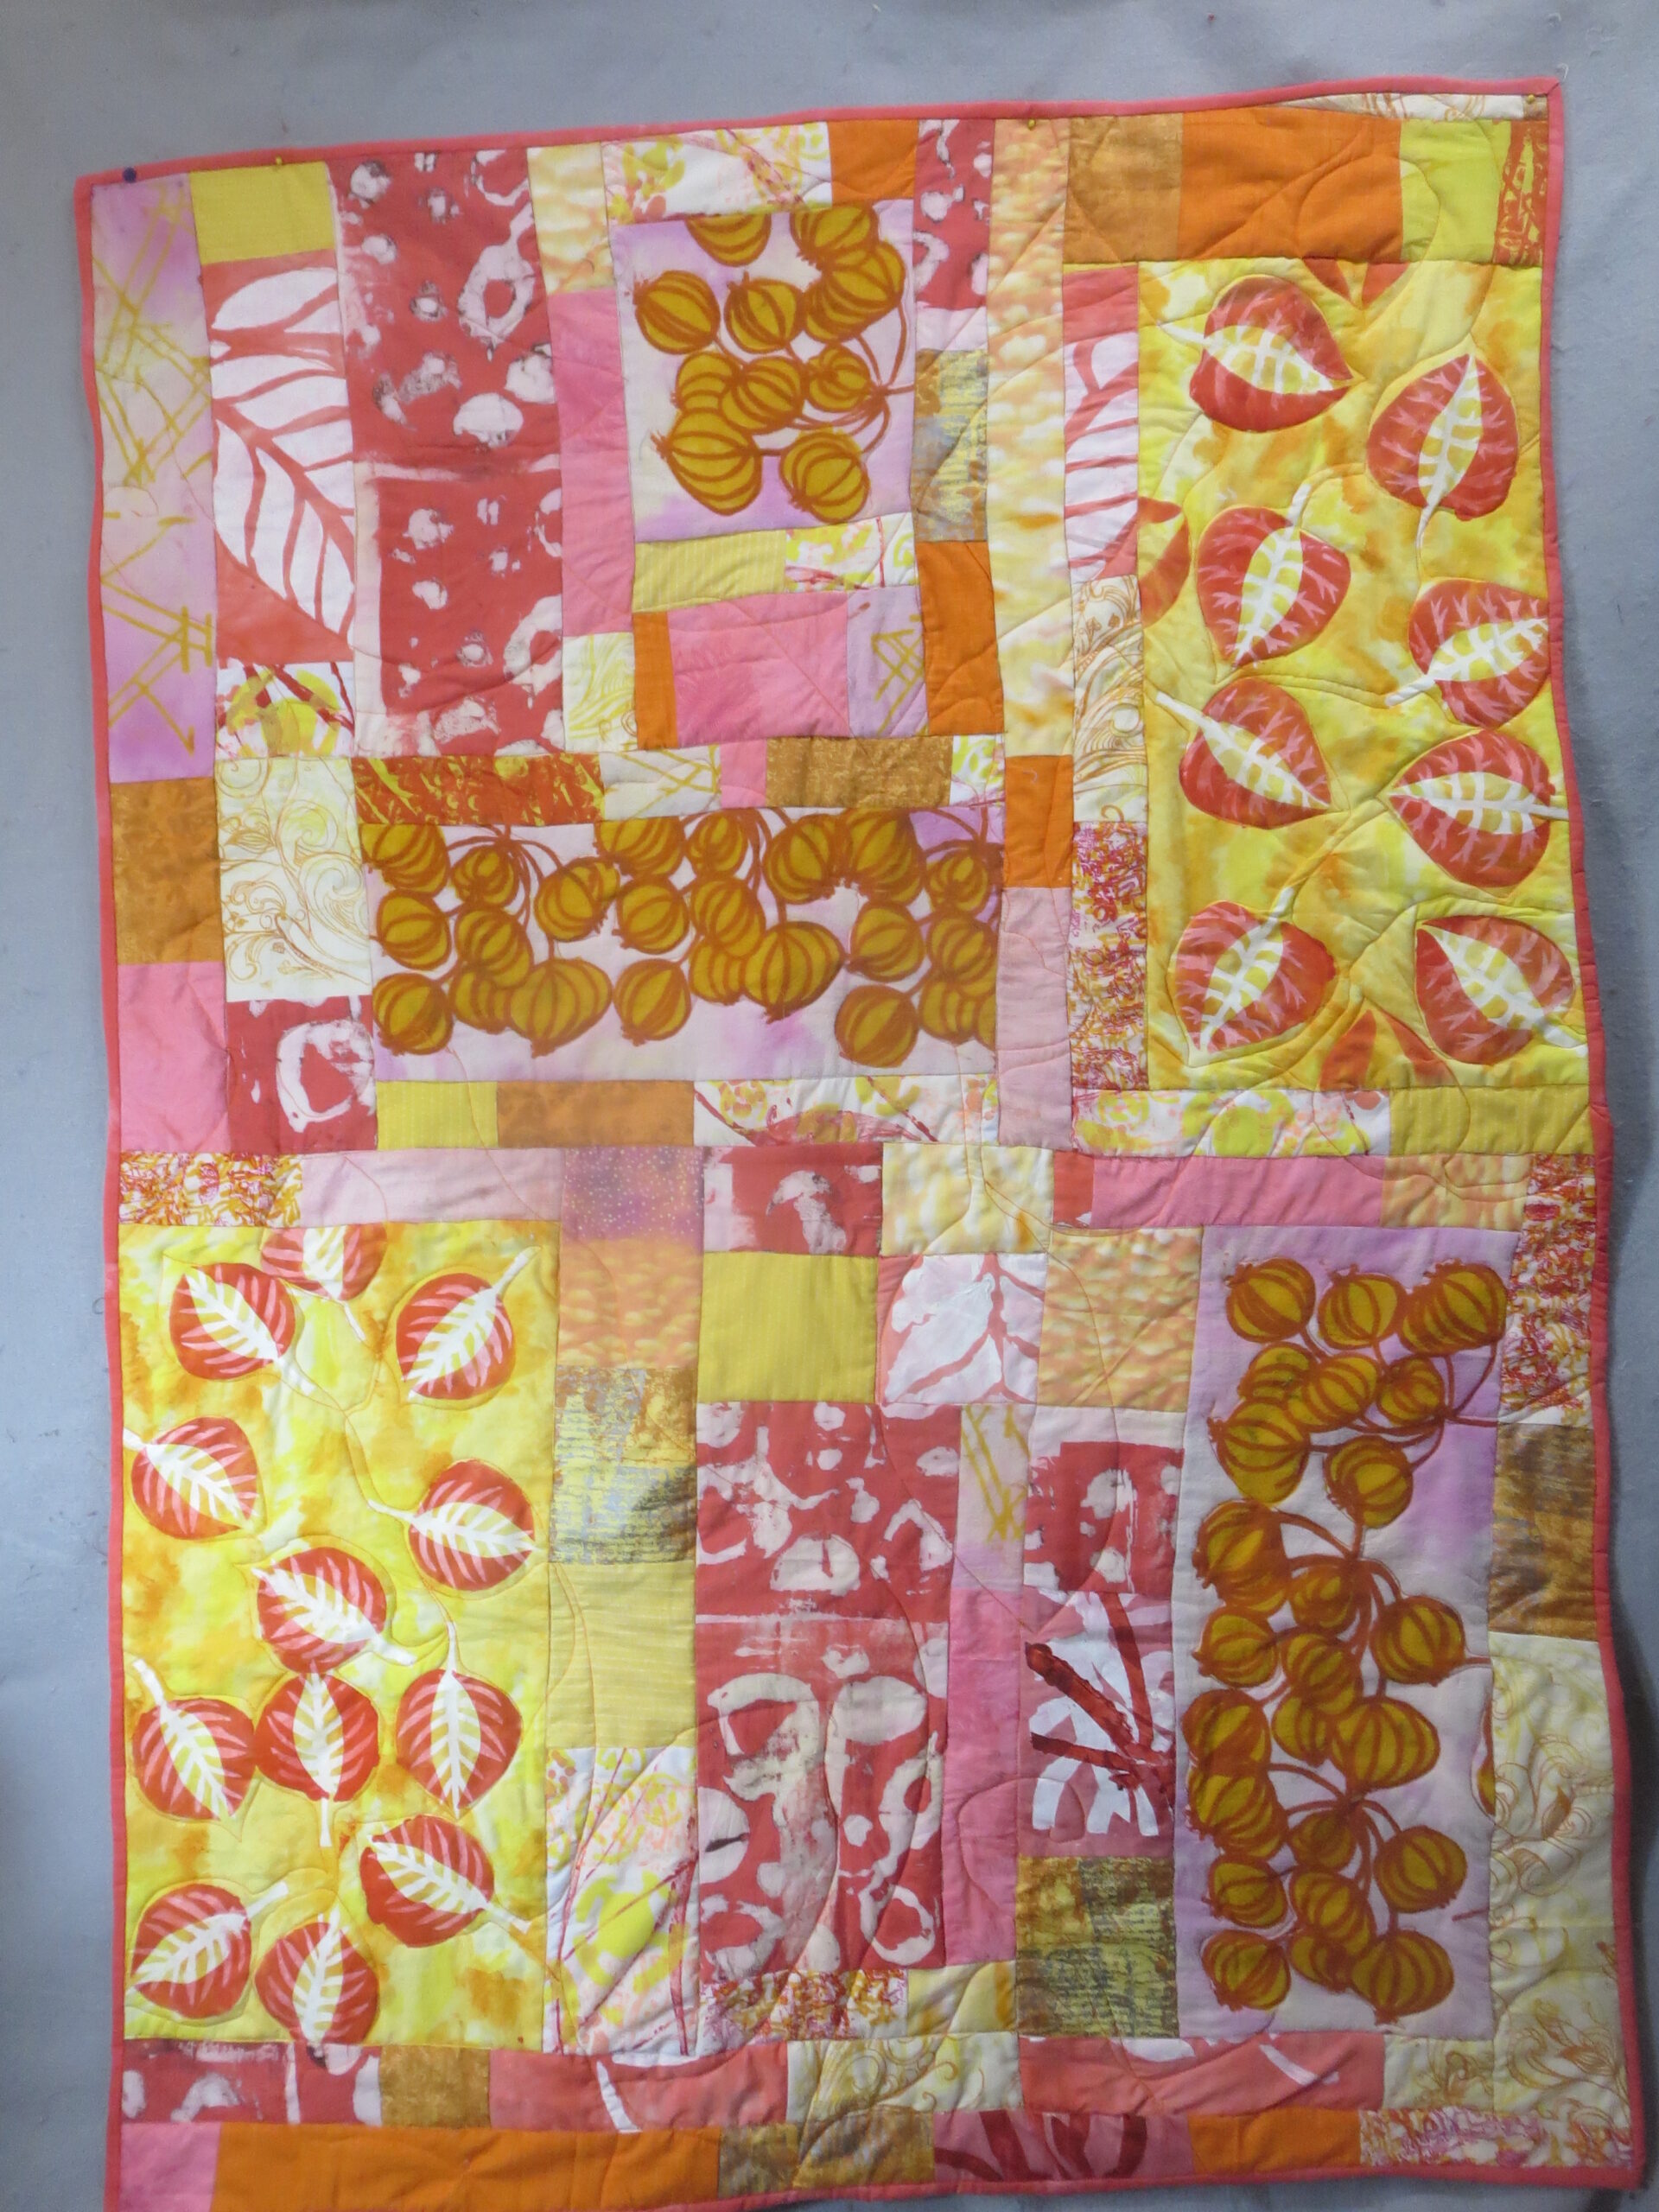
Lap Quilt #13 This work in 37″ w X 52 “ l. I keep making these fun small quilts to use my altered fabrics and explore techniques. I applied Joe’s idea to the quilting here too.


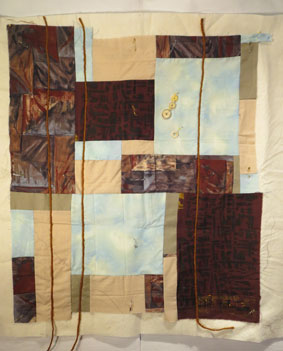
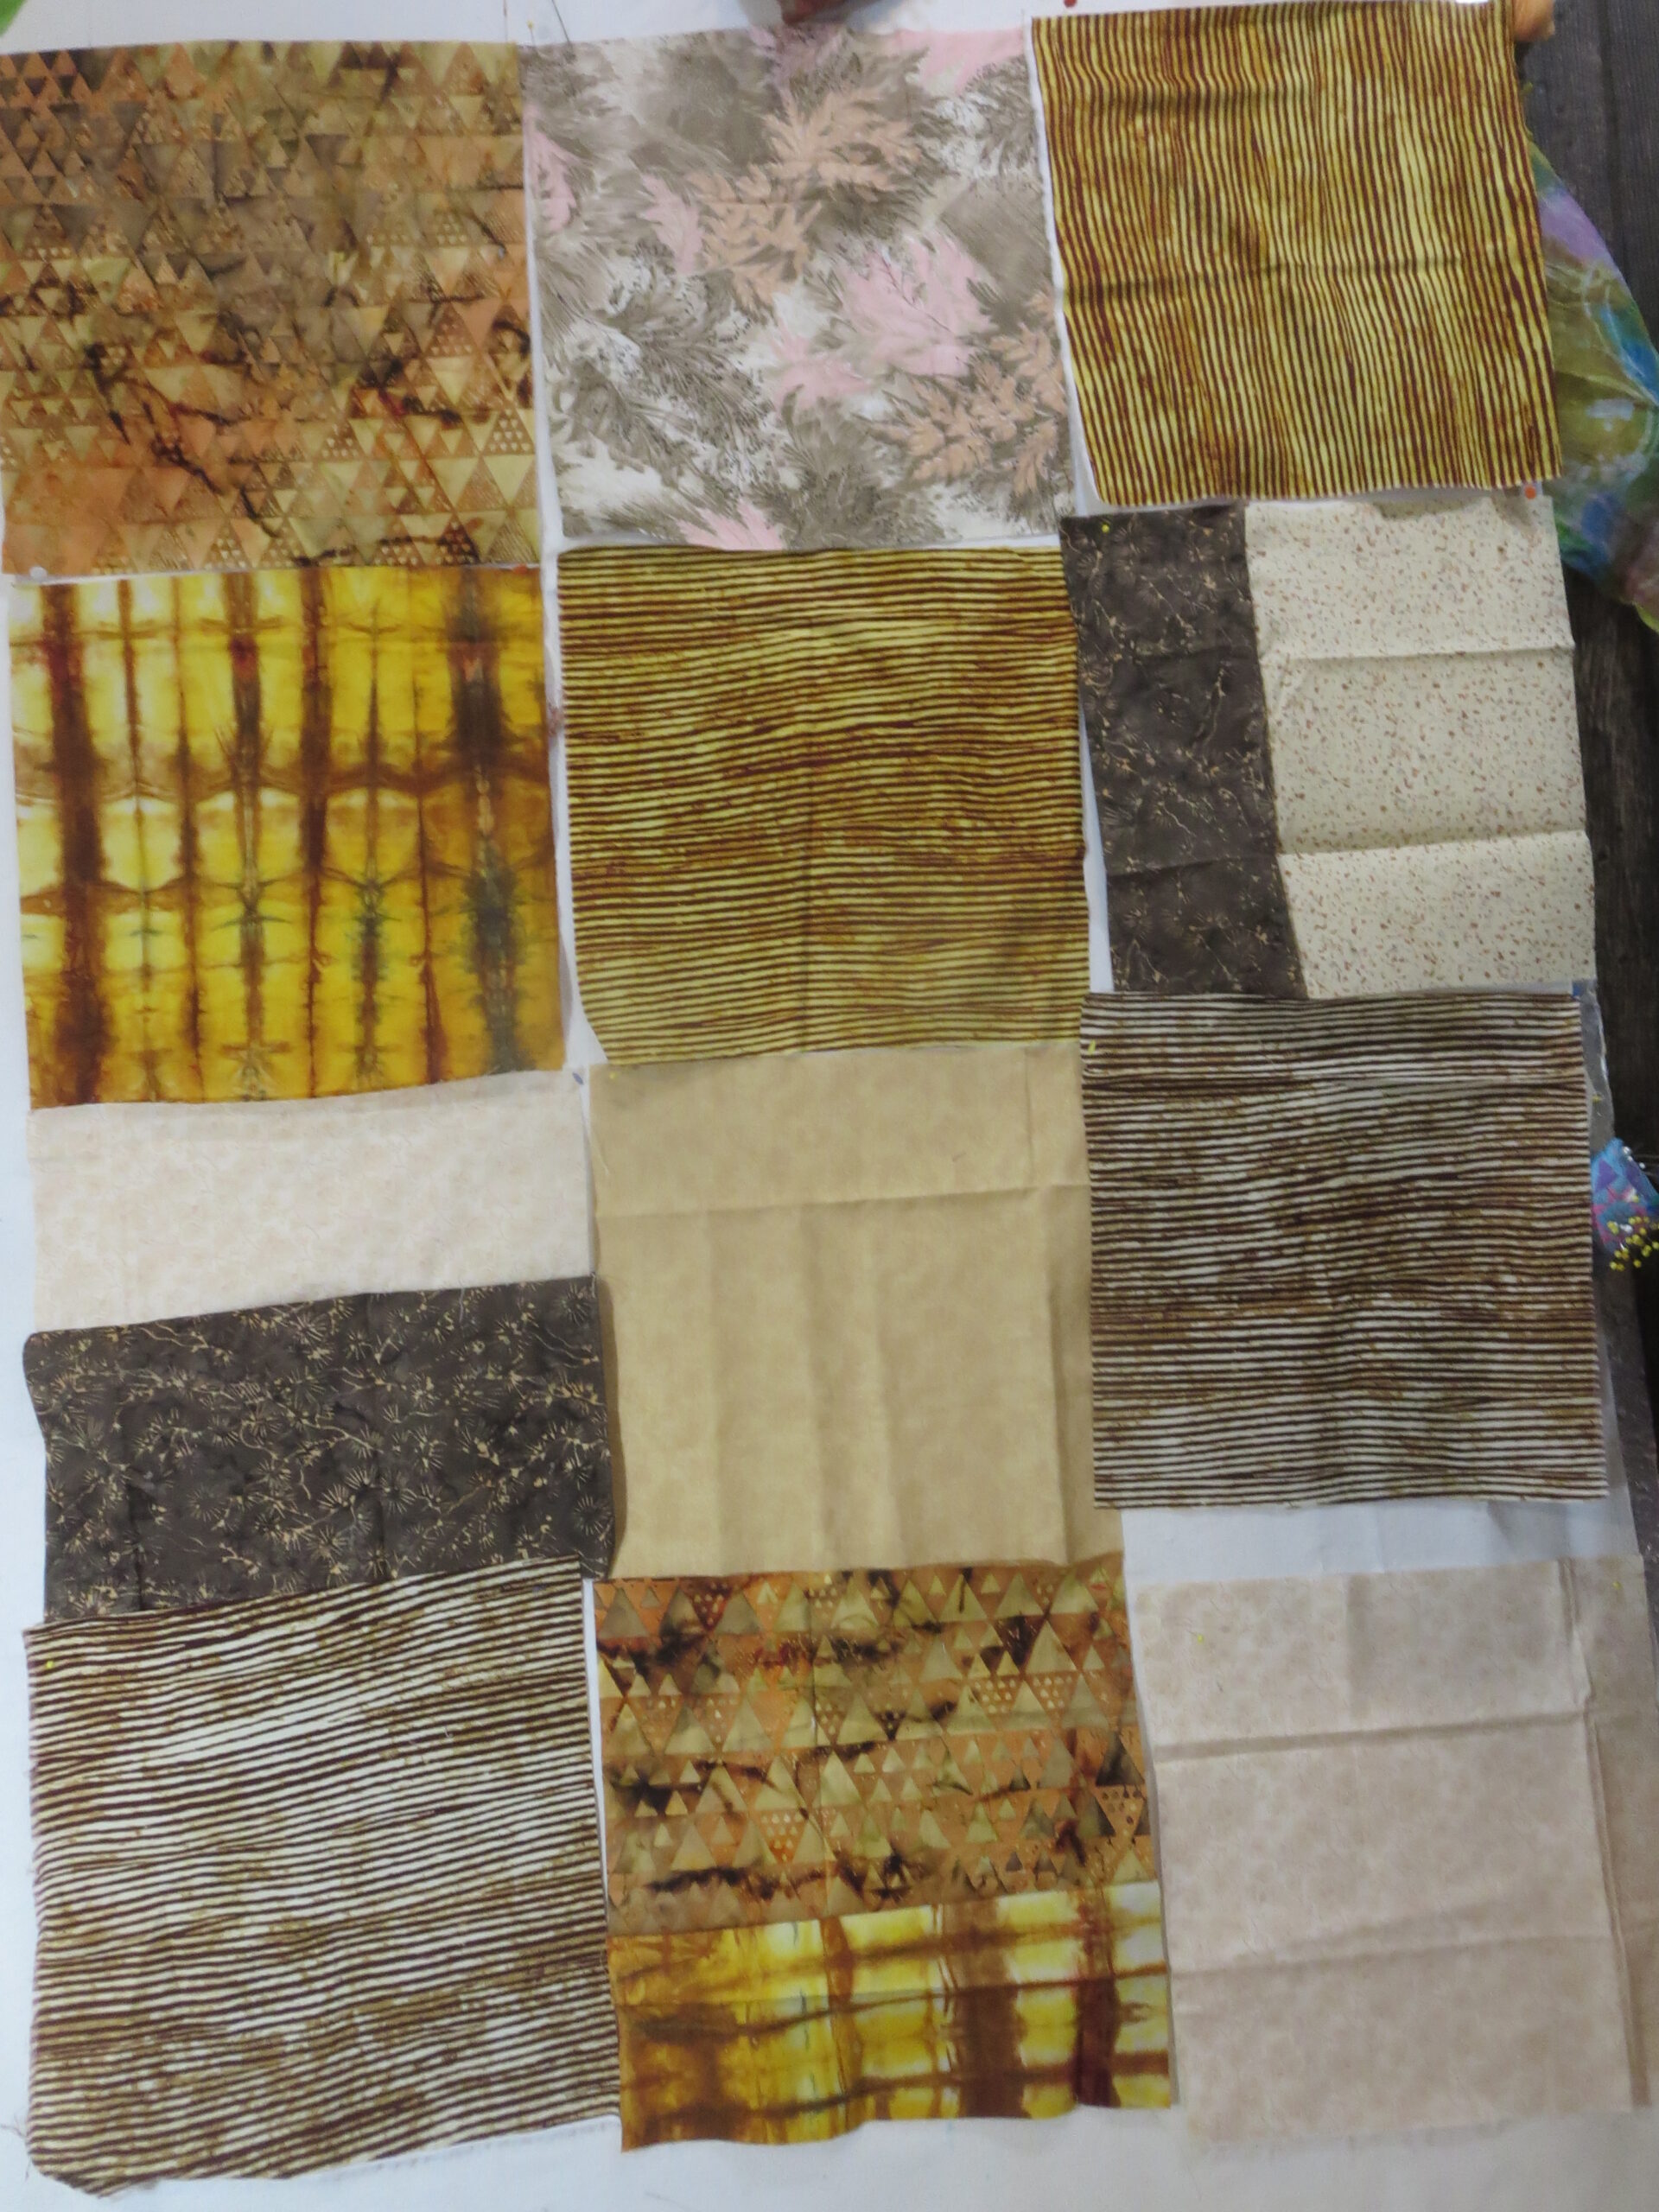
Lap Quilt # 14   Broken Blocks (Tutorial )With is work I was playing with a limited color pallet and 14 basic blocks for my start. After stacking the blocks into two stacks I sliced them diagonally.


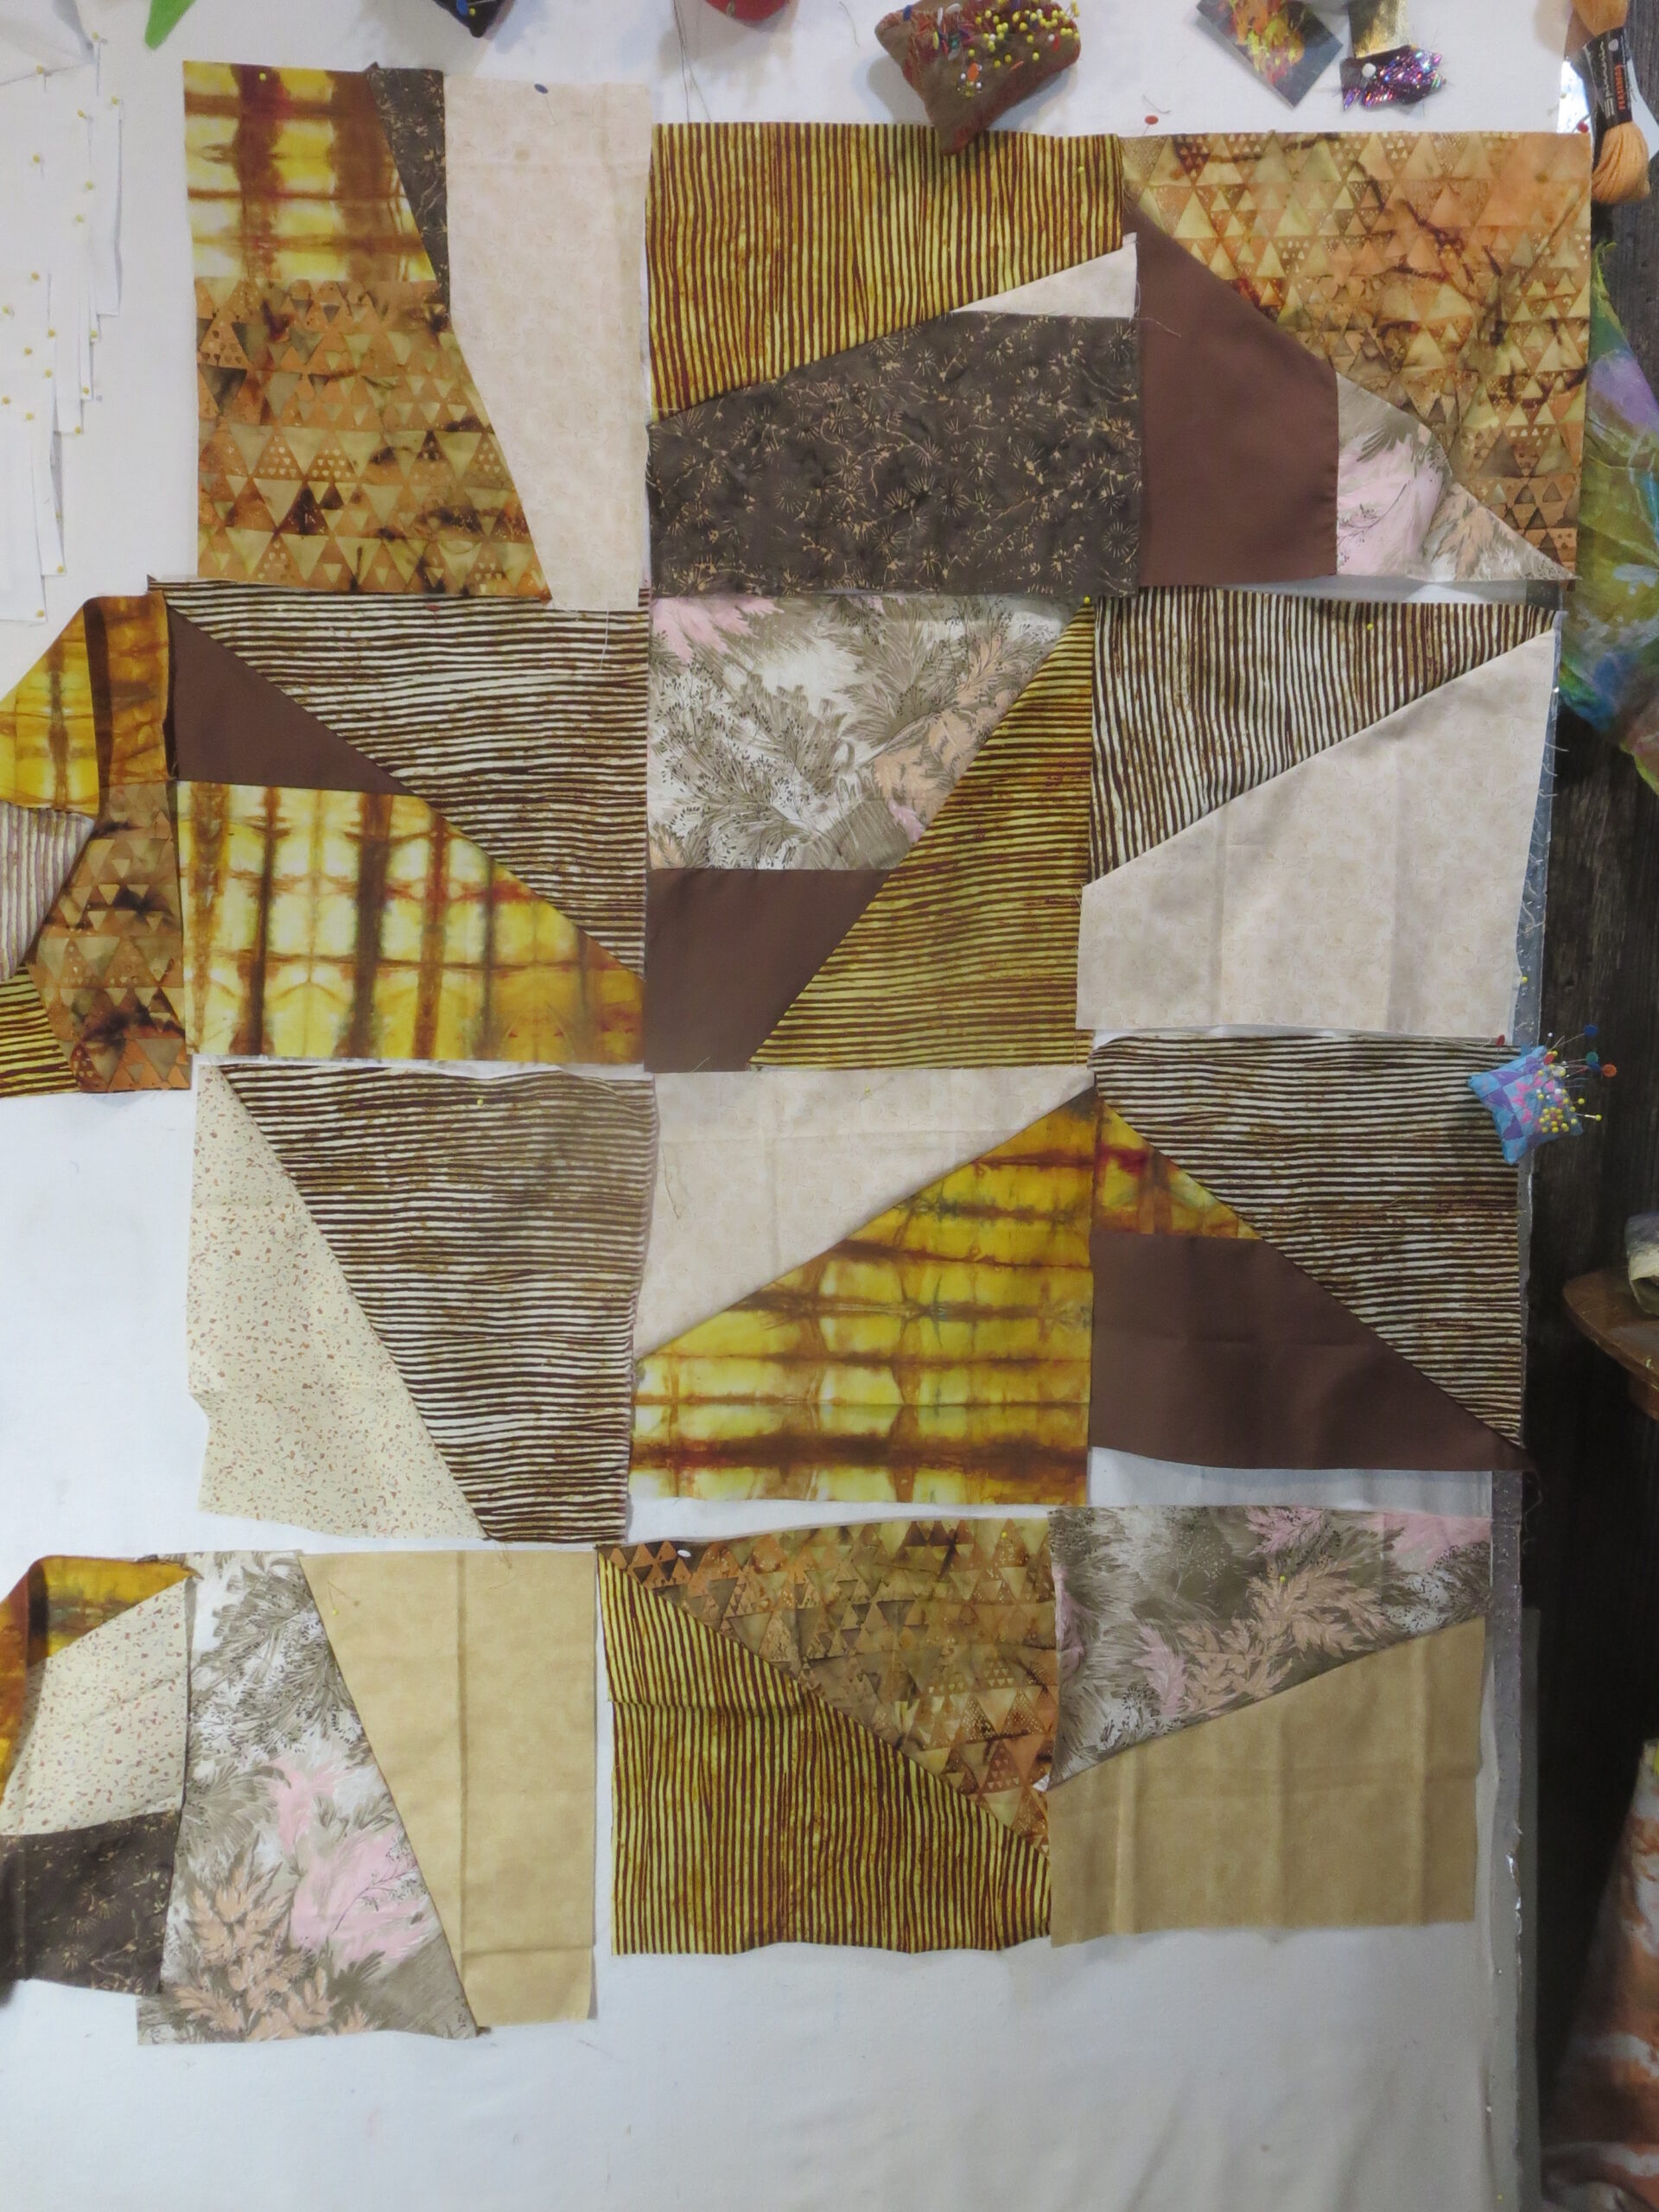
Next step was to shuffle the units and recombine them. I repeated that step holding two blocks out of the process. These last two blocks were sliced in half vertically and set aside.


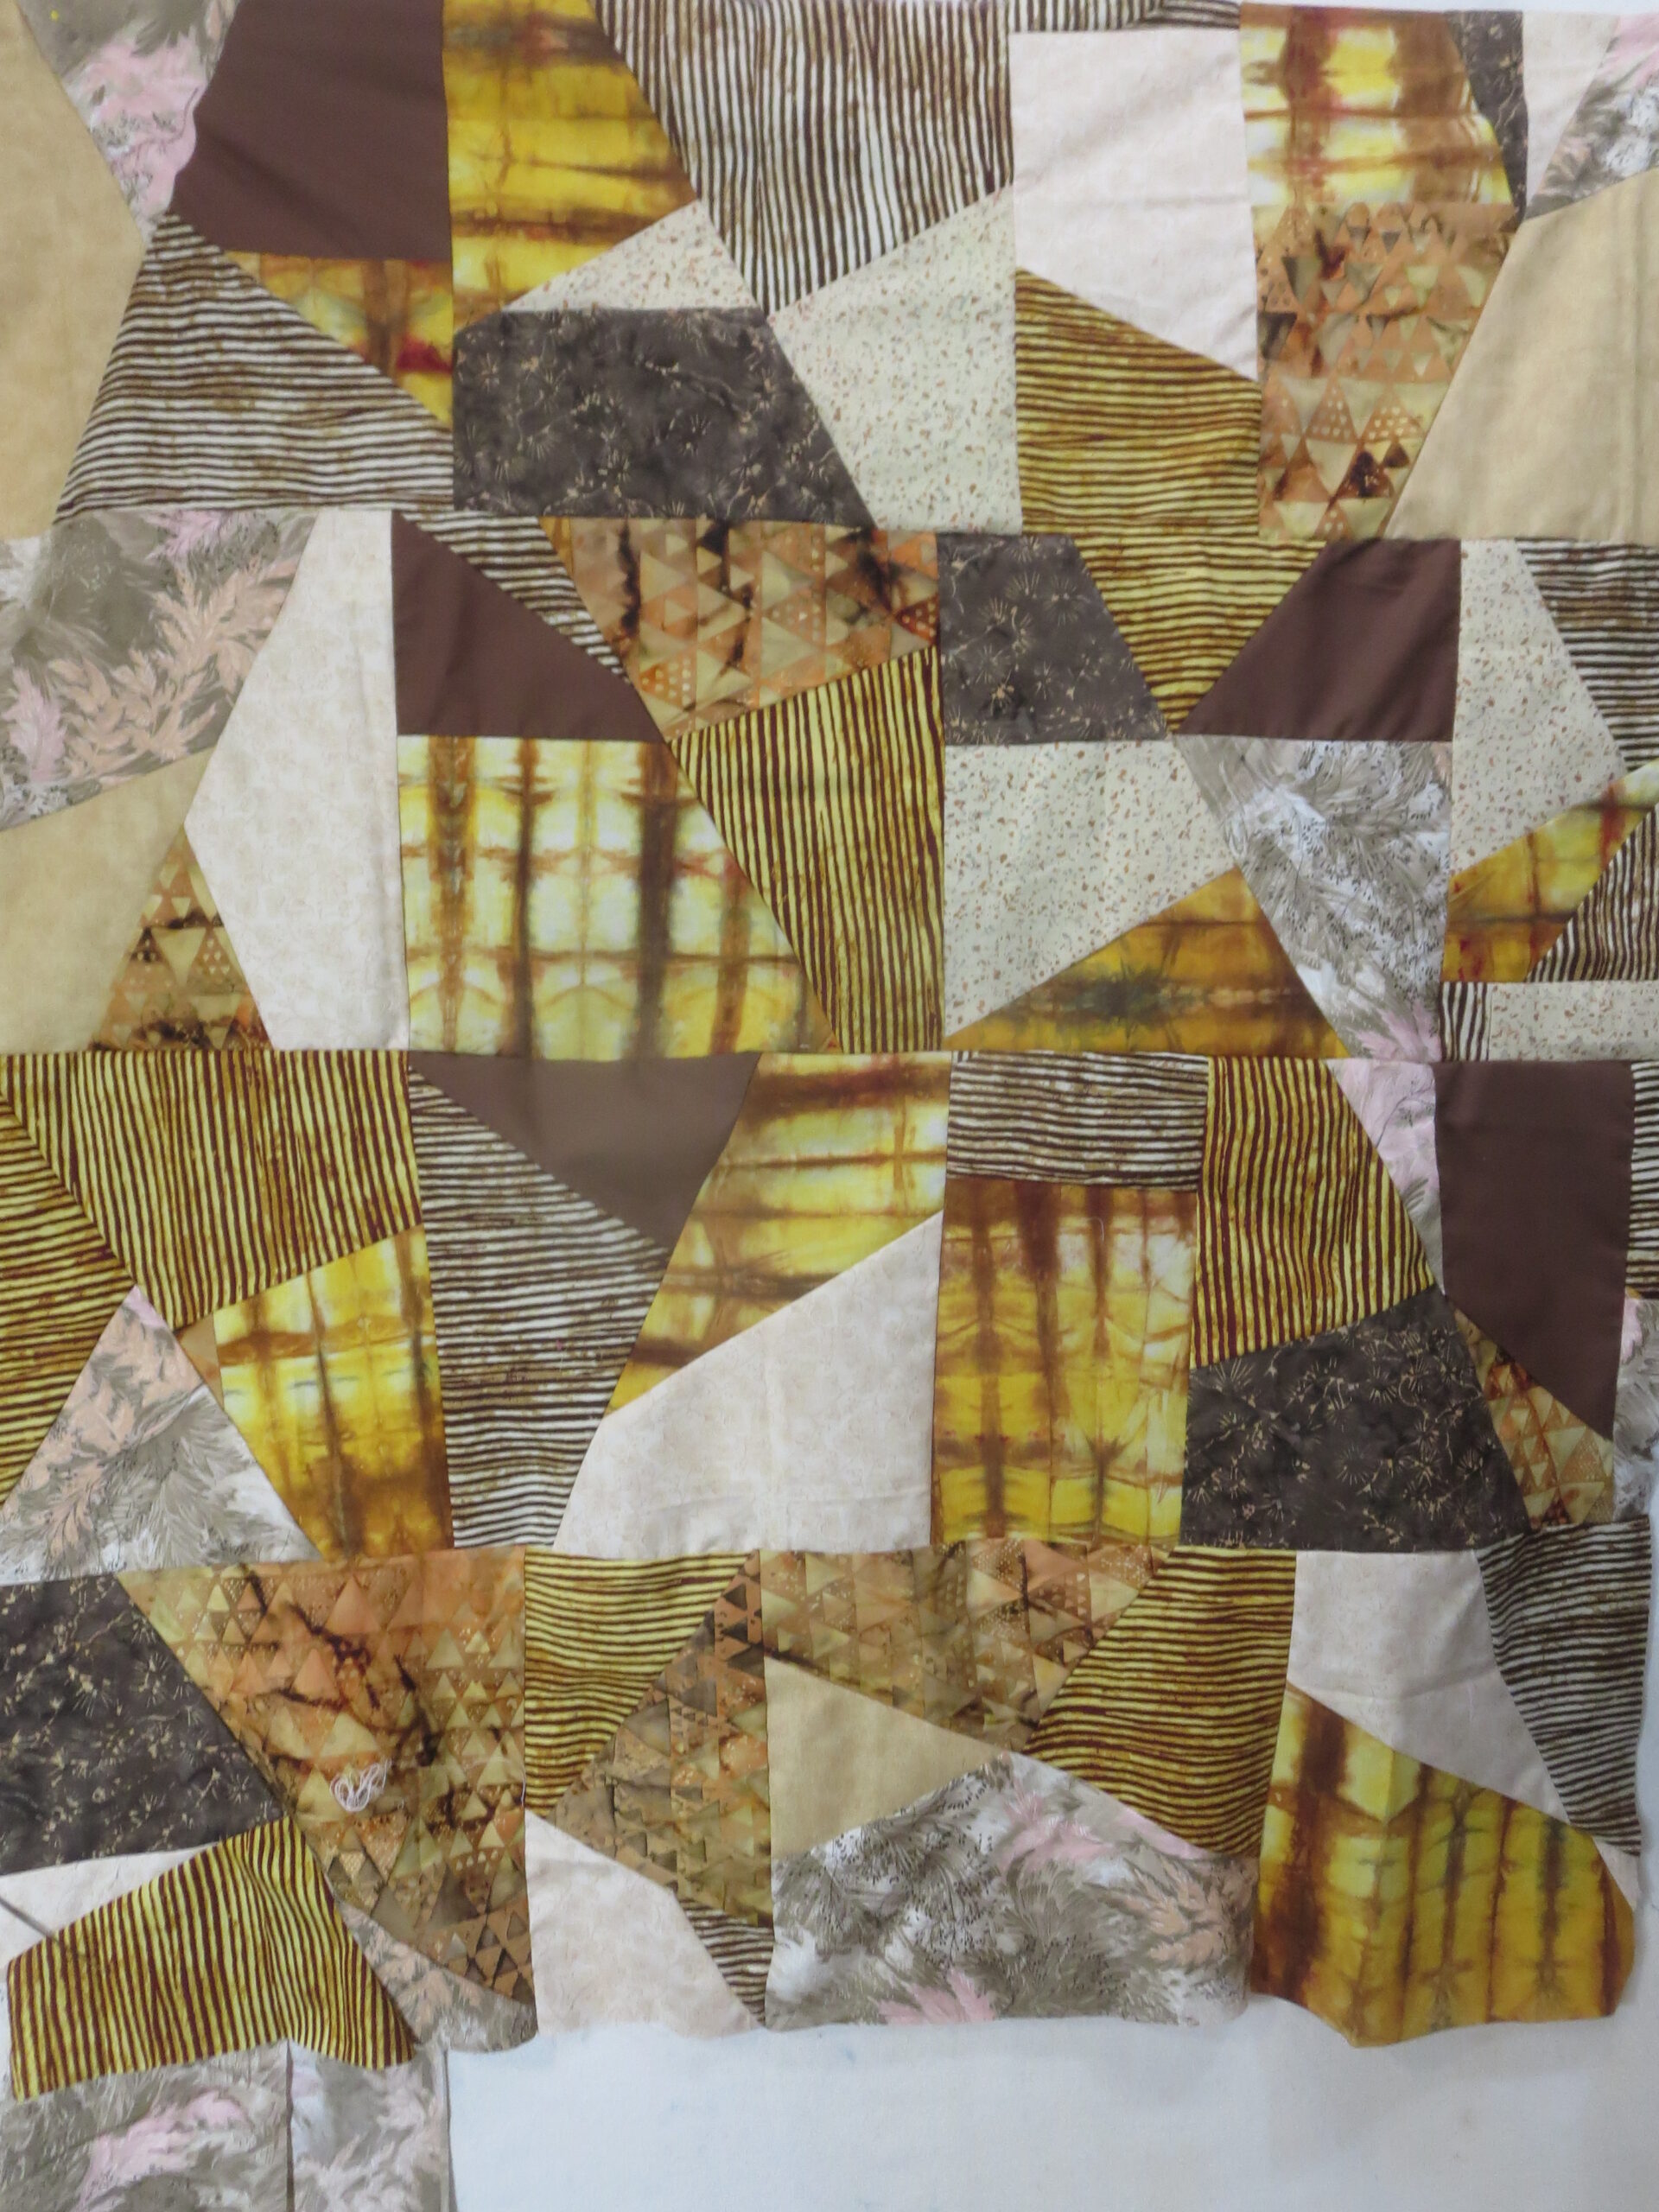
After sewing all the units into blocks again I lined them up into four rows, I added a half block into each row so there were no vertical seam lines.

Then I connected the blocks into four rows and then into a top.


Lap Quilt #15 I am building a new lap quilt.


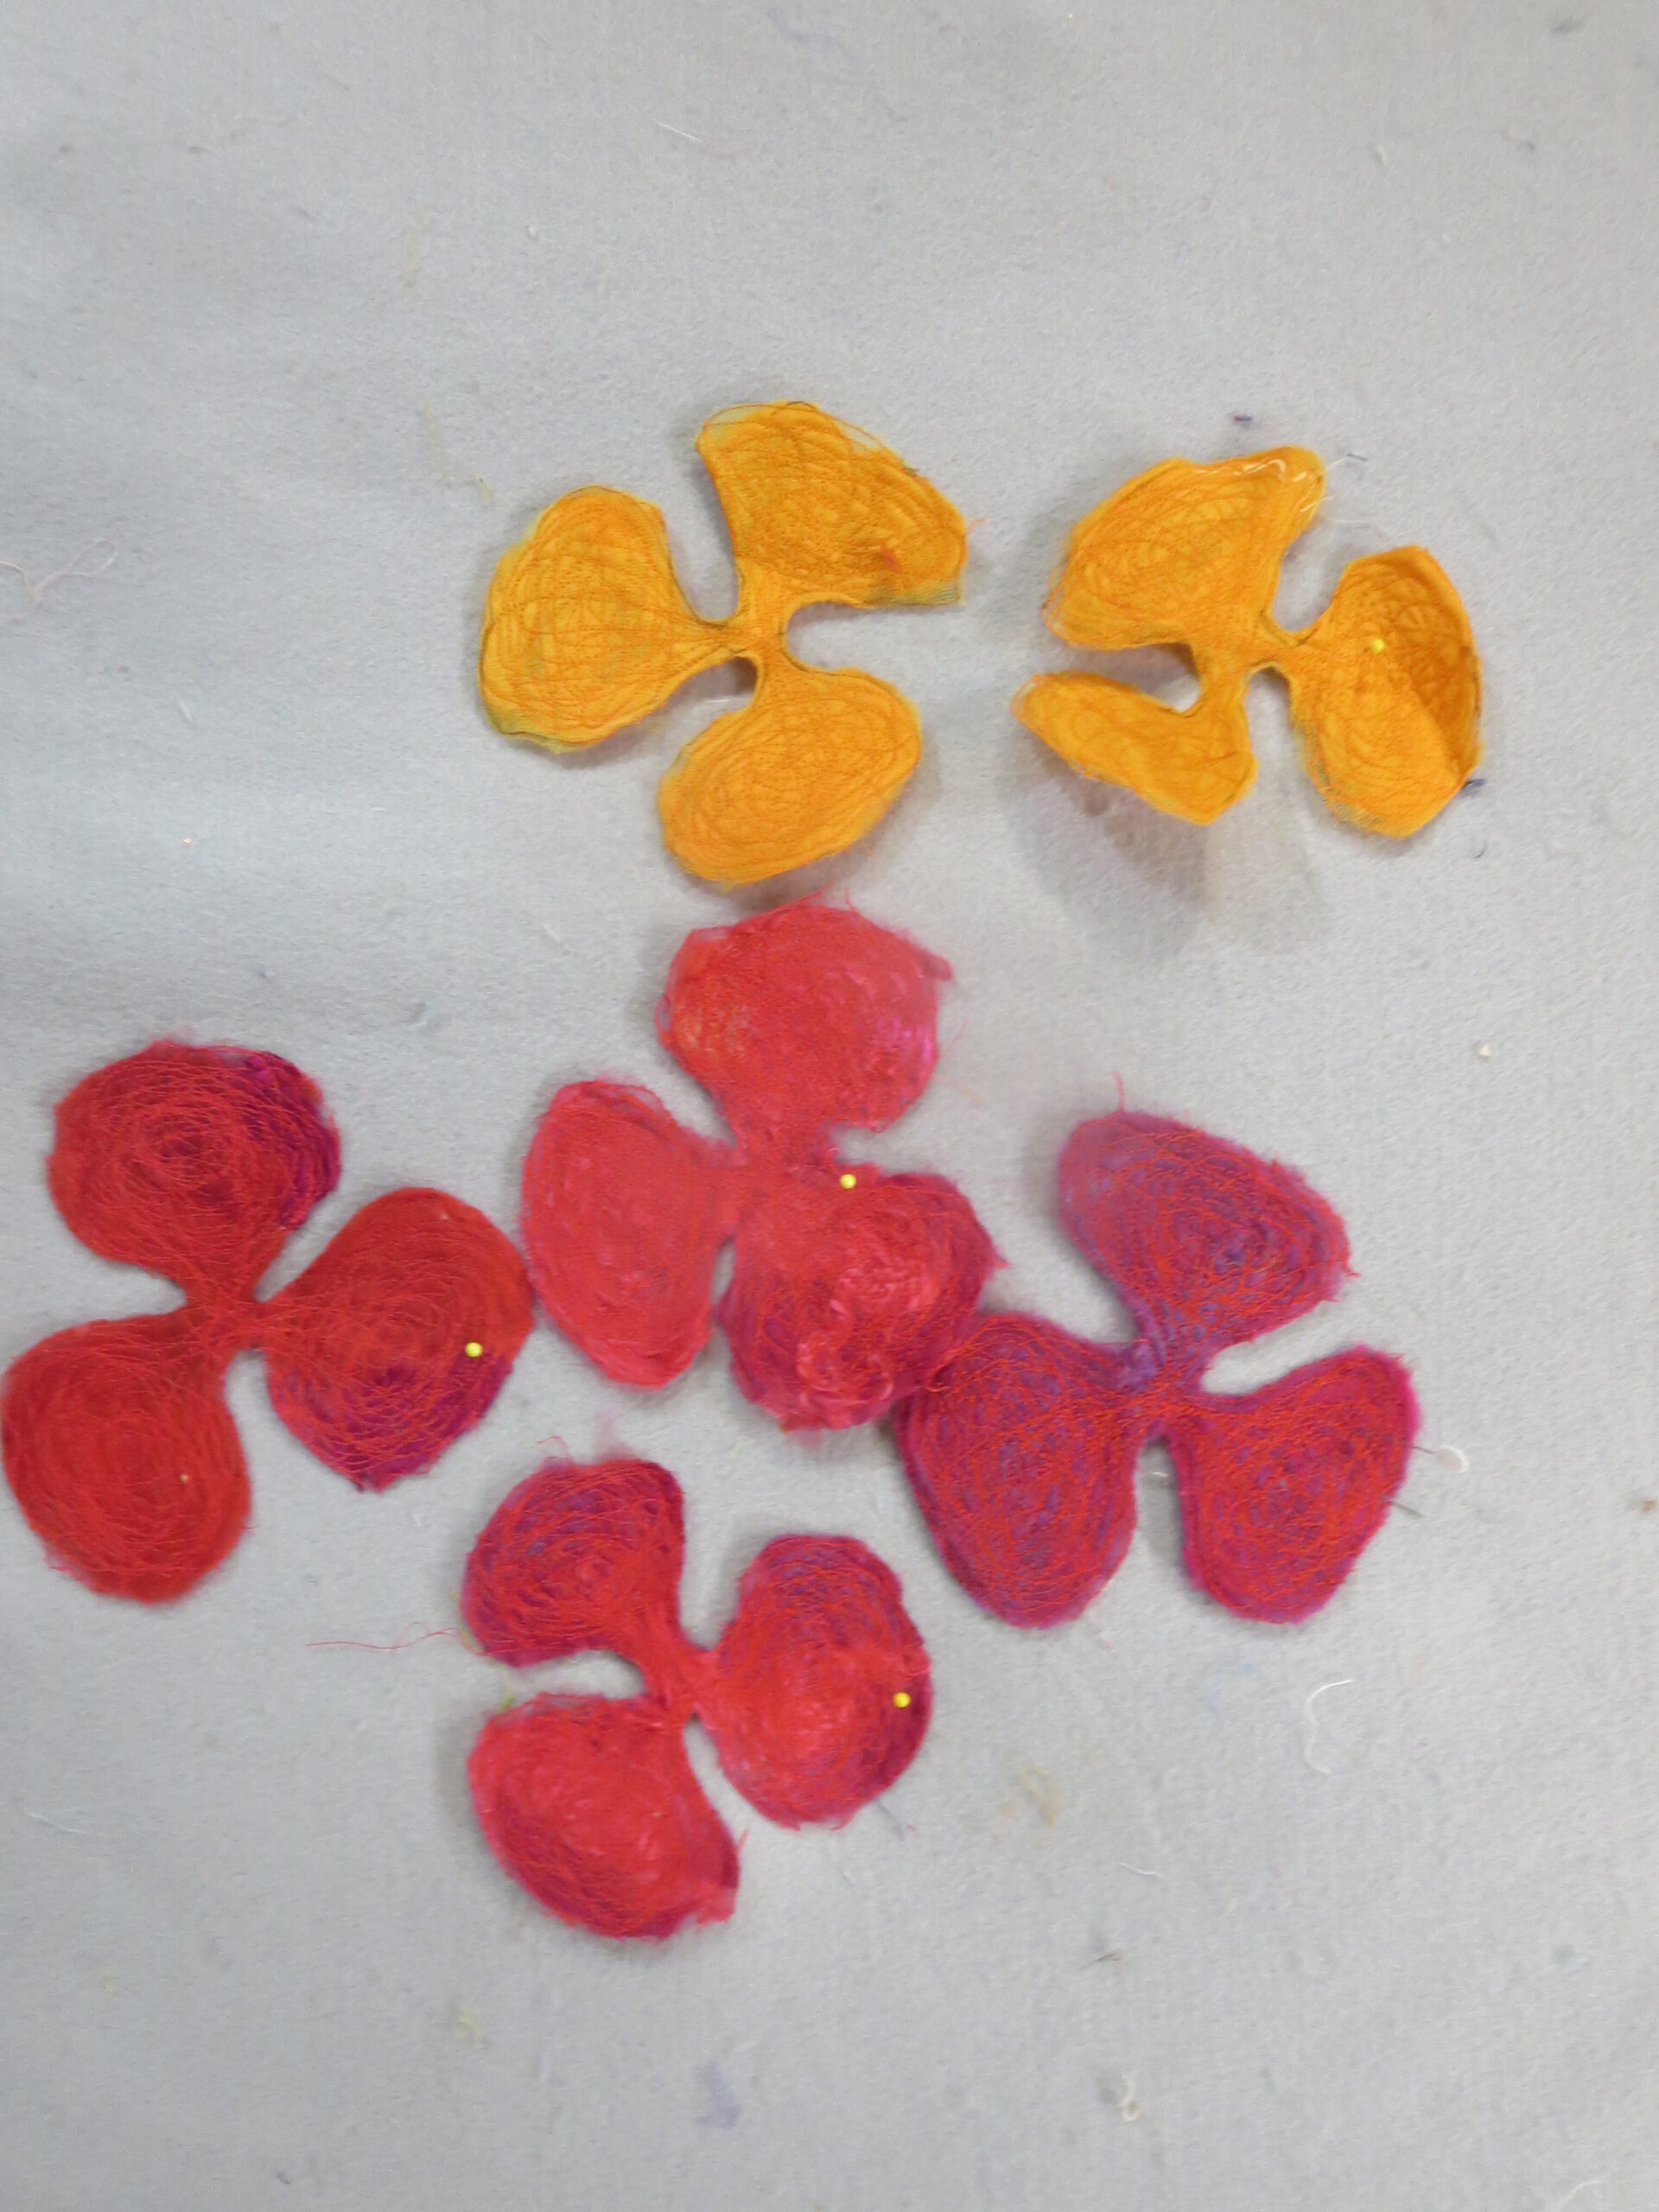
Poppies I continue to make more blossoms for the project.


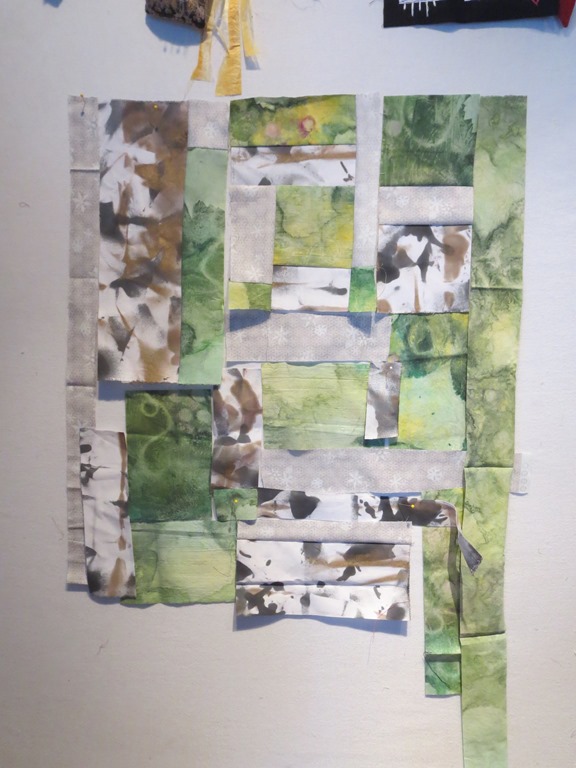
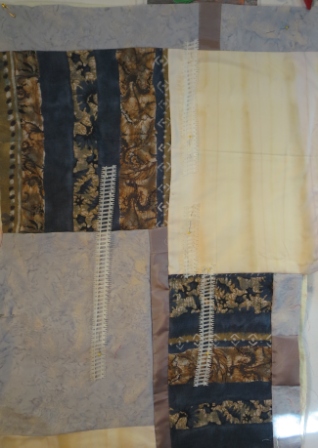
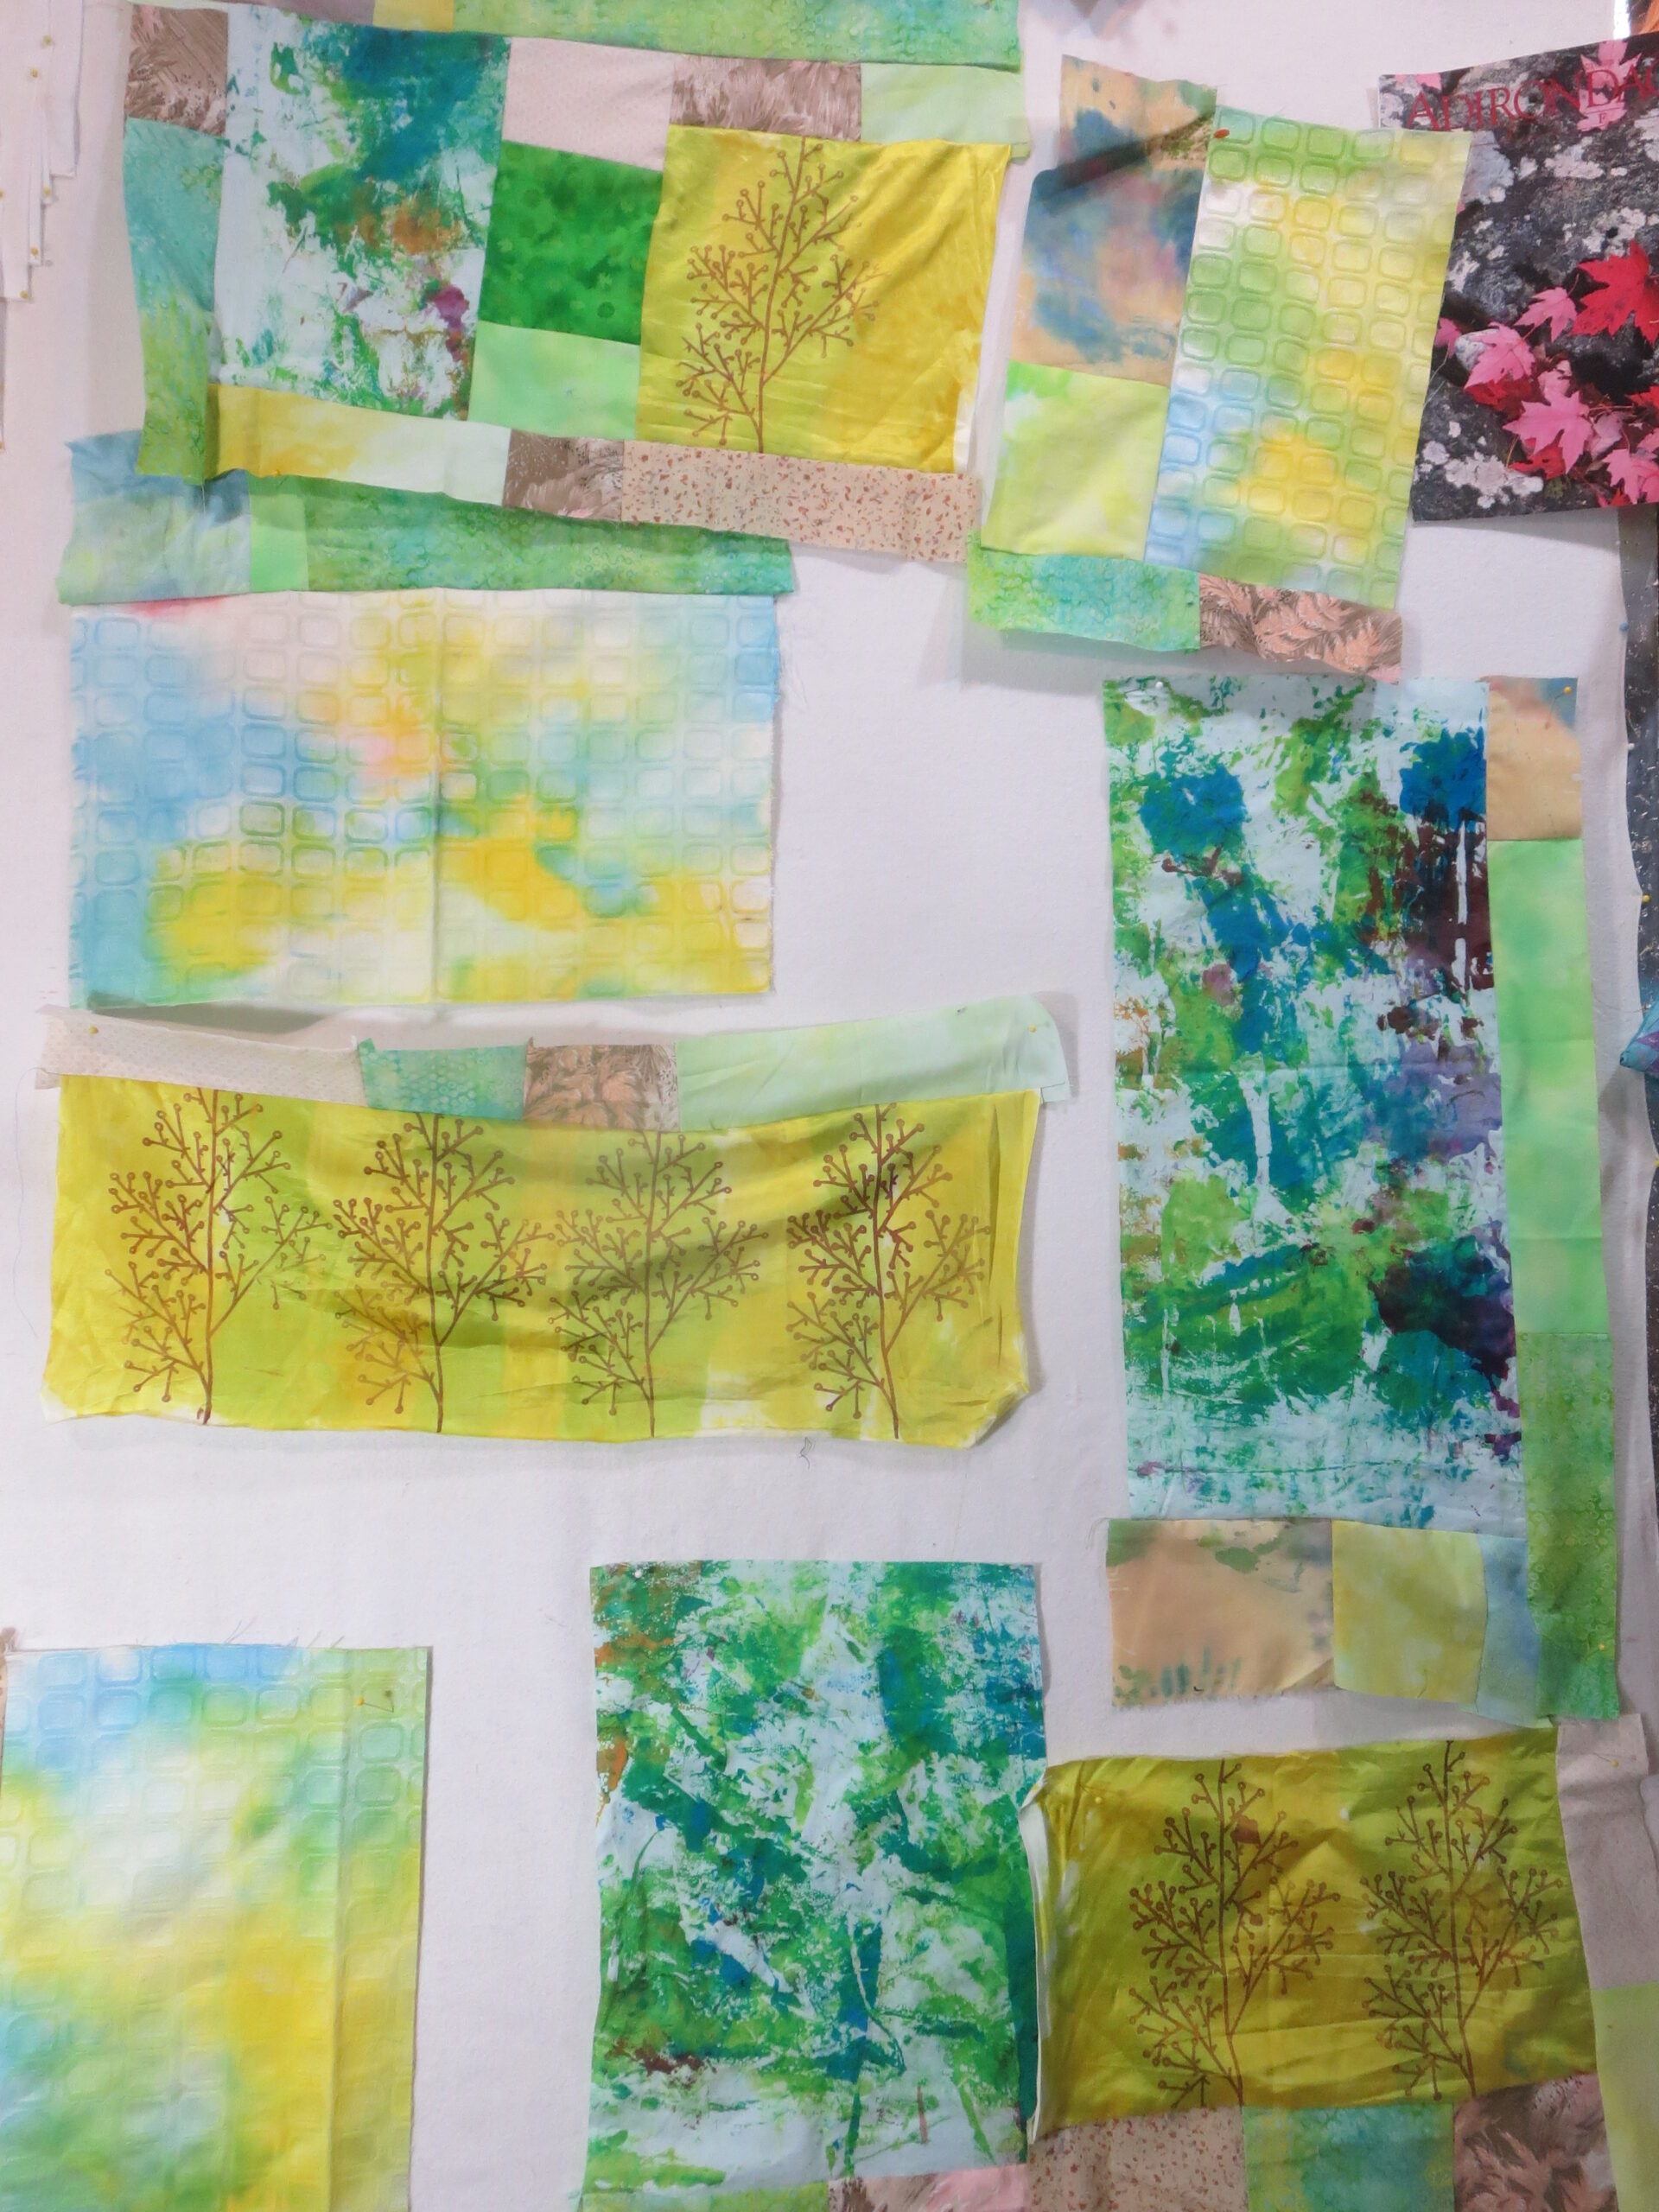
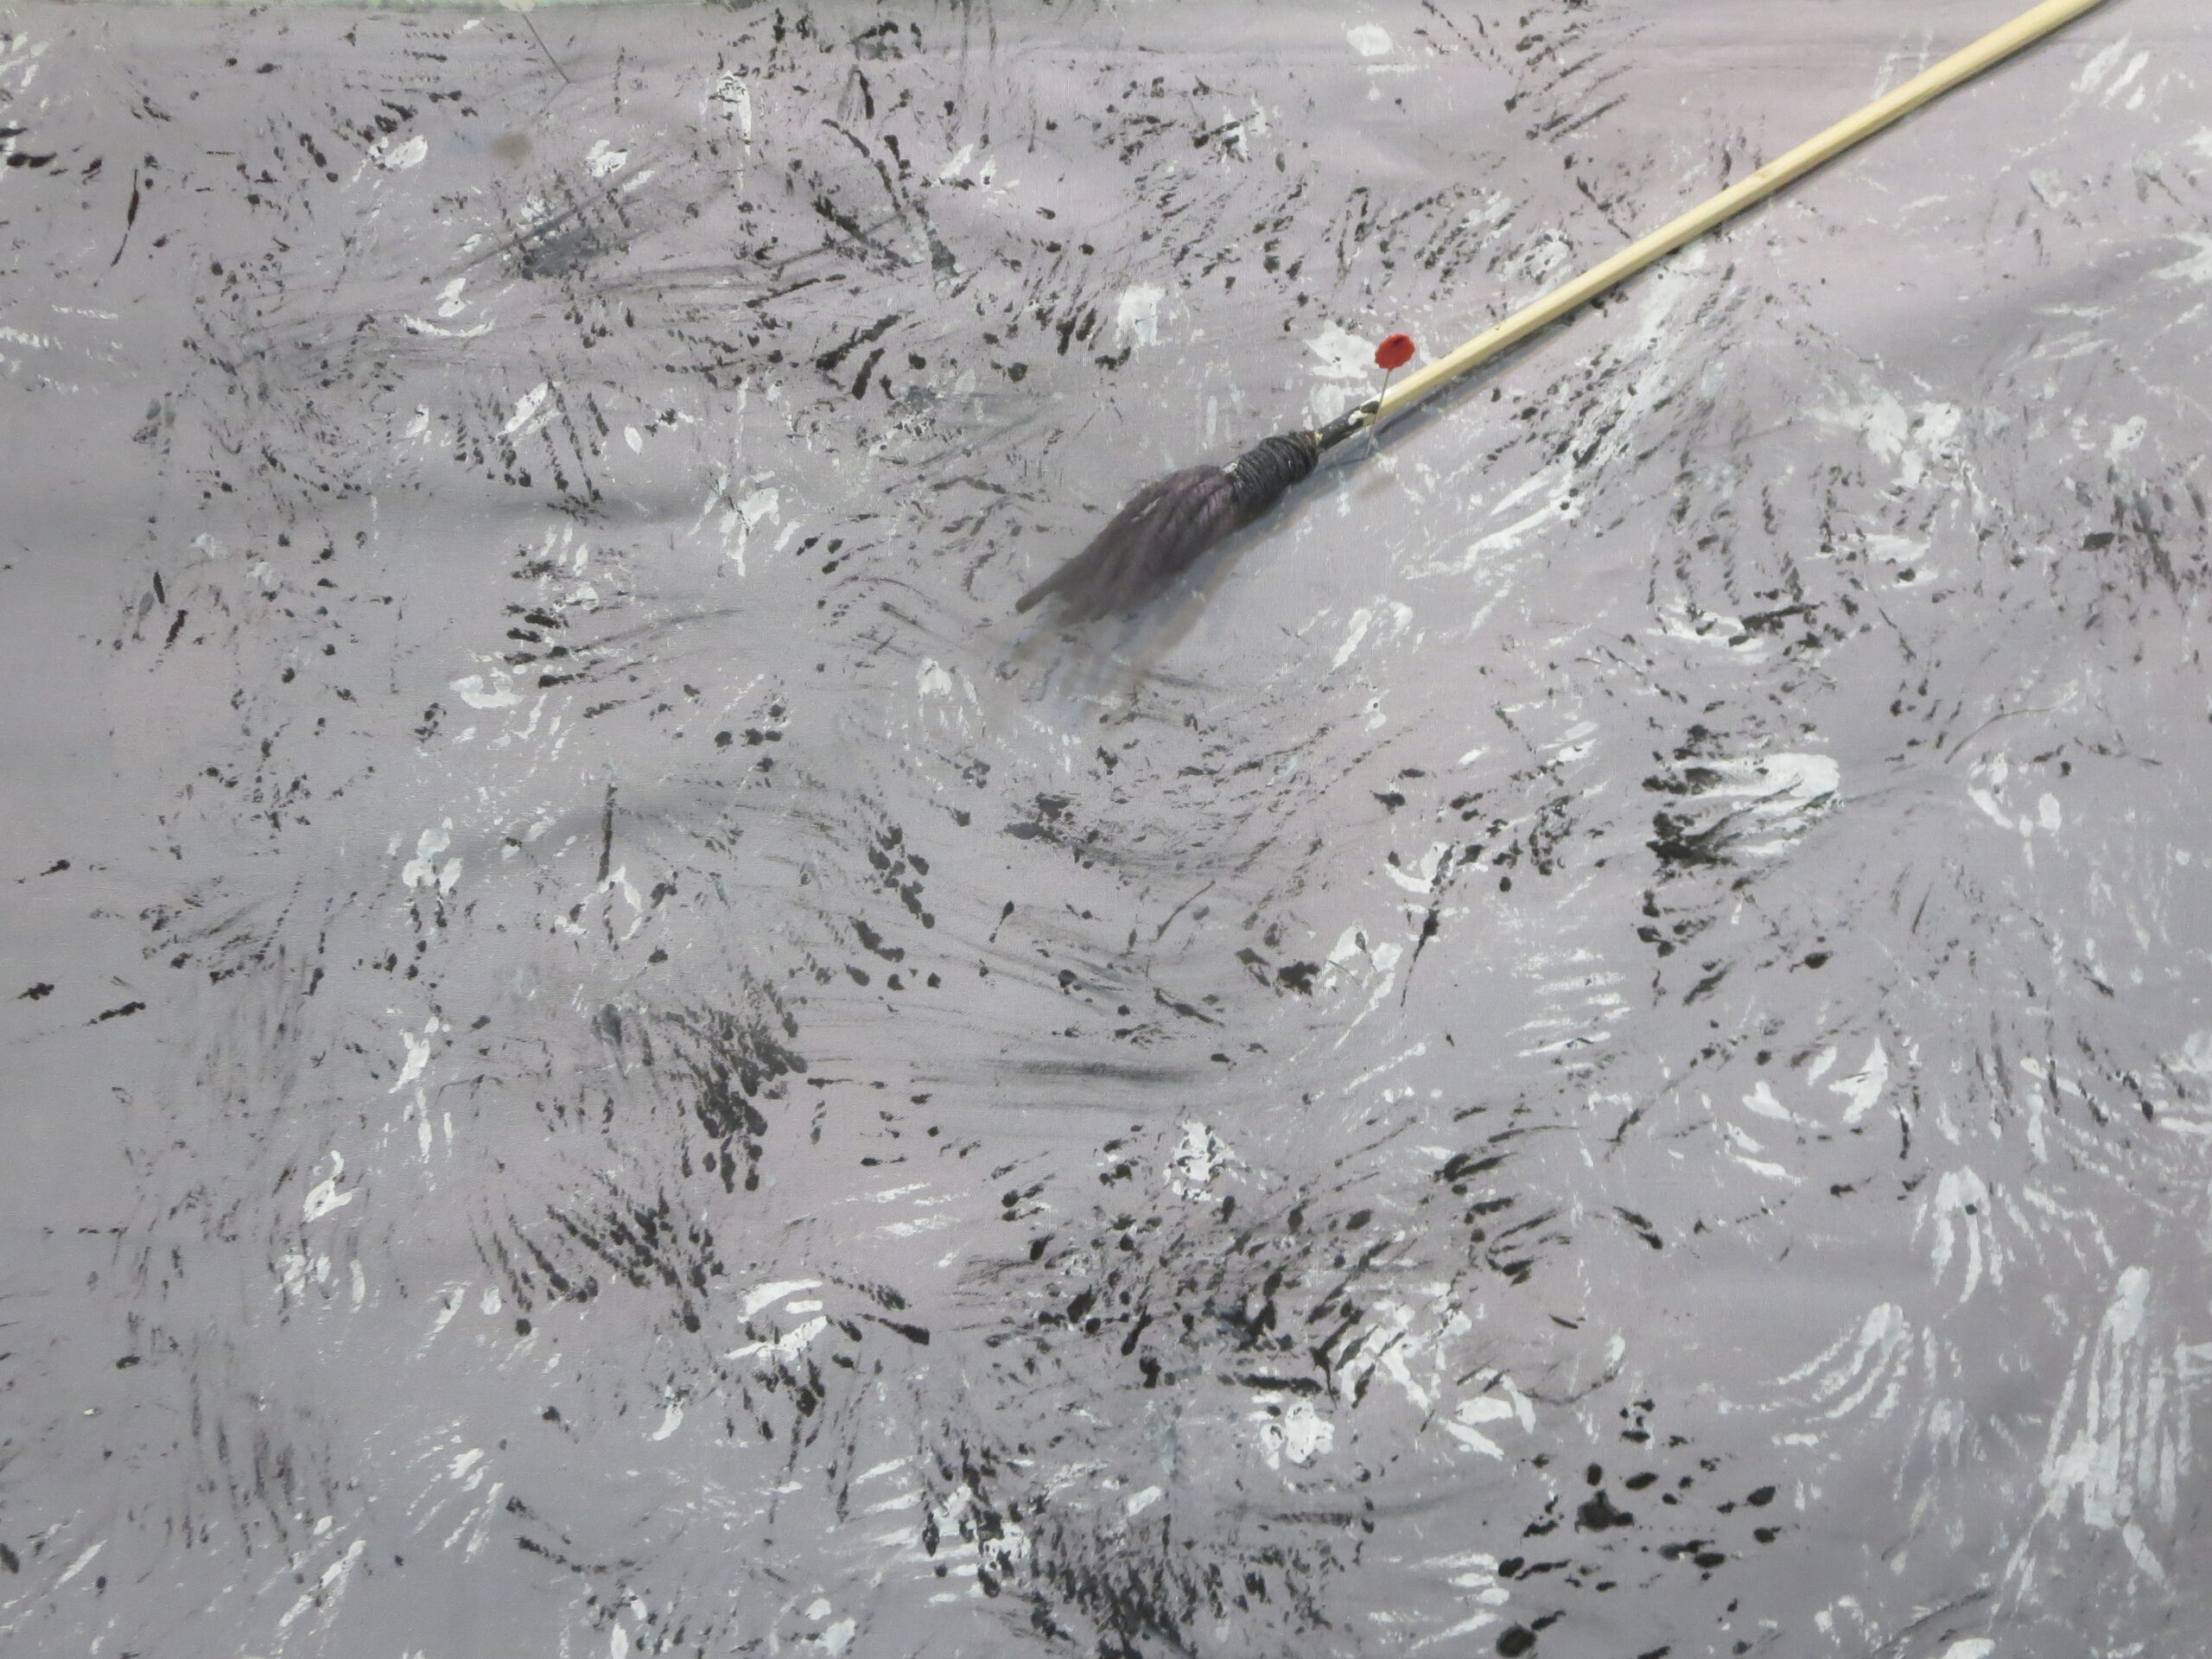
New work I decided I wanted to do a new leaf quilt. I built this whole cloth base to look like Granite. I used one of the brushes that I made earlier this year as a part of the Pixie Challenge to do the painting. Great fun.

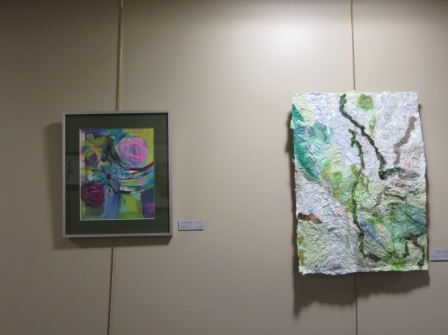
Daily Practice I finished two more units this week.


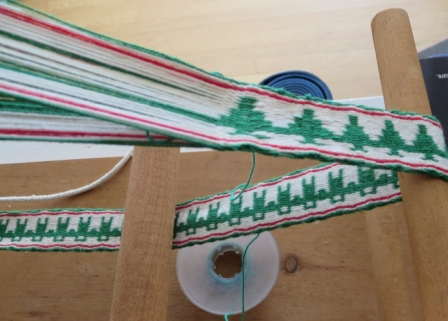
100 Days I am now at day fifty two. It is still a fun challenge.
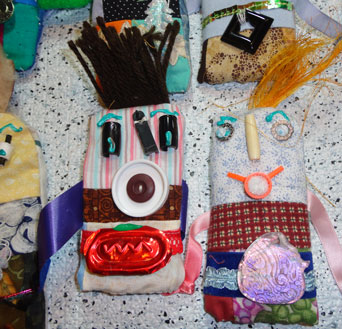


Drawing


Adolescence Summer 1965

The summer after the hospitalization   sunner was a bit quieter then in the past. I did summer school but not as much swimming and such as the summer before. I did enjoy my time with the band gang. Summer band was a bit different as the group participated in more competitions. We even won a first place in one of them. We did the county fair stuff as in the past too. In Aug Gene and I went to Iowa for a few weeks before Mom and Dad. Grandmother Ester took us off to a different church camp then in the past as it was only a morning thing. In the afternoons she and I worked on sewing up some new clothing for school. She helped me make three dresses that were all the same pattern but with validations in fabric, neck openings and sleeves , they appeared different. I remember helping Grandmother Ruth clean out the Flour House that was at the back of Aunt May’s house. It was called the Flour House because when the train went through town flour was stored in the building. The building was snug and full of old stuff. One of the treasures was a horse drawn sled. Grandmother said it was the sled that Grandfather Howard took her out in at Christmas time to see Hailey’s Comet and purpose to her in 1911. There were was a strange electronic devise that we called “the Brain Machine”. Grandfather had taken it in trade for gas during the depression and the man never retrieved it. The cabinet was mahogany with two electrodes on the top. When one opened the folding doors on the front they revealed a series of nobs and dials above each was a little screens containing numbered dials with little needles that one could adjust when the thing was plugged in. On the doors inscribed on brass plates were the instructions on what dials to adjust for different illnessnesses, like headache, back problems, arthritis and rheumatism. And of course brain illnesses. One was suppose to put a finger from each hand on the electrodes and get a mild current/ shock to cure you. Mom said she was sure it did nothing- except excite one into believing things were better for a while. I got to take home some old photos albums full of old tin types that Grandmother told me that again, they were traded for gas. There was a collection of old Iowa auto licence plates from 1933. She said grandpa Gast had purchased them to patch the barn roof and these were the leftovers. I still have one.
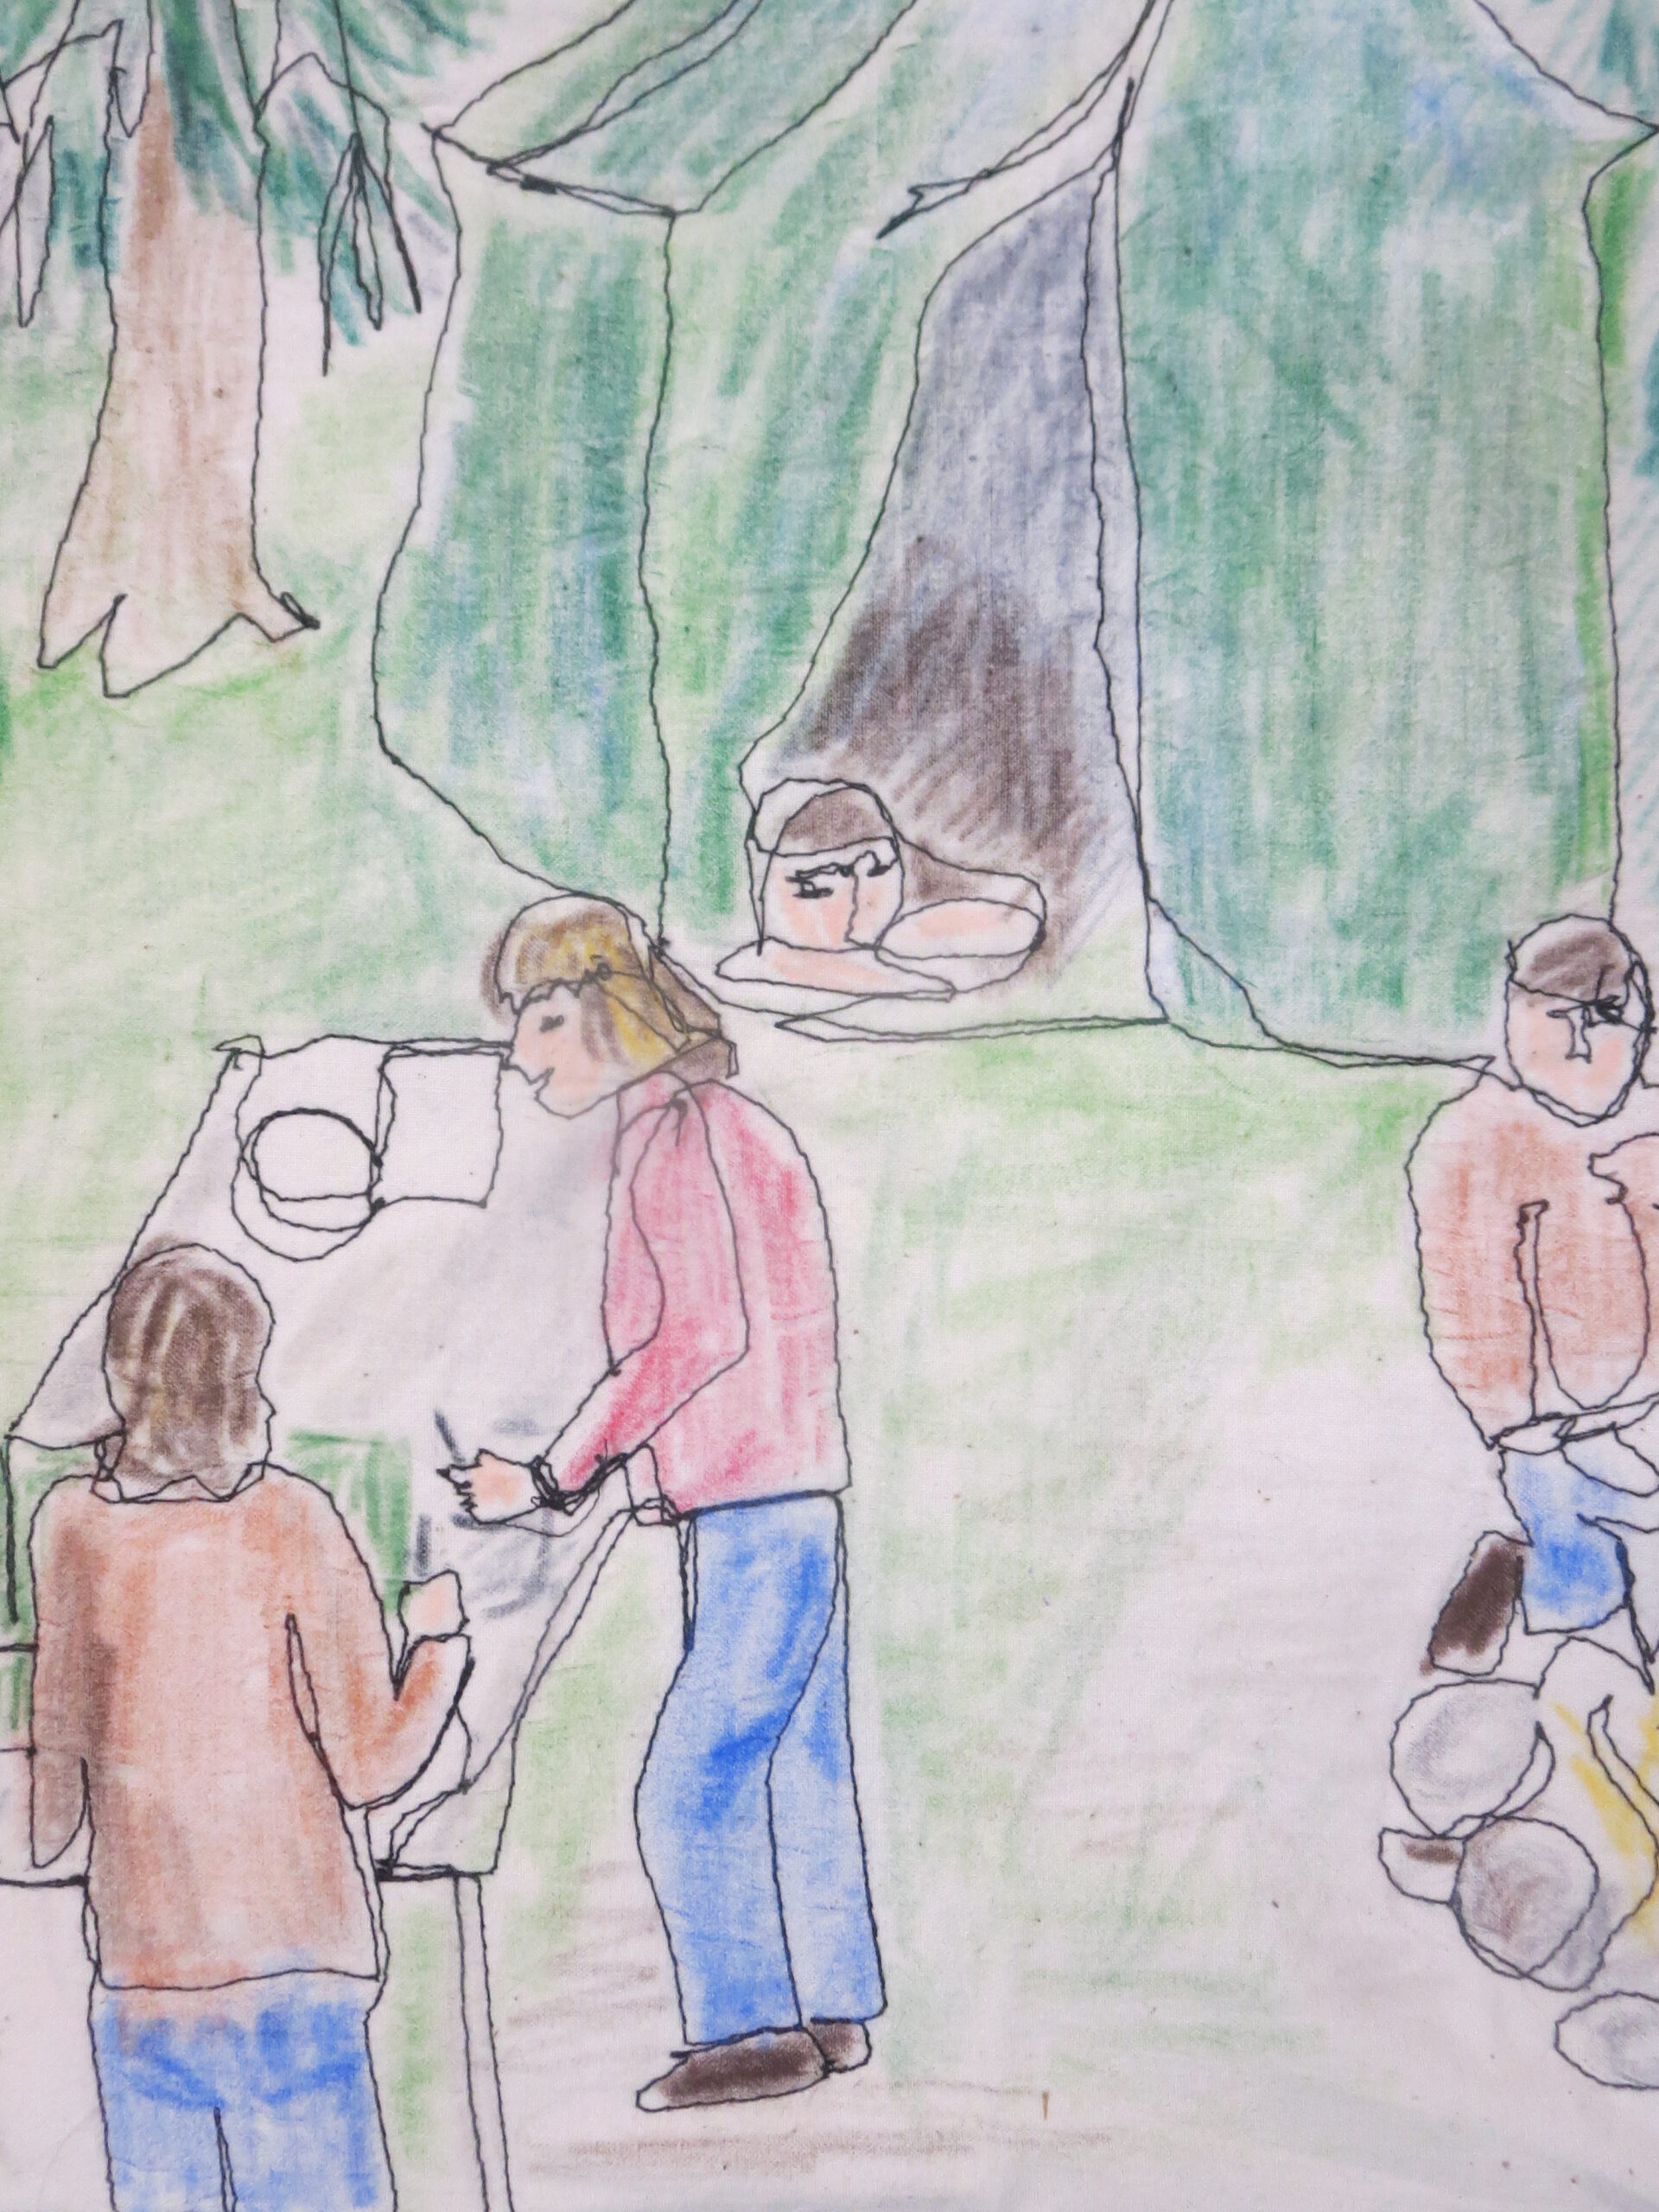
We went from Grandview north to Wisconsin and on into Minnesota to do our family vacation in the land of 1,000 lakes. We had the canoe and we rented a second for the water part of the  trip. We were along the US and Canadian boarder, crossing back and forth several times. For the whole week we did not see  or hear another person. It was wonderful with lots of portages and camping on islands. The moss on the ground was about four inches thick in places and sponge. Gene and Dad both had fishing permits so we ate lots of fish. We saw many red squirrels and a flying squirrel too. I loved the many calls of the loons that we heard mostly at dusk and dawn.   For the first time I really saw the Milky Way and believed that there were more stars in the sky then one could count. There were lots of insects too- but not a lot of misquotes. It did rain on us one day and so we spent the day in the tent lounging and reading. We hiked to several water falls as well. The water was cold but we did swim a bit every day or so. It was a very calm and quiet week and what I imagine the whole country was when the native americans were its inhabitants . Our trip was the week of the Watt Riots, but with our insolation, we only learned of that disastrous event when we got home.

Have a good week and there will be no entry for next week as I will be away.

Stay safe


Carol

Winter Ice


Hello,Ice

I am paying special attention to ice as I slipped and fell last week.  I am fine.  This shot of ice along the street really shows how water shrinks as it freezes.  I love all the layers of air pockets in this shallow pool along with the leaves for extra texture.   I took lots of photos of ice this week so there may be another ice quilt in the future.

IMG_4958Angela is having a play day in her studio tomorrow and we will be printing with interfacing stencils.   I got carried away as usual with my preparation and made 4.  I will show the results next week.

Autumn LeavesProgress Report: Autumn Leaves This is the last  of my leaf series for the time being.  I had a good time doing bobbin work on this piece as well as the free motion quilting of the leaves on top.  IMG_4952  The out line of the leaves was done with cord that was so thick it could not go through the eye of any of my machine needles  so that is whyClose up of Autumn Leaves I put it in the bobbin and drew from the back.    I then changed the thread and did the vanes  from the front.    I also used this one last piece of printed fabric  from one of my trips up at Mill Site Lake .    The rest of the leaves are from trees in my yard.  There are two different types of Oaks  and Maples.IMG_4950


Coastal Color 2Coastal Color 2   I am having fun adding to this felted piece.  I really like the build up of the texture with stitches and yarns for color.


New work fuchsia   New work This is the third  top  developed from a collage.    I also meant all three of my personal monthly challenges with this piece.  The challenges are: 1. to use some of Ethel Fabric in a work.    2. to use some fabric I have altered in a work  3. to use a collage as a starting point.   Now I need to decide how I want to quilt this piece.


new workNew Work green This top is not quite finished yet,but close.  I have always been interested in how things work and seeing the insides of stuff.  So when I got a new IMG_4954_thumb.jpgcamera last year because I had dropped the old one, I did not throw it away.  I finally took it apart this week .    I love all the little plastic and electronic parts and so I decided to make a top to stitch them too.    It will be a stitching challenge of  sorts.

IMG_4955.jpgLittle Fox  I made this little fox pin this week too.  After receiving positive feed back and having two friends ask for pins of their own,  I  decided to make a tutorial on how to make this fellow.  It is started and I will finish it this week.


 Creative Assistants  Creative AssistantsI finished off 30 creative assistants this week.  This is a shot of the last ten.    It sure goes to show how easy it is for me to improvise.

Label Block #35IMG_4956  I just keep working away on these little guys.

Keep Creating

CarolIce


Winter

IMG_4902.jpgHello,


The woman who works with her hands is a laborer.      The woman who works with her head and her hands is a  craftsman.   The woman who works with her hands , her head and her heart is an Artist.      St Francis of Assisi

IMG_4905.jpg

This quote really spoke to me this week.  My wish for all my friends is that they be Artists.     I spent a lot of time with those artist this week.  One day I went to the Turquoise Street Studio and work withIMG_4904 three other gals.  Beth was doing pastels, while Barb and the other two were painting.   What a lot of fun to work with this energy flowing.

Then because it was the beginning of the month the QuIGs  and IMG_4907.jpgDiva’s meant too.   The gals in those groups help me so much when it comes to problems I have with my techniques.  I learned a lot about mixing   different types of fabrics this week.  Corrine was showing off her daughters aromatic jewelry at the meeting and she even sold one.   IMG_4908  Then yesterday the FAB group meant at Patti’s house.  She shared beautiful fabrics from the far east with us.  There was wonderful weaving in all of them  with lots of color and  gold threads.  My one other event this week was to be a part of the judging of Scholastic Art.  I so enjoy seeing what the middle school and high school students are doing when it comes to art.  It was very enjoyable.

IMG_4915.jpgProgress Report:  Creative Assistants   While I was at the studio with all the other artists I worked on these little guys.    I was only stitching them closed and adding a pin to the back, but  I got 20 of them done.  I added  the paint when I got home and they are now ready to pass along to others.

Williams’s Quilt IMG_4916I finished the stitch in the ditch quilting on this project this week.  There were lots of lines to do.  Now I am ready to start to do the binding.  It will take about and hour to do each side.  It is a bright colorful work – just great for an active little boy.

IMG_4918.jpgCoastal Colors  I made progress on this piece this week.  It is done as far as the machine work is concerned.   But I am concerned about the ripple.  The gals at the meetings all had great suggestions about how to deal with that and I learned from them.

IMG_4917Hopefully I can stretch it well enough to get it flat.   The bad news is I  already laided  out and started two more that I fear will have the same problem.    But the next time I try to mix felting with machine drawing, I will know better then to put stiffener as a part of that step.  It does not shrink at the same rate as the wool and that is the source of the problem we think.

Autumn Leaves  IMG_4913   I am doing the free motion drawing of the vanes of the leaves now.  I am having fun and I have learned how Mother Nature designs each species differently.

IMG_4912.jpgLabel Block #34    I remember taking the Pooh label off a blanket for Alexis when she was little.  She is 20 now.  Do I hold onto things for a long time or what?

Keep Creating

Carol

My word for 2015


??????????????????????????????? ???????????????????????????????   Hello,

I try to choose a word to concentrate on every year and in doing that I find I pay more attention to my actions.  Last year I selected EXPLOIT.  I tried to make the most of  every experience and situation I encountered.   I do not know how one measures the success or failure of such a venture- but it did make me try to use each day/event to its fullest.  It has almost become second nature with me now.  It is time to focus on a new  word/concept.   I have been thinking about the idea for the better part of January and I have decided to think/concentrate on an art concept this year.    I have selected LINE as my focus word/idea for  2015.  I will now make a sign for myself to help keep it in sight and focus on it.    Look for some thoughts on this topic next week.

I have had a good week.  Cris Winter came and we had a great Nancy's mountiansplay day.  We made  Fused Silk Papers.  It was fun to play with her as she had lots of different ideas about how to use the silk  paper.   I would not have inserted the plastic ribbon into the surface without her suggestion.  ( the red building has the plastic ribbon in it)   I also played a bit more with the shape due to her influence.  It is good to explore and try new  stuff I think.

Nancy has made great progress  on her quilt .  I really love how she has developed  the mountains.  I am so proud of her.

Gallery ShotThis shot is of the Inside Out show at the Manillus  public library.    By friend Barbara belongs to the group- that is her work on the left and she invited me- my work on the right.  It is a fun show with lots of different types of work in it.


FAB meant thisPatti's  Card  Weaving week too.  Patti is doing card weaving and creating a great tree pattern with the cards.  ( the figures are the back of her project)    I never learned how to do this process, but I remember my mother doing it when I was a child.


Progress Report: Scrap Happy # 3   Now the third one in this groupingNew Scrap Happy #3 is complete.  I have parts set for three more so these will keep popping up for a while.  As I said before I sure love the new open space on my shelves because of doing this project.


Creative Assistants  Creative Assistants   I finished a new batch of these little pin fellows this week.    They are just fun and I enjoy the process.  About 30 more have faces and will need to be completed this week.

New work


New  Work This work is not getting much attention while I am working on the Creative Assistants because it is ready for the hand work and I have been putting all my efforts into the pins.   I can see the end of that project so this one will get my efforts soon.  I am trying to decide what color I want the thread work to be at the moment.

I hope you are keeping warm.

Keep Creating

Carol

More Fall Stuff

Creatie-Assistants  Hello-

Fall is still all around and painting the landscape here with color.   I love it.

When football season starts, I watch and spend my time making  my Creative Assistants.   This is the  first batch of 49 that I have completed.  I so enjoy the process and it does make the football go by faster for me.   It seems the games have lots of time when there is nothing  much going on- but commercials, so I stitch away.BO29-QBL2    I  enjoy giving them away when I go to Quilting by the Lake every summer.   ( there is a tutorial on how to construct your own Creative Assistants below)

I am taking a class called Deconstructed  Screen printing with Kerr Grabowski. It starts today and lasting for three days.  This is my pile of stuff for the class.  I am sure I will come home with lots of  new altered fabric to use.


Spill 17" X30" $185
Spill
17″ X30″
$185

Progress  Report: Spill  I had a good time working on this piece.   I so love texture and this one has lots of different materials that add to that.   There is the usual cotton of course, and my current  favorite – silk paper then I added iron melted plastic bags and  turquoise mylar as well as satin, and course woven silk.  I added hand stitching t in the form of french knots, button whole stitches and chain stitches to the surface as well as machine drawing too.   I  am pleased with the results.

Spill-cl3This piece BO29Spill-cl1fits very nicely in a little nook in the wall.


Spill-cl3


Watermarked Sandstone 33.5" X 25" $305.00
Watermarked Sandstone
33.5″ X 25″
$305.00

Watermarked Sandstone- Foundations XXIII     I am finally finished with this newest  member ofwatermarked-sandstone-c BO29Watermarked-Sandstonew-the foundations series.  I really enjoyed the free motion work on this project.  I had a good time doing the painting on the surface of this piece.  Adding the iron nodes to the surface was a bit of a challenge as  I tried them in many different locations before I finally selected this layout.  Then when I was shooting the work Watermarked-cl3for this entry I discovered that I like it on a 90 degree  turn from the direction that I had been looking all the time I was working on the construction.   One always needs to be open and aware of what is in front of them.

New-workNew Work    As I was nearing the end of my work on  Spill I realized I needed a new piece to do hand work on so I looked  through my sketchbook of ideas.  I came across this old idea of using circles  and lines for a piece and though I would try it. I have a box full of old Saxaphone keypads that a friend had passed to me and I thought this would be my BO29padsopportunity to use them to express this idea.    There are so many different sizes, colors and textures here- I am sure I will have fun with this work.

I hope all   enjoy the colors of the season and the kids all dressed up for Halloween.

Keep Creating

Carol


Tutorial- Creative Assistants

 Hello,   

Every fall I try to add a tutorial to my blog.  This year I am adding how I create my little Creative Assistants that I give away at  the  conferences I attend.  The little pins make folks smile and create great a great way to connect with fellow creative souls. They are also a great way to use up all the bits and pieces that seem to find there way to the bottom of sewing baskets and drawers.    Have fun.

Materials list:    Scraps, card stock,  thin batting or polar fleece scraps, pin backs  .  Materials for faces: buttons, beads, little plastic or metal found objects- like paper clips, safty pins, cap liners, plastic rings, old broken bits of jewelry. ect.  For hair, yarn bits, old fur cut offs, ribbons, lace ends, scarps of leather- all of these can be used for arms too if they are a bit bigger. 

 Sewing kit( scissors, needles, thread ect) Sewing machine


QBLCreativeAssistantsCreative Assistants     Tutorial

1.  

     Base: To being this project you will need your scarps.Tutorial1

      I try to cut them down to strips that are two and a half to three inches tall –and some that are two to one and a half tall, plus a third one that is one to a half inch units.  I do not worry about being precise about this.  Then I sew all the pieces in the same size range together. The result is three long strips of the three different sizes.  I then sew the smalls strip to one of the others and trim off the excess as necessary.  The next action is to sew the two unit strip to the last strip with the slender unit in the middle.BA1tutorial3  

BA1Tutorial6     2.Sizing:  The next job is to cut the long colored strip into base units.  This is a vertical cut across the seams into three inch units.

3.  Embellishment 1:  I then go to my trim and short yarn box and attach a bit of color to each unit. BA1Tutorial7 I usually do two units with each trim and then change the trim so there is lots of variety.  I sew one bit of trim vertically on a base. BA1Tutorial8 I look at the base unit and decide what will be the face area- I sew the trim below the narrow strip or across as horizontal embellishment.  Sometimes I also sew a strip vertically for a different look.

Facedfigures     4.  Faces: The next actions are done by hand:


 mouth   Mouth: The next step is to add the faces in the top or lightest area of the base strip.  One Button, bead, heart shape, bit of straw, cap, small spring, or washer can become a mouth if it is added in the lower center of the face.

    Nose:  Any longish object placed on thenose vertical can become the nose: hair pins, pen parts, bugle beads, pipe cleaner, paper clip, plastic strip, ect


-face c.   Eyes: Here you need two- one on each side of the nose. I like to put two items together to make it more fun sometimes, but that is not always the case.

      Eyebrows are optional- they can add a lot of expression though.

5.  Embellishment 2: I sometimes add old bits of jewelry or small toys to the bottom sections of some of the dolls.  I let the work guide me on this step

6.  Hair: Back to the machine.TutHair  Bits of yarn, string, ribbon, thread tangles, fur, ect is added to the top of the head area.  I loop the yarn about my fingers a few times before I sew it down.Tut-pinnedarms

     7.  Arms:  Leather scraps, cording, heavy yarns, pipe cleaners, holiday ribbon and other heavier materials become arms.  I tie a knot in the end to give the feel of hands.  I pin the arms in place and sew them just above or near the middle of the body. 


    8.  Back:   To create a back I cut six to eight  inch long strips to serve as my backs.  I place the finished body unit face down on the good side of the strip and cut it so that it is the same leanth. backs-and-pinning Then I fold up the bottom of both the back and front of the doll one fourth inch and pin.  I pin the body together and them sew around to connect the two units leaving the bottom open.


9.  Body: Clip and turn the body unit right side out.CTturned-and-readytotrun


10


10.  Stuffing:  I cut long two inch strips of card stock.  Body-stuffingThen I cut batting, polar Fleece scraps  or felt scraps two inches wide.  I create a sandwitch with the card stock in the middle and the scarps on the out sides – I  zig zag down the center of the strips.

     11.  I trim the padded strips to be just a bit shorter then the body and trim the corners that will be the top.  Then I slide the padded strips into the body and stitch the bottom closed and add a pin back to the Creative Assistant. 

     12. I then look at the dolls.  I add a bit of squeezie paint if some is needed.  For eyebrows; a extra bit of color in the mouth area; or more decoration on the bottom.  When they are dry they are done except for the signing.  Pass out to your friends and enjoy the smiles they bring to their faces.     

 Hugs 

CAROL   Creative-Assiatants-Tutoria