Category Archives: Trees

Spring get away

IMG_5278Hello,

Before I left for Florida I was a part of a second show at Turquoise Street Studio on the week end.   I even sold a piece and I am thrilled by that.  Barbara is so kind to share her studio with us and help  us all benefit from that experience.Sun rise


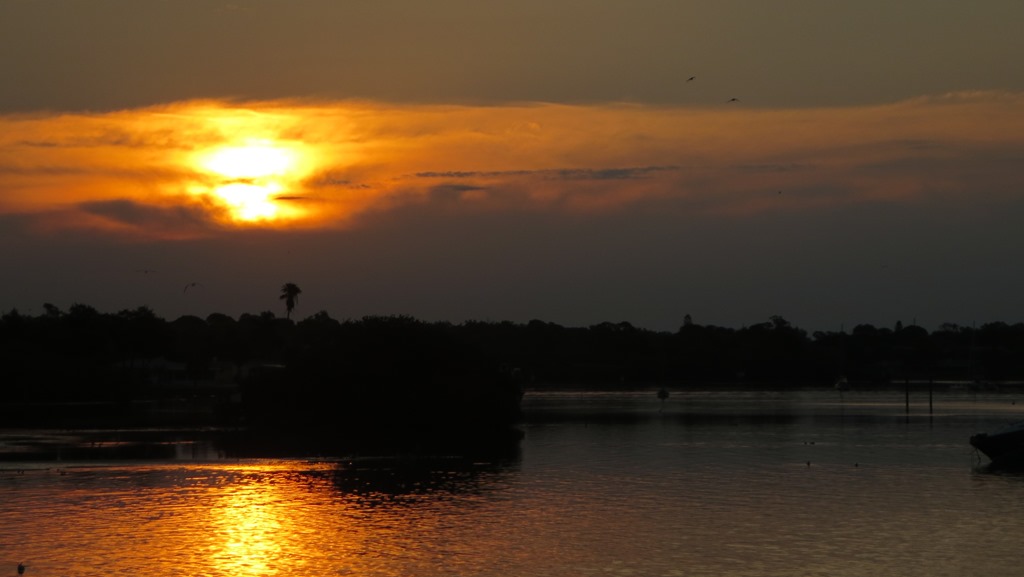
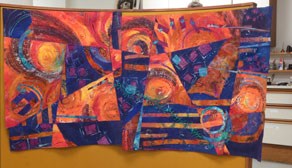
The photos tells the story of how I started many of my days when I visited Susan and Carolyn in Florida.  The sun rises were wonderful.  The light was truly “golden” as Barbara says.  IMG_5317A big reason for my trip was to see their show.  I went through the door and  was stopped short by the visual impact.  There was so very much to see I could not get myself started.  I think I IMG_5293.jpg
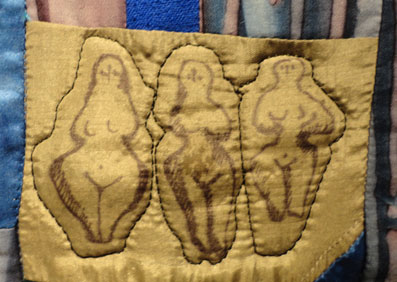
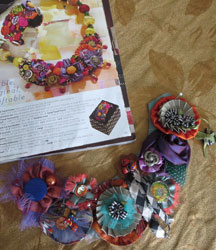
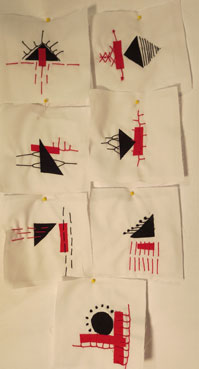
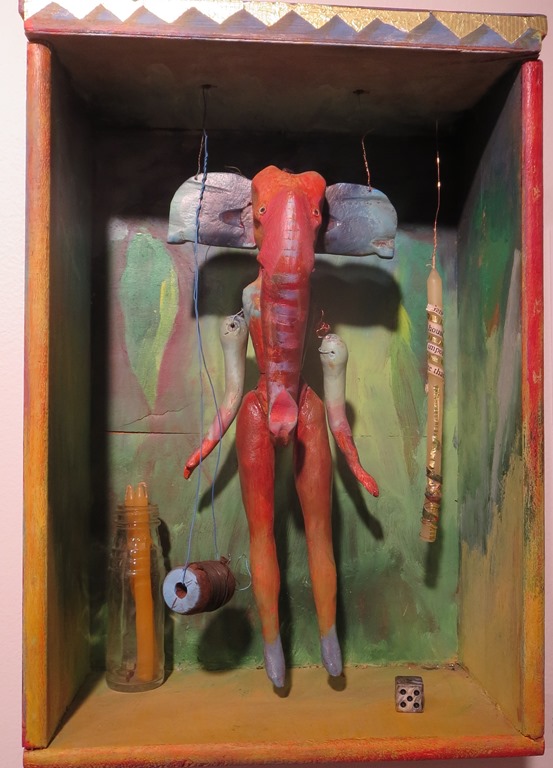
was fortunate to have seem some of the work before or I think I could have been truly overwhelmed.   In trying to decide my favorite I was struck by the variety and the powerful use of color.  I really like this altered Barbie that has become a  god.   Carolyn’s Swing Clocks with the moving feet made me smile too.IMG_5294 This picture is only two of  seven different variations that were presented.    Some works were small and intimate and others were bigger than life size like this red dress.  Red Dress
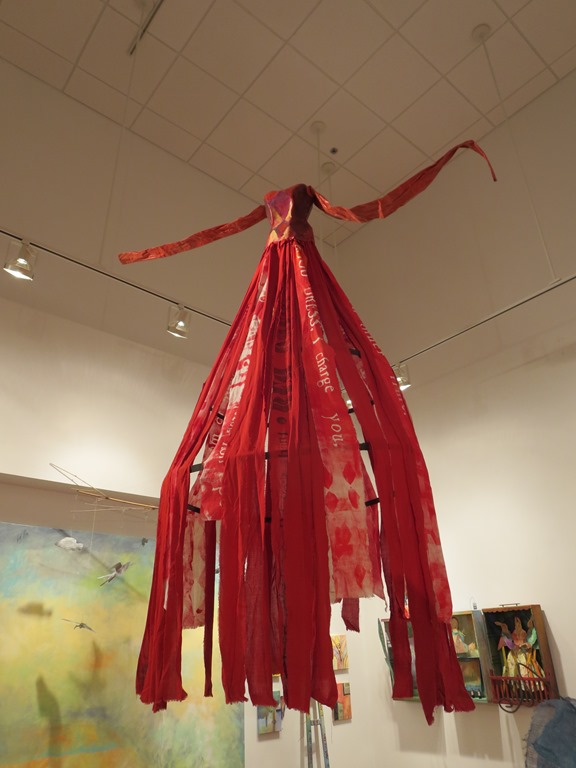
I liked Susan’s piece that was based on Little Red Riding Hood too because it had so many parts IMG_5296 that were all fascinating all by them selves and  also worked together.  It was a full and delightful experience for me.  IMG_5310.jpg  
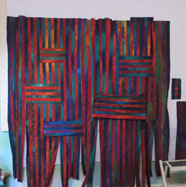
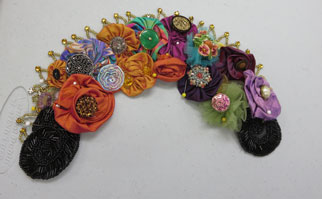
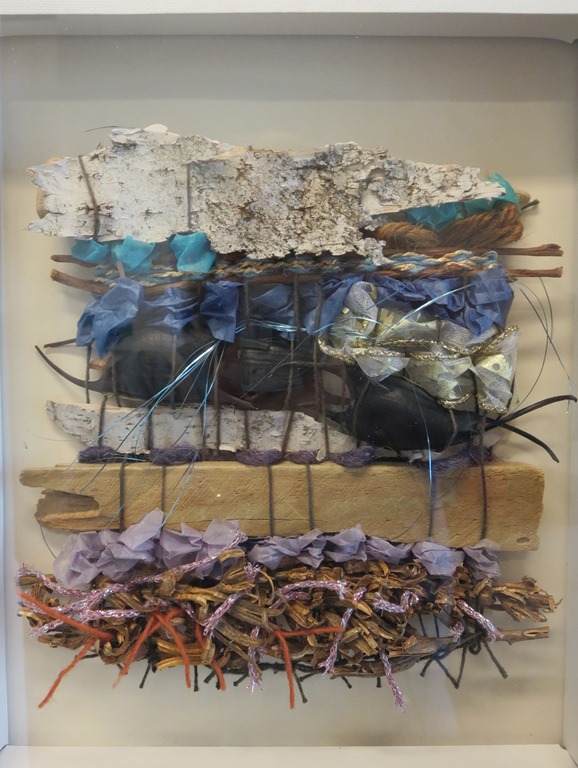
We went to the building next to the gallery and saw a second exhibit of the works of the collage faculty and staff.  I was taken by this wonderful small weaving.  Susan told my it was by the director of the gallery were their work was on display.Susan


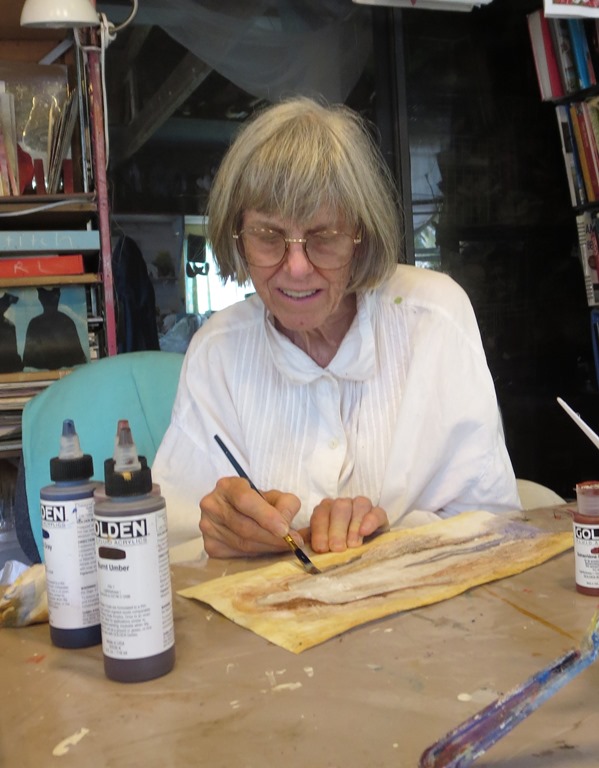
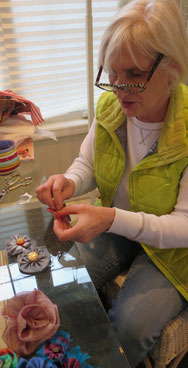
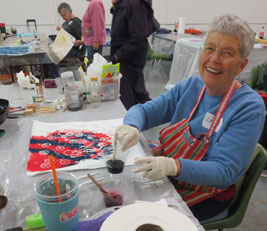
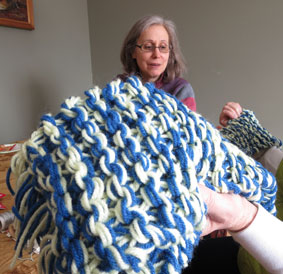
Susan and I worked in the studio every day too.   This shot is of Susan painting on Tyveck for her project for the Diva 15 Show.   IMG_5339  We worked with wood and fabric as well and had a lot of fun.    We  went for a morning at the  beach as our way of celebrating Easter.    The day was a perfect one for our ramble with a clear blue sky, white sands, crisp  ocean smells and a cool breeze.

IMG_5367.jpg
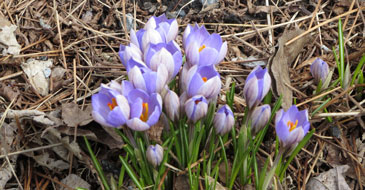
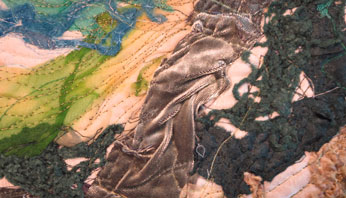
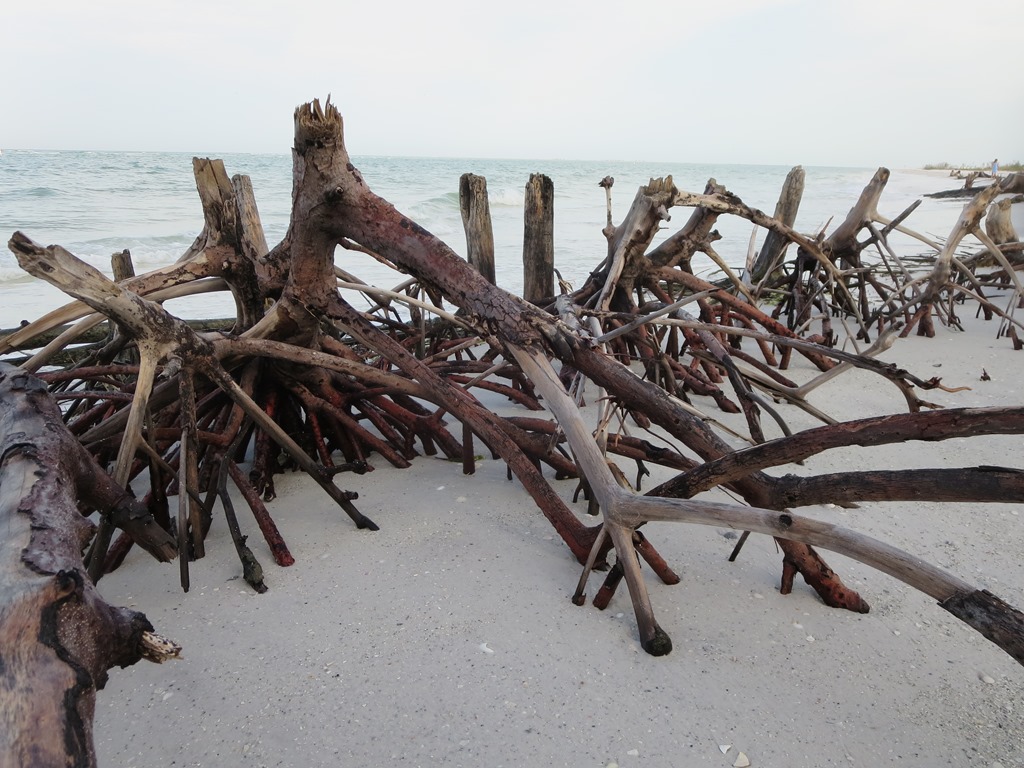
I found so many fascinating  patterns and textures that I took over 75 pictures.    But I decided that this shot of Cyprus  stumps is my favorite.   They almost look like they could walk the shore them selves.   I had a great visit.


IMG_5388.jpg
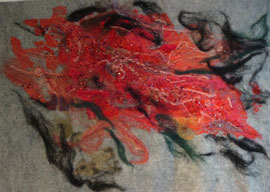
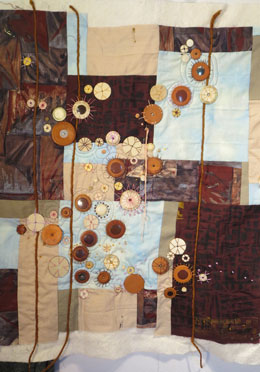
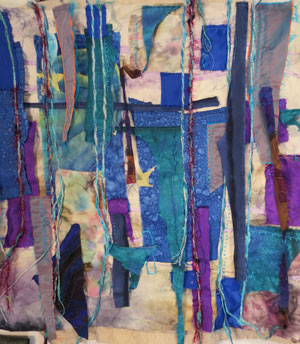
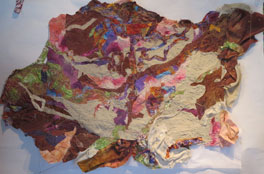
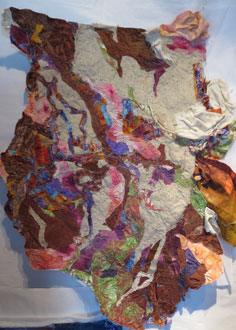
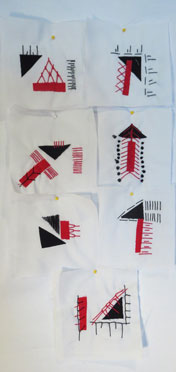
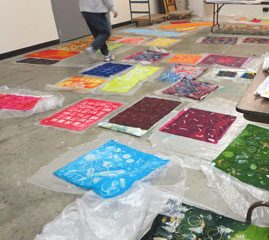
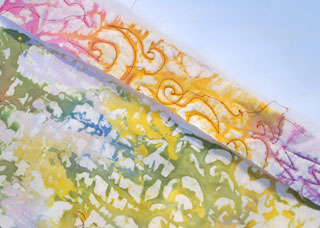
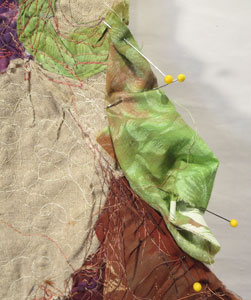
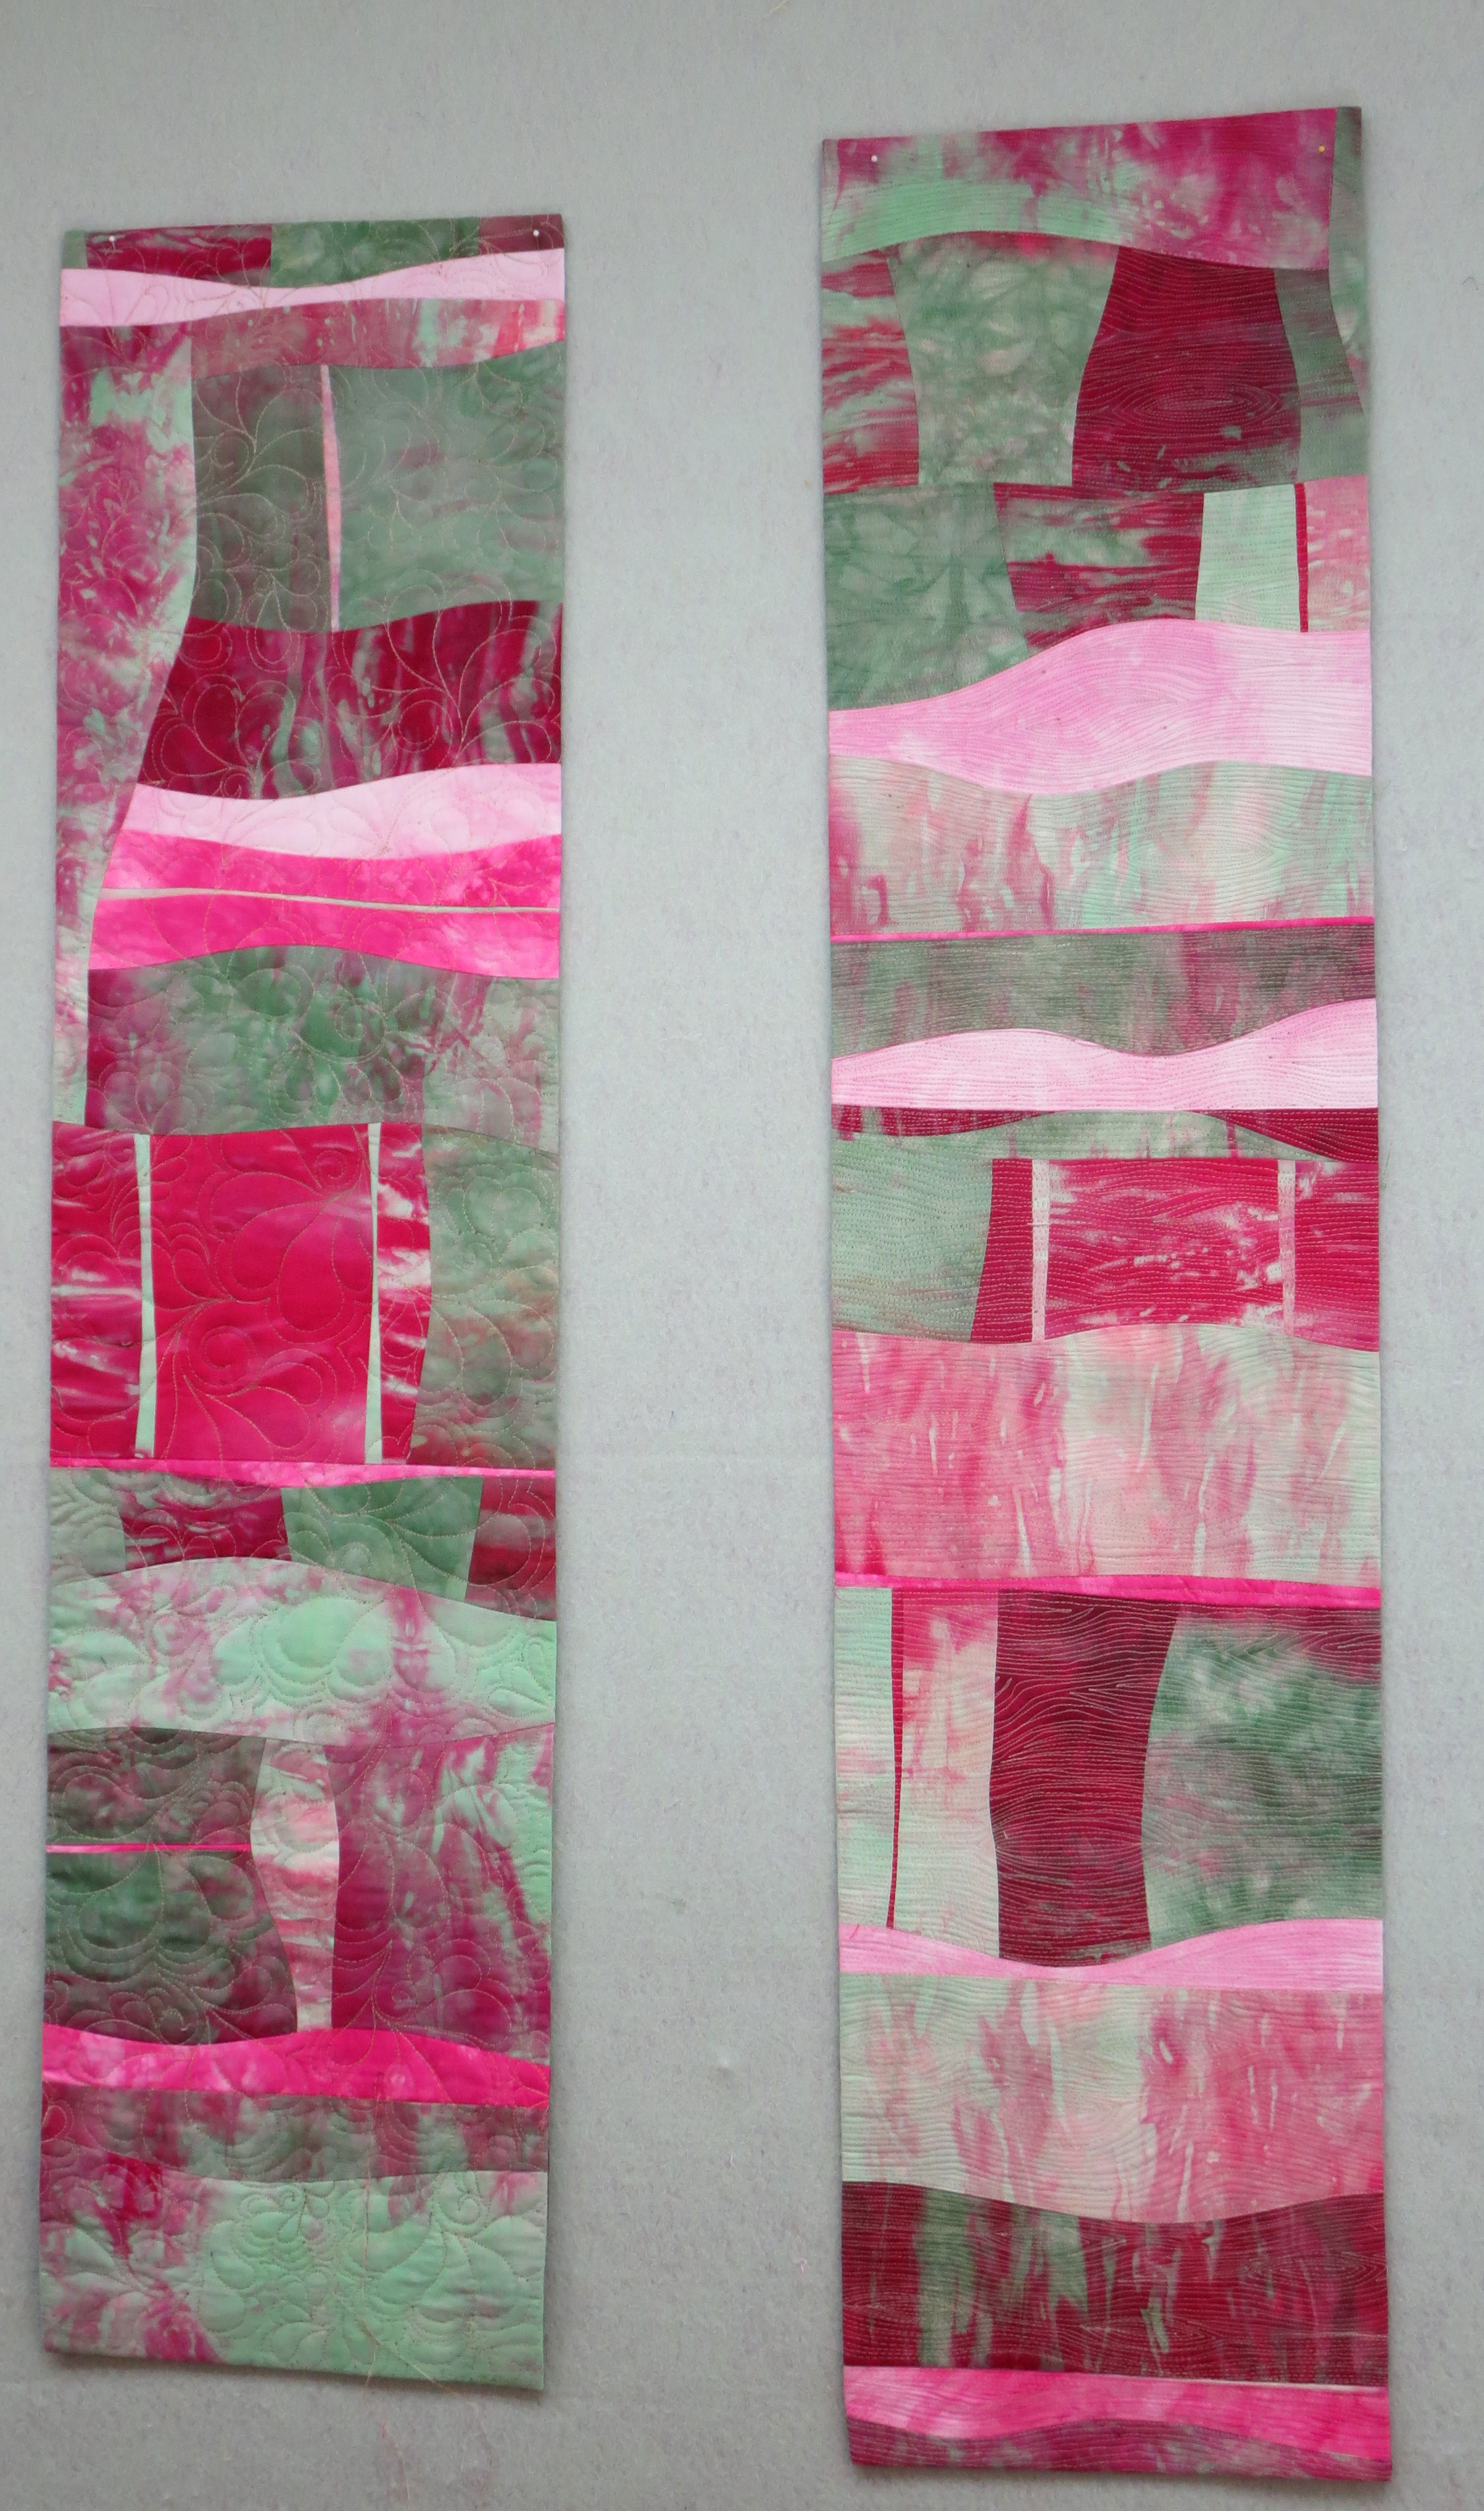
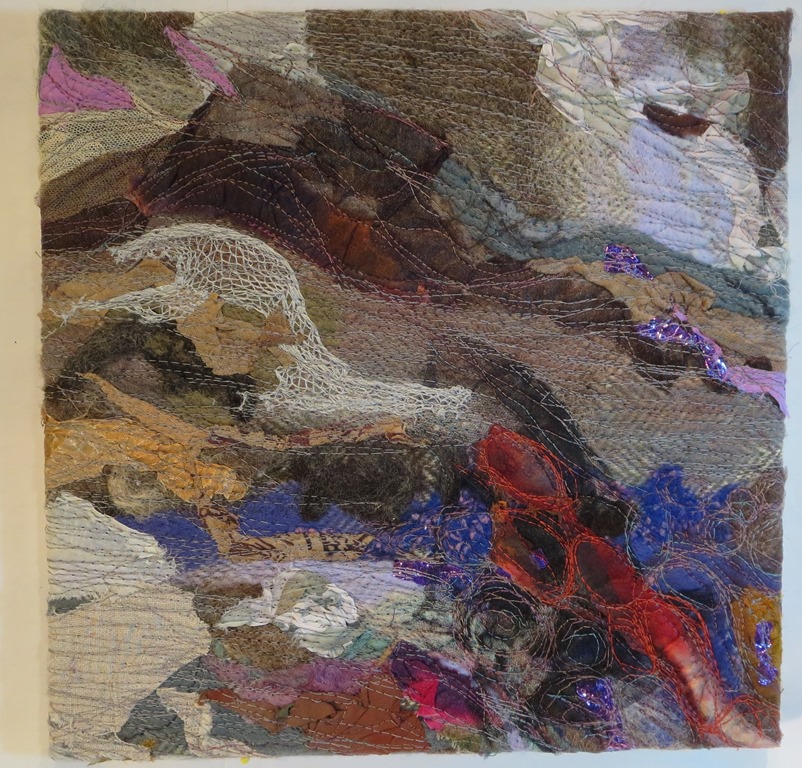
Progress Report:  Watakoo Wall This is another in my stretch works.  I am getting better at trimming back the corners enough that they lay flat now.  It seems I learn a new trick with every one of these projects.  IMG_5390 I put lots of fabric bits on the surface as I build up the effect I am after.  This one even has some “plastic twist”  on it to give it  a bit of a punch.IMG_5391 It has silk paper as a part of the texture and color as well.
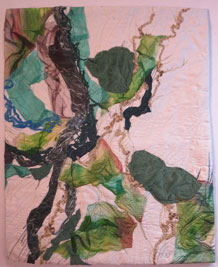
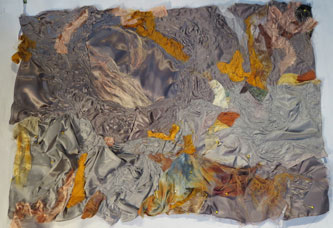
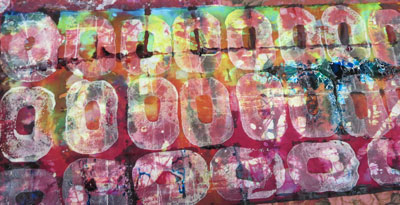
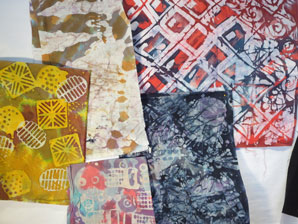
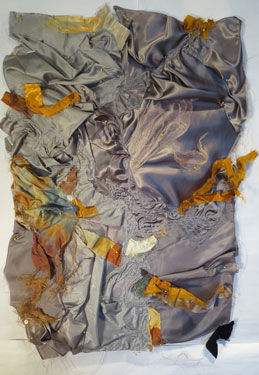
  Second Wall  IMG_5381.jpg 
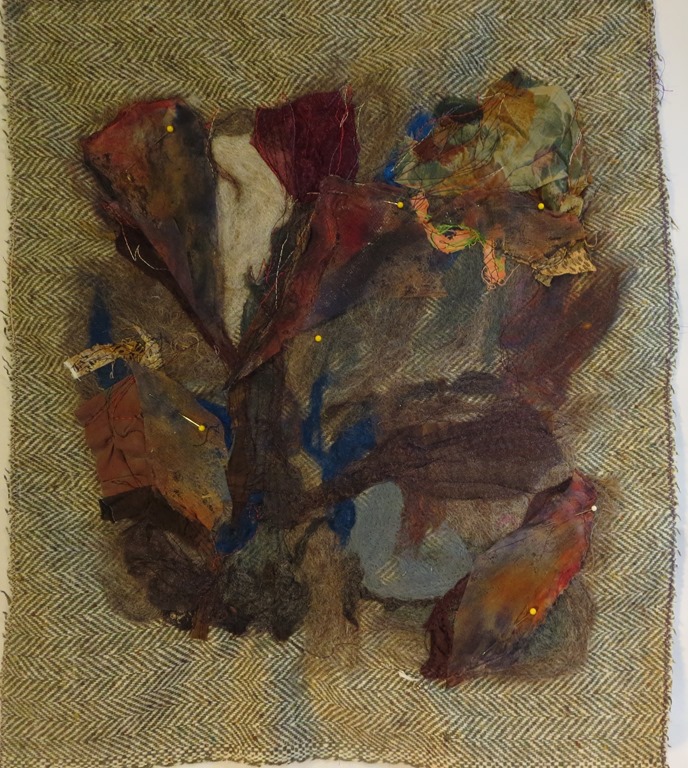
This work is a partner to Watakoo Wall.  Both are from the same  photo, but a very different part of the rock face.     This is a very early stage and I am sure it will grow and change as I work on the surface.  It seems to cry out for some light at the moment.

IMG_5392
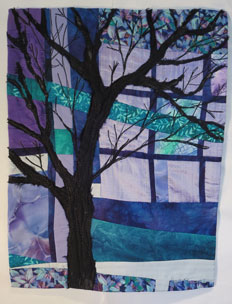
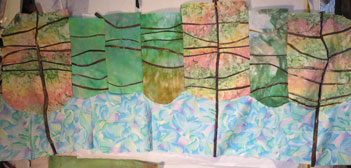
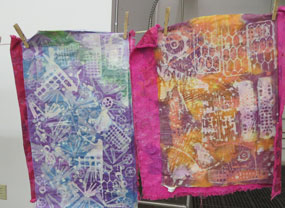
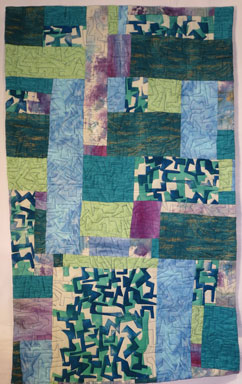
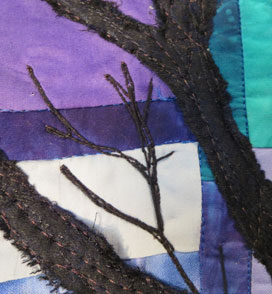
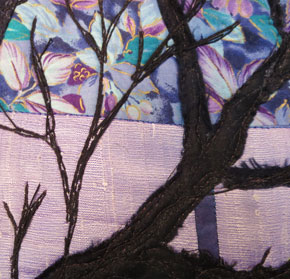
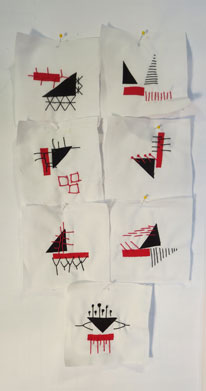
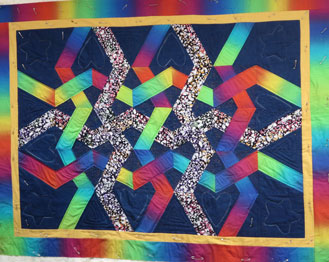
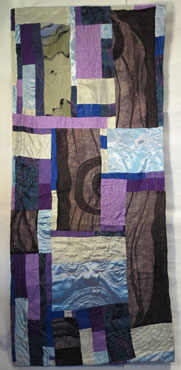
Out My Windows   I am to the fun stage of the work on this piece.   I am doing the free motion drawing part and I always enjoy that step.  I did all the  dark purple squares yesterday afternoon.Trees 
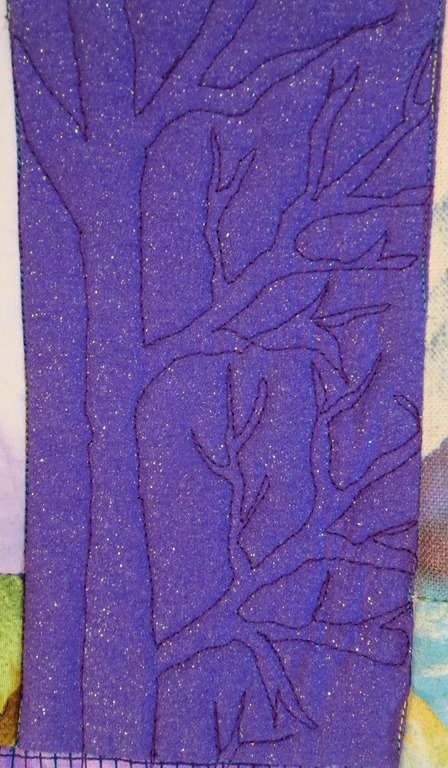
They are all night views across the roof tops showing the bare trees.

Spring Green
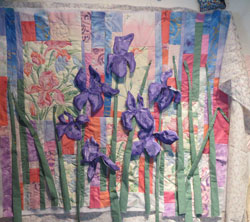
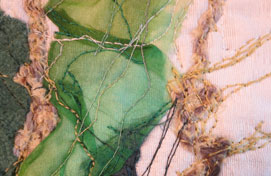
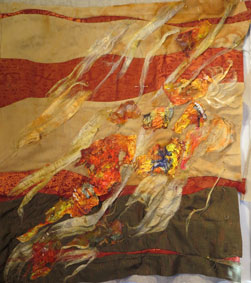
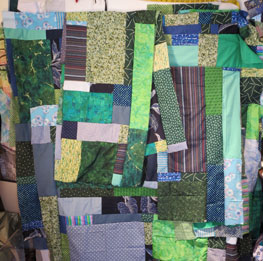
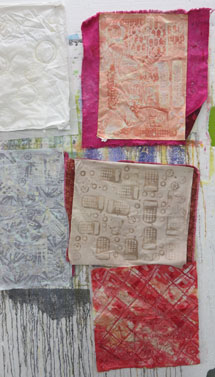
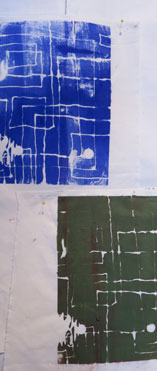
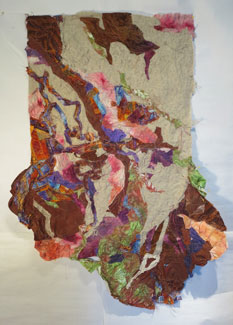
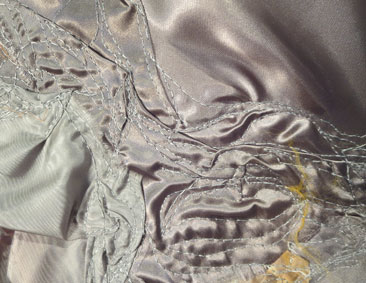
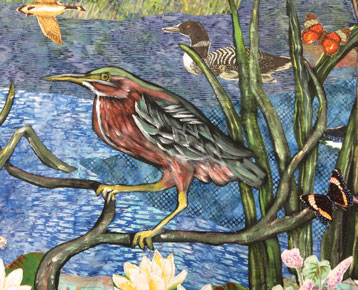
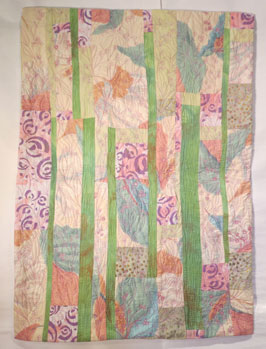
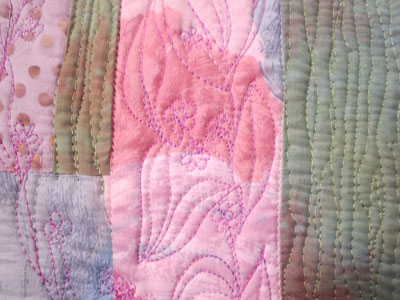
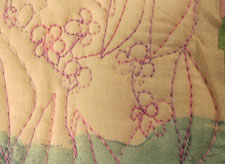
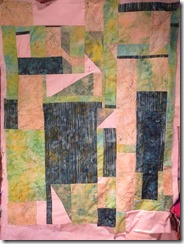
Green Grass of Spring  This work is another of the pieces that is based on a collage.  It grew and changed a lot as I enlarged it from the 5”X7” card I did the collage on.  I did try to keep the tones of light medium and  dark in the same areas however.  I have it layered together and it is ready for the quilting.   I am just looking and thinking about that step at the moment as I have no real clear idea of how I want to do that.

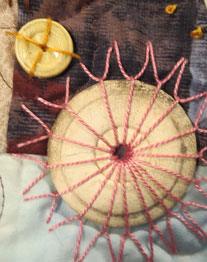
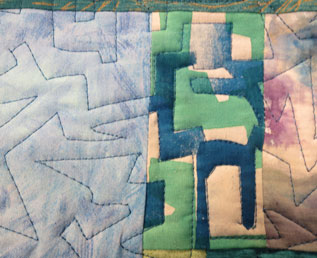
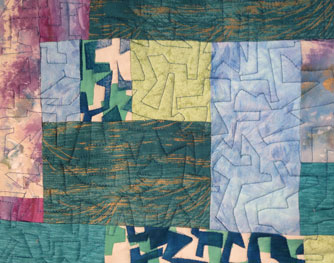
Memory Maps:Columbus Junction IMG_5383.jpg  
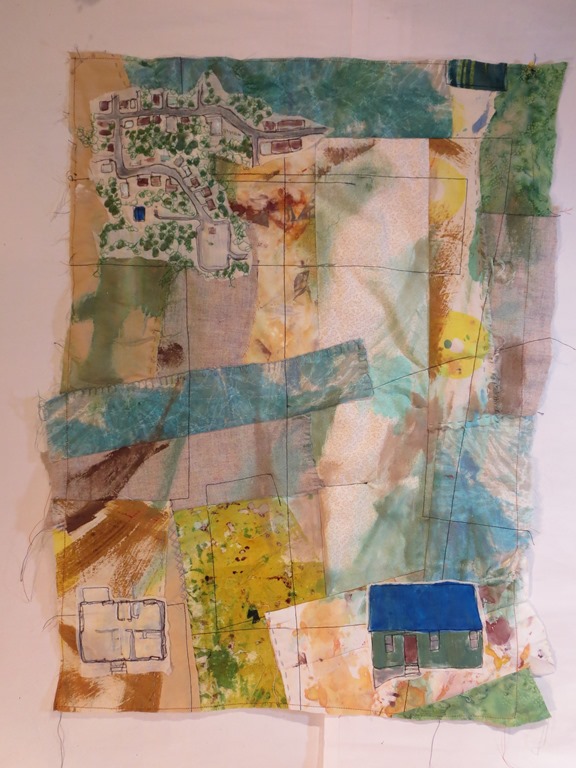
I started this work after talking with Susan before I went off to Florida.  She mentioned how much she liked one of the other Memory Map works and I realized that I had not done all the pieces I wanted to do in that series.  So after checking my list of possible subjects I selected Columbus Junction the home that  I lived in from Kindergarten to the end of  third grade.  IMG_5385.jpgThen I  did a list of possible  subjects and began some drawings.   I built my base and then started working on top.   This shot is of the map section with our house being the square with the blue roof.  This shot is of the upper right hand corner of the work.
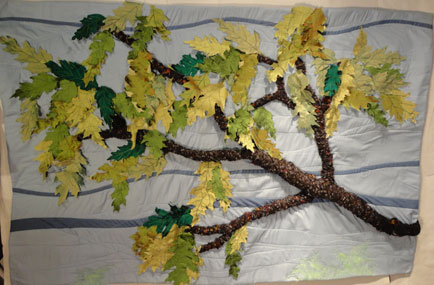
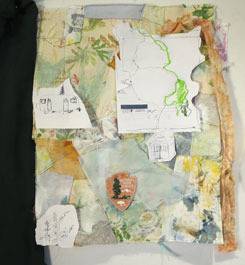
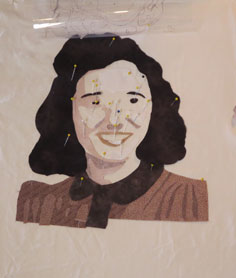
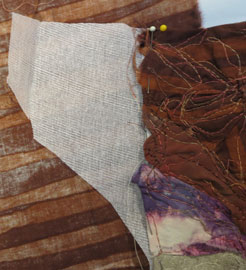
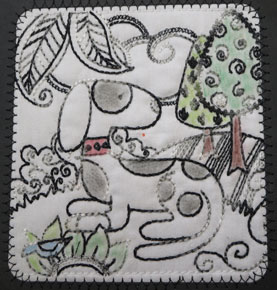
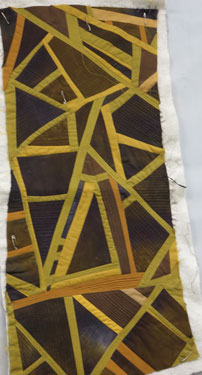
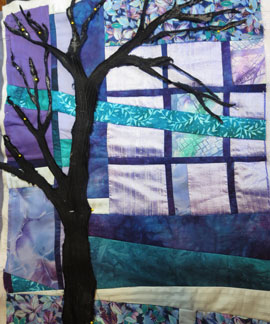


Ethel’s Trees IMG_5382  I inherited lots of Ethel’s unfinished work and this is one.  I am sure I will not not put my stamp on all of her pieces, but using it as a starting point is a good challenge for me.  This started out as only the brown tree painted on the white cloth.  I added the gray painted “wonder under” to build up the land and then found this second  Ethel cut tree yesterday.   I need to live with this work to know were to go from here.  The gray tree is not stitched down so it may move before I fuse it down.

IMG_5379.jpg
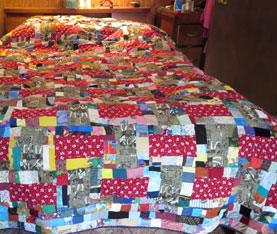
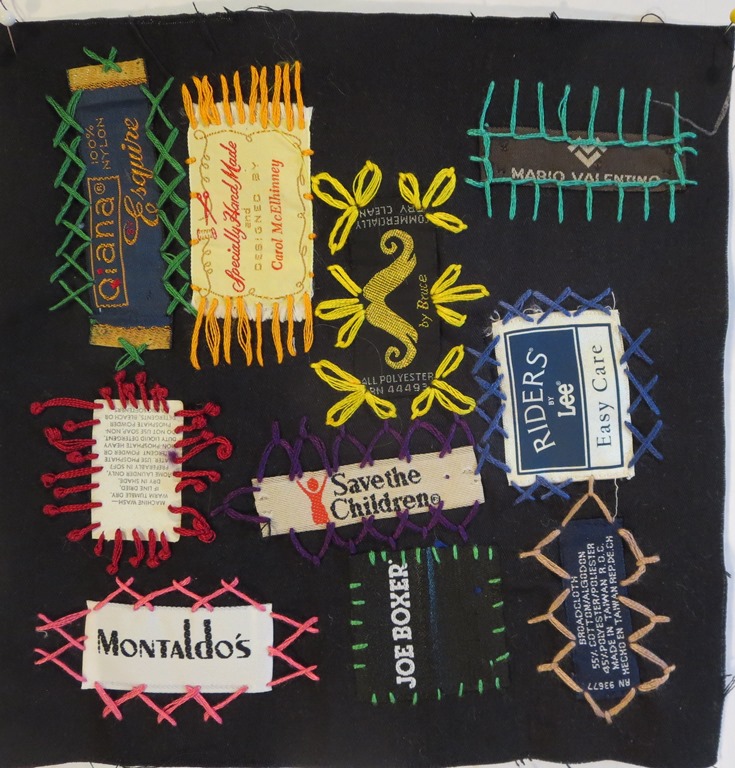
Label Block # 45   I worked on this as I waited for the connections flying back and forth.    I did not want to get behind while I was away and the activity does not require a lot of attention and its small so it travels well.    Susan gave me a new batch of labels so I have more to work with.

IMG_5357  I am going off to Chicago to the Quilt Festival and a visit with my Friend Sharron Evens  on Wed next week so there will be no posting for  April 7.  It will be another double shot when I get back.

Keep Creating,

Carol

Realisations

Out of the Dark closeup 1Hello,

I feel so Positive when I think about my work.  I did a solo trunk show yesterday for the North Syracuse Art Guild titled

Out the Window  16.5" X 21.5" $125.00
Out the Window
16.5″ X 21.5″
$125.00

” Your Art /My Art”.  In that lecture/ trunks show,  I compared my work to the many styles and types of work that the members use.  In doing so I really realized how much I draw from the other  art categories to get my ideas across.  I draw  directly on the fabric with pencils, crayons and markers.  I use my machine as a drawing tool too.  I  New-IrisPaint  with acrylic,water color and dye on the surface when I need to create a special effect.   I print on the surface using  silk screens, stamping and stencils to get images I want on the work.POMEGRANATEcl4  I use some weaving techniques like felting, silk papers and frapping.    I often use collage techniques to build up my surfaces with

Red Nebula  18" X 24"
Red Nebula
18″ X 24″

textures and transparencies and different already textured fabrics like velvet and satins.    I even embellish with old jewelry on occasion.   I am thankful that I get to use from all the different art areas to full fill my creative drive. I realized too that I have been using my experiences and interests to fuel my work for most of my life.   Doing a presentation like this is a good way to reflect and re evaluate oneself.

Oak Leaves 45" X 30" $ 350.00
Oak Leaves
45″ X 30″
$ 350.00


I now have the monster job of returning all the work back into the category packs that I store them in.     I feel so very thankful that I am working in so many ways to fulfill my creative ideas.


Acanthite: Foundations XXIV 18" X 23" $ 150.00
Acanthite: Foundations XXIV
18″ X 23″
$ 150.00

Progress Report: Acanthite :Foundation 24    This quilt is  went together very quickly for me.    This stone added some problems as some of the areas where a sold white.    I wanted to be sure to use velvet and now whale corduroy  on this work to show the wonderful textures they  add to the surface.  There were also lots of  cracks on the surface that added interest to this one.    -Acanthite-cl2


This shot also shows some of the chenille yarn( dark green) and some silk paper( blue- near the top).

Acanthite-cl3


 Broadcasting    I am enjoying doing the hand work on this piece.  Most of the saxaphone Broadcasting full pads are stitched down now and I am adding  beads and french knots to the surface.   I have added some reflective quilting to the surface too.    This work is going along well at the Broadcasting detailmoment with each actions leading to the next.


YellowstoneYellowstone    The ease that Broadcasting  is a great contrast with my slow process on this work.  I think I finally have the map portions the correct size and location.   I will do the paint step for that and then I will move forward.  I also realized that the piece is too pale.  Yellowstone has lots of forest and I want to project that feel too so I pulled out dark green organza ( pinned to the left) and adding that will help me go forward I hope.


The Blues   This work The Blues just needs time as the hand work is a slow thing.   I am playing with three of different types of stitches-  the chain stitch,  the blanket stitch and the  fly stitch.  I am varying the size of the stitches  to add interest.


CarmelizedCaramelized    This is a new work that is still in the shifting and  pinning stage.    I melted  the Tyvec that I painted in the fall colors last week, with the iron between sheets of parchment paper.  The melt results are so much fun because they  are uncontrollable.     Mixing them with silk paper makes me think of carmel  and melting butter.  That is were the title came from.     I am enjoying the play.

Keep Creating

Carol

Flowers April 17, 2014

Crockuses Hello,

Spring is teasing us here  in central New York.  It was so very nice and warm for three days and then we had a  cold day that ended in a snowstorm.   I am waiting for my spring flowers to appear.     The day that it snowed I took matters into my own hands and spent the day with Noel in her studio along with several others and we madeCherri's-flowers our own flowers.    (look back two weeks to see Noel and Victoria’s  first ones)   It always amazes me how we human beings fliter and  apply our own tastes to the same processes.     These red, pink and purple blossems are Cheri’s and the black, tan and Noel's-flowerswhite ones are Noel’s.       We  all took the same basic materials and techhniques  but treated them with our own unique “stamp”.    Noel showed us how to create several types of flowers and then turned us loose. Victoria    Victoria, like Noel had made flowers before,  she cheerfully tried a complex rose type flower where each petal is made indavigaly.     I can hardly wait to see how everyone finishes her  necklace.     I was so excited by the processes that I kept making more flowers for the next two evenings.   I am sure I will have two or three necklaces even if I stopped with what I have.  I did take the time to lay out one possible my-Flowerscombination.  It needs small additions like  beads and buttons.   I just keep thinking of more ways to play with these ideas.   And recalling things I did not try yet like yoyo flowers   that Cherri  did.    It sure  was a wonderful way to combat the snow falling outside that day!

Foundations-XVNew-DirProgress Report:  Foundations XV –New Direction   I am still struggling with this project.  I have added to the sides to pull away from the square format.  Then  this morning when I hung it on the wall- “What If” – hit Foundatons-XV#1and I turned it 45 degrees to the right and I liked it better- and even more so when I added to the those two sides as well. I try to always be open to what is happening while I am designing and wonderful things can happen.    I will push myself to do the remaining work on this one over the next few days.


New work1New Work   I am still playing with this newest member of the  Foundation series.     This one  does not seem to know what way is up yet either- but I am enjoying the process.    I do think I will   leaves this one in a basic square format even though I am trying to go beyond that idea.     It is holding it’s own without that  challenge. Grove

Grove    I am making progress here too.  All the trees now have their horizontal branches.  I have them all connected to one another but I feel that it is almost too much to take in visually.   The blue below the trees is too busy as well,  so I plan to remove it and try again.   I just don’t know what will work until I try it sometimes. Mia's-back

 Mia’s Quilt    These green and blue pieces are my prepations for the back of Mia’s Tee shirt quilt.  I am building the units and when they are big enough I will assemble them into the big back.  It is a fun process from my point of view.

Daily's                      Daily’s    I am finding time to do my Daily’s too.  They are starting to really pile up.

Think Spring and Keep Creating

Carol

Spring Warmth April 10, 2014

Carol-with-my-work Hello,

Spring is really here!  I went for my walk today with out a coat.  I even ate my lunch on the patio today.   It was around seventy and the sun was shinning.  It made me feel glorious.

I had a busy week end as I took at three day workshop with Carol Soderlund( www.carolsoderlund.com) called Waxing Eloquent.  It was about how to use soy wax and build up layers of dye on fabric to create great depth.  We had a grand time and the three days flew by.  In this first shot the teacher is holding my experimental piece.  I had tried this before several years ago and I am more excited about it  on this second attempt. Print-stuff  I sewed the prepared fabric with to two layers of batting and  normal thread on the top and a wash away( water soluble ) thread in the bobbin.  Then I painted the soy wax on the “mountains”  of the project and painted the dye in the valley’s.  ( the work is at that stage Lindain this first photo.)   We all brought along a big supply of tools to apply the soy wax to the fabric.  I enjoyed the old calulator plastic and the empty spool a lot.    After the wax was dry we applied the dye to the fabric .  This shot is of Linda who was setting across the table from me.    We  worked all afternoonwall at adding wax and color to the pieces we had started.  This shot is of my pin wall in the middle of the afternoon.    By the end of that first day the floor of the room BA10the-floorlooked like a magic carpet shop where the pieces “batched” all night long.  We then added more soy wax to the surface.   Things were really getting lucious at this point.   This piece Peg'sworkis by a new friend, Peg.   The big circles in the wax were created with a sponge that had a hole cut in the middle.      To fully use the dye, Carol had us layer the fabric in two and three stacks. drying    I folded over several of my pieces and so I had softer second pieces and there was much less dye to mop up when the pieces were picked up off the plastic sheets.

There is a little problem with the water soluable thread- the dye also causes the thread to disolve.  So before I put on the second layer of wax I had to cover the valley area of the surface to keep the white.

There are several  ways to remove the soy wax from the fabrics.  One is to iron the fabric between two pieces of BA10-the-potnewspaper and this should always be done first.    This process was done with my work and then it was placed in a boiling kettle of water.  All the milky color is the soy wax in the pot rising to the top.     The water is then carefully poured out of the pot and the fabric is ready for a hot was in the machine.  It is OK to pore the water soy mixture down the drain because the soy wax is a natural product and will bio degrade.   I was surprised by the color change.    This photo shows some fabric( at the top that did not  have-washout-1 the color washed out and the thread is still attached) and the bottom is the final color of the washed and ironed fabric.    The green color came from the blue dye added over the yellow dye of the day before.   It will still be a fun piece to do hand stitching work on top of.

Washout-form-class This shot shows several of the fabrics that I washed out at home on Monday.

Then on Wed I went off to visit my friend Ethel and we did more soy wax work.   She has a wonderful electric Jaunting tool and I used it on just about all the pieces I worked on yesterday.    I wrote several bits of poetry as well as drew with the tool.   Great fun!Ethel's-work They are still batching and will be on the blog next week.  Ethel is working on a wonderful piece on her pin wall.   It is about  50″ wide and 60″ long at this point.    I love the intense colors she is playing with here.


-Patti's-workThen the FAB group meant at my house this morning.  Patti is doing this wonderful portrait of her mom.     She is still in the building stage without any of the pieces stitched down, but I am impressed.     She told us she is using the front and back of some of her fabric to get the tones and shades  to match her photo.

Then we did a little work with the silk screen so the gals could get the Nancy's-screen-workhang of using acrylic that was thinned with GAC 900. (  a Golden product especially made for use with fabric.)   It was also a chance to play with a deconstruced screen as I had used  Elmer’ s school jell on the screen to create a pattern.   These are Nancy’s prints.   I will continue to print with the screen until the image is mostly gone and I can show the others the effect at our next meeting.


Electric  19.5 " X 31.5" $215.00
Electric
19.5 ” X 31.5″
$215.00


Progress Report:  Electric   I finished this quilt last evening.  All the stopping, changing direction and starting sewing quilting patters made this project take a lot longer to quilt then I expected.   I used the images I had created with the silkscreen print as my inspiration.  I started quilting around them first to get a feel for the shapes.   After I had done this it was a bit easier to create similar shapes on my own in the other areas of the quilt.   The fact that my machine as a needle downElectric-cl1 position for the stop helped with this process.    But there still is a lot of quilt were the printed images is not avaiable for a guide.

Electric-cl3


 Out the Window    This  is my solution to

Out the Window  16.5" X 21.5" $125.00
Out the Window
16.5″ X 21.5″
$125.00

the quilt that I cut in half two weeks ago.   Last week I had decided to add the tree and I tried it in several locations before I decided on this final resting place.   After I had stitched the wool tree to the quilt I loaded my bobbin with black embrodery thread, and drew in smaller branches from the back.      The whole picture  makes me think of looking out my friends window in Brookline where the next building was so close there was hardly any space between the two.  But a out the window -cl2young tree had grown up there anyway.     The nine patch from the origional quilt looks like a near by-out the wnidow---cl1 window too, so it adds to that feel.


Foundations-XVfullFoundations XV- New Directions   I have been struggeling with this work for a while.  When I took it to the Diva meeting last week  Alice  asked ” Why are you keeping these Foundations pieces square?”     After considering that idea I have decided to try to alter the shape.   Hense the new name on the end.     Here is the process I am now trying to see if I can grow from an existing rectangle format.

First I add some additional Buckram Foundationscl2in the shape I think I want to add.   (I put the brown fabric behind so to allow the Buckram to show up.)    Then I build up the fabrics on top being sure some crosses over the original surface  and i sew it down as I Foundations-XV-cl1normally do.     I like the fact that this method allows me to change my mind a lot as I work.   I already know I want to change the left hand side and the top edge.  I will know better what the piece needs as I look at the progress.

 Grove     I did not Grovedo a lot of work on this project this week.  There has been too many other things demanding my time.  But one more unit was completed.    It is also at the back of the stack of work pinned to the pin wall so I run out of time before I unearth it many a day.    I only have one more tree to create here before I need to move onto the next step

 New WorkNew-work BA10new-work-cl1


I have pinned the fabric to the buckram for this new work.  I have the detail to show that when I begin the stitching down of the piece I start near the center and do not totally finish even that area until later.  That allows the work to change as I progress through the work.  I had cut the buckram before I decided to try the new shape, so I will at least start out with is as it is and let the piece grow with the work.

Daily's Daily’s    I seem to be doing more stitch work with the Daily’s as time goes along.   It is still enjoyable  and something that I look forward to every evening.

Keep Creating

Carol

Spring! April 3, 2014

Crockuses Hello-

Spring is finally showing it’s self her in central New York.     Three days in a row of  blue sky and sun shine!     Tue and I spotted this garden full of spring flowers and it made me smile  every timePatti's-scarf I thought of it all day long.   Hurry for the new season!    This week has been so very full of stimulation I, hardly know were to start.    At the FAB meeting  Patti showed us two scarves she had knitted to send off to be given to runners at the end of the Boston Marathon this year.   They both were so very soft that I am sure they will be welcome gifts.   Victoria had been to a little workshop that Noel is giving.  They are playing off the ideas of the BA3Victori's-necklacenecklaces that  Mackenzie- Childs  sells.    The catalogue  in the background was the inspiration, and Victoria really put her own spin on it I think.  The when I went to the Diva meeting last evening I found that Noel was the gal who is leading this play.  She is giving up her rented studio and cleaning as well as  trying to create a new workshop for herself.  Everyone in both groups loves the idea, myself included  so she has agreed to open her spaceNoel's-necklace and try  a variation  with several more of us.    I am looking forward to that play day.

The QuEG’s meeting was in morning on Tuesday and there was lots of inspiration there too.  We got to meet in Sue Ellen’s studio, always an inspiration SueEllen's-workplace all by its self.      She ” wowed” us with  six new works!  Like all of us she has lots of fabric and these two pieces were created from her first dyeing experience over 15 years ago.   She says she did them to try out different quilting patters on similar tops.   I think she proved her point.


Sally's Birds   Then there is the wonderful on going work by Sally.   She does such amazing  stuff with her embrodery machine.  The birds just blew me away all by them selves.   Then all the unique nine patch blocks on top were just wonderful too.    In addition to that  she had a pack of about a dozen 6″ cards that used smaller images.Sally's-Cards  Each  card was different and where she used  varigated gray black and white  thread for this card, many of the cards used different threads for different sections.  She pushed the idea further  water color pencils  to add more color to these small wonders.  She gets sure gets miles of usage out of her machine.

Liz


Liz is playing with retro fabrics and antique  blocks that are six inches on a side.   The fabrics and patters sure play together well and are a delight to look at.  The small size means it is not  overwhelming- but it will sure take a lot of blocks to finish the piece.


Barb's-project


Barb is working on this colorful work for her grandson.  The dark blue is denim- just the wright thing for a  young  boy.   She is just starting to quilt in the areas around the zig-zag lines- the white is chalk that will disappear when that job is done.

Anne's-workThen there was the Diva meeting on Tuesday evening to add further delight to the eye.

Anne is pushing forward trying unique quilting patters with the works she showed last month.  I really like how the horizotal  varigated thread  seems  to disappear in places on this work.    Class projects are great places to play with new ideas and explore.

Alice had yet another new wallAlice'swork book to share with us.  This one is called We Love the Water.   The bid bird is one she hand painted on black fabric.  The loon and flying Canada Goose are both from commercial  fabrics.  I find the way she mixes thous two ideas amazing.  Most of the time putting these two things together just does not quite meet the mark- but she does it flawlessly. Noel's-project1

Noel is working with thin strips now.   All the brown units that are cut on the biases sure add to the challenge here.      I like the limited values that she uses here.

She also had a second larger top  in this same vain with kits in some of the diamond shapes.


Cheri's-Fiddle-HeadsCheri finished the wonderful work she shared with two mouths ago.   She has added a lot of hand work to her canvas painted quilt Fiddle Heads.  I really like this work! Scarp-Happy-3

The  last of the three Scarp Happy quilts was picked up on Friday.  It went to the local Public Television Station for their  spring auction.    I also gave them a small wall quilt.  I have done this for years as I so believe in public broadcasting.

 Progress Report: Green Grow the Grasses This pale spring quilt is now complete.

Green Grow the Grasses 23" X 32"  $260.00
Green Grow the Grasses
23″ X 32″
$260.00

It too makes me smile as I recall the  joy of creating the stamped areas as well as all the free motion flower and leaf forms I put on the surface of this one.

grass-cl3 -


I really feel the sewing machine has become a drawing tool for me.  That has only come with years of doing the process, but I want to encourageGrass-close up 1 - everyone to keep doing it until it is a natural act for you too.


Smoke 23" X 52.5" $395.00
Smoke 23″ X 52.5″
$395.00

 Smoke

This work was also completed this week.    More than once I thought that I was done, and I would hang the work on the pin wall at the end of the day.  Then Smoke-close up 1when I would look at it with fresh eyes in the morning I would see easly what  else was needed- more hand work for the most part.     Smoke-close up 2  I had never quilted through silk before I tried this project and learned a lot doing so.   I really like how the needle glides through the surface of the project.

Smoke Close up  4  I cut up an  silk scarf that I had created years ago and was not what I would call a success.  All the dark and gray areas are a part of that project.   I like the result here.


Grove

Grove   I am still working on the insertion process.   I only have one more tree to add the branches to and then I will start the stumps and setting.     I may  shuffle  the parts I have created too.  But I make those visual decisions by looking at the subject.

  altered--workNew Work    This is the top half of the work I was considering cutting apart last week.  It was not working as it was so I cut it.  The black tree is just pinned in place.   I did try several other placements before I settled on this one.  Again the visual decisions was made visually.    I have quilted in the ditch the background sections of this work and plan to free motion in the tree with additional limbs as needed. Daily's

Daily‘s         I am working away on the  these little fellows.  I discovered one of the  black circle and  units from last month in the bottom of the tin where I keep the prepared squares.  So I finished it too.

Keep Creating

Carol


April18, 2013 Natural Changes

Dear Friends,

It really feels like spring today.  This was the third day this week when I ate my lunch out on the patio  and enjoyed the out of doors.  One of my favorite sketchbook assignments that I did with my eight graders was what I called ” Noting Natural Changes”  and I started it this week with the drawing on the left.  I when out into the sun shine and selected a branch and tried to draw it life sized in my sketch book this morning.  I will follow up next week and draw the same branch- again life sized  and in so doing note the changes a week makes for growth at this time of year.   My students always were suprised by the change a week can make at this time of year and I feel like paying attention to that myself.      This week has been as busy as they all seem to be.  I went off to visit with my friend Ethel again yesterday and we had great fun making silk paper.  Silk paper is created from silk threads that have not been spun.  They come in great long hanks that one gently pulls apart and lays down on nylon netting.  Three  layers of thread in alternating directions  is the usual lay out. then a second piece of nylon netting is placed on top.  The whole thing is gently soaked with water and then a mixture of fabric medium and water is applied to first one side and then the other side  of the sandwich.   After the sandwich is all dry  the nylon netting is carefully pealed from both sides and ironed.  The top image shows the pre-dyed silk drying on the line and it is still encased in the nylon netting.  Pictured on the left are two others we did in the morning with the netting removed.  The blue and purple piece is made of what are called silk hankies- a group of squared off silk layers that can be pulled apart as apposed to a hank of silk.   We dyed both of these two pieces before we added the water and fabric medium to them.   We had such a good time that we are going to play at this another day next mouth.  I already have an idea of things I want to try next time.

Progress Report:  Spot On

Spot On
22″ X 34.5″


This quilt is done now.  It is one more of my piece that grew out of  my ” Use the old materials” push.  The marbleized fabric in the upper left and the center bottom are both old materials.   The light blue with the natural shapes in purple and white near the center left are from an experiment that I tried last fall.  I was attempting to do shobori with paint instead of dye.  This piece is the most successful section.    The tyvek is painted on both sides and I did  that last winter when I first started going to the Turquoise Studio.   The pink color  is painted on the back side of the tyvek.   I have used tyvek several times before and not been to  happy with the results.  But this time I quilted it before I applied the heat.  I also waited until I could go out of doors and I wore my respirator while I did this process.   I like how the heat gun distressed the tyvek and  how much the stitching controlled the distorting too.

Golden Rain.    This quilt is all quilted now and ready for the embellishment.  That is the part that will add the rain running down the surface.    I wrapped gold pipe cleaners with two different yards.

They will become the rain when I hand stitch them to the surface.   I still need to tack the facings on both the left and right sides as well.  The copper ribbon really shows up the quilting patterns and adds to the flow motion down the quilt that I was looking for.

Slicing Through:   This quilt is moving along although very slowly.  After Sue Ellen’s tutorial on how to make those little cuts and sew them in I feel I am successful with that part of the process.   Now to work out the design part.    This work has gotten away from me as far as size is concerned- the rule says 18″ X 24″- and this is bigger than that already….. I am not sure how to go forward, so it is fermenting under white paper and two other starts, on the pin wall.

About to Bud:   This piece is basted and ready for quilting.   It too has some marbleized fabric in it, ( Use the Old Materials)although this is a newer experiment then  Spot On.   It also has some of my foam stamp work in the dark turquoise fabric.    The off rounded long forms are from a commercial stamp and come from my play day where I was trying to use every stencil I had in my note book that I had never tried before.     After letting this work hang on the wall over night I decided it needed  to have a machine drawn/quilted bare tree added on top of it.   I will do some sketches before I stat that part of the project.

Silver Slivers:  I have had these silk triangles for several years. ( More Use the Old Material )  On Monday when it was so rainy and gray I pulled them out and added the gray to them at the end of the day.   Now there irregular shapes means that I can not keep the full silk shapes and make traditional connections.  So the following morning I though I might insert silver slivers between the units and in so doing  sort of square them up.      If and how that works remains to be seen,but I do like a challenge and this is a good one.    It may also help when it comes to doing Dawn’s fabric form the DMC   challenge because the colors are the same.

New Work:     This one remains to be named and completed. True to my solution when I am frustrated I start something new-  all this wonderful hand dyed/ printing fabric  in a discarded pile on the cutting table …. put it together.    Only time will tell if it becomes anything.  I go off on these little seaming sprints some times- knowing that it can always  become a part of a Scarp Happy if nothing else….   But is spring and anything is possible.

Keep Creating

Carol


January 24, 2013 The show- Goddesses:Text to Textiles

Hello-

The show is all hung.  I will admit that I am very pleased with how the thing looks.  As the creator of this work, I had never viewed  as a group.  I do not have a big enough space to even spread it all out in one room.  I was quite surprised by the fact that Lauren insisted we hang them all, and by how well they all worked together.  This shot at the top is of three of the quilts and three of Lauren’s baskets below.   It was a fun experience doing the work with her too as she was so very excited by my pieces.  She had asked me to do the show after seeing only one piece of my work.  This third shot with the pink wall behind it is in the bar room of the  resterant. She also has pointed me in several other directions for places to contact about future shows too.  It was a very up lifting day for me.   These photos do not show all the work I will add more next week.   I now look forward to the opening on Sunday.

Progress Report:Spiraling Out

Spiraling Out
43 ” X 55″

   This quilt is finished now.  I added a lot more quilting to the surface this week and I like how that pulls it together.   This work was  created do primary because of the silk screen material that I had purchased from randy Kennan this summer.    I really liked the action in the fabric  and tried to repeat some of the patterns in the quilting patterns I added.   The close up shows the decomposing screen and some of the needle work.     It was a fun project.


Twilight Trees    I have really enjoyed doing these twisted tree forms.  I am enjoying  the movement using curves has added to my quilt work.

Twilight Trees
21″ X 22″

I liked the new skill I am building and feel now that I am ready to tackle the DMC Challenge that they were meant to be a prelude for.  I sure hope that my vision can be full filled- but that remains to be seen.     Tree Men     I have been playing with the felt work tree too.  This shot is a partial of  two of the faces.   Thus  far I have done all the work by hand and so the green tool to the lift side is in the photo.   I have rediscovered that the black wool felted skirt that is the dark background unit is difficult to felt to.  I am glad that I need to soften the intensity of the dark so I am going to really build up the other grays and browns on top of it.  That will help unify the work too I hope.

Pele    I spent time this week getting this top to be flat.   I cut and stitched away several wedges of fabric for this purpose.  There is still a lot for me to learn about the curved cutting process like do not make the action too sharp.   Anyway it is flat now.  This shot shows the arms of the fire goddess drawn in thread  on organza.  I will trim away the the outside portion before I attach it to the top.   I am still considering if I want to add some more color to the arms before I do that step too.   I  do want the arms to appear as a spirit like presence on the surface.

Play Day Printing I spent  Friday last week printing with my Styrofoam stamps.   The Styrofoam is the thick sponge like  type  that comes packed around big items like printers or computer screens.  One draws into them with a welding iron in a well ventilated location.  I cut mine last summer out doors  The teacher who taught me  how to do use this technique was teaching a second class on the same day and I was tempted to take it a second time, but decided instead to just play by my self with what I remembered.   I think I got more accomplished too because I did not have to pack up my materials and  spend travel time to get to the workshop. This top one shows two fabrics printed with fabric paint on  commercial textured fabrics.  This shot shows more turquoise fabric with a Styrofoam  leaf stamp print and on the gray a stamp made from some plastic floor matting.  The white is a mixture and I like this piece of fabric the most.    This last piece is the white again with the last Styrofoam stamp  of the figures dancing.    I cut one set on one side of the foam an the other set on the back.    I had a good time and although I have no plan for there use at the moment, I am confident they will all go into work in the future.

I hope winter is treating everyone well.

Keep Creating

Carol

January 17, 2013 Preparing Solo Show

Hello,

I am all excited about the fast approach of my one woman show.   I addressed and sent post cards on Monday.    Hanging day is the 20th and I am busy doing all the little things that go along with that job.  I did my labels this morning.   A quick check of the location yesterday revealed the fact that I need to make new hanging rods as the ones I have are too large to fit with the gallery hanging system used at Sparky Town.  I got the lumber and I plan to cut  and drill the wholes in it tomorrow.   All the work is done now that I have finished the Diana piece.  I will have 15 pieces ready to display, but I do not think they will all fit.   But I always feel more comfortable bringing things home than not having enough.    This also gives the curator some choices.

Diana
16.5″ X 29.5″

Progress Report:  Diana    I am pleased with how this quilt finally came together.   I got to use some  fabric I had done a bit of dye painting.  I then used acrylic gold paint on a spiral stencil  on top.  This fabric  was created about three years ago and it was just the thing for this piece I think.   The owls were fun to free motion quilt around.  I like this stamp and I am sure I will use it again on more fabric in the future.  The  Drawing of the head on the other hand is a one time thing.   It was drawn with a sharpie pen and colored pencils were used as well.   The two other attempts of this face are already cut up and disposed of so no one will ever be tempted to “save ” them.

Spiraling Out
I am still working on the hand step of the facing of this work.  it will be finished this week.  I am sure that after the show is hung I will feel more at ease to do  other things.I did spend a couple of hours adding more quilting to this work this week as well.  

Rusty Text    I have started quilting on this work- all in the ditch  so far.     I am thinking that I will use the green liner units as my starting place for the real quilting action .  That will provide a lot of directional movement I hope.

Twilight Trees      I have really enjoyed working on this top this week.   I am feeling much more confident about the inserting of slender strips of fabric after this  project.    It is  pin basted  and  some quilting is already done to the edges of  the trunks.   I am not sure what to do next so I am just looking at it every morning when I first come into the studio.   It needs to set in the subconscious until it is ready for quilting.

Peli    I know that the goddess quilts are all done – but the ideas are still running around in my head.  Cali is the Hawaiian goddess of fire and this top has that feel for me.  I am not done with the curve cutting thing yet either I guess.  I have learned a lot on this one too- like do not make too sharp of a curve.  It is still not at all flat and I will need to do some additional cuts to remove the bubbles- but that is part of the learning I think.

My wish is for everyone to be as happy and busy as I am in winter. Keep creating

Carol

January 10, 2013 Winter Work

Hello,

Angela with printing stuff

I always love this time of year after all the wonderful joys of the holidays have become good memories and things seem to slow down and commitments diminish and I can really get some work done.  That does not mean I am not busy- it just changes and I find I am more focused on what I want to accomplish.  I started on that path with a play day with  four friends.

Liz

We  ( the QuEG’s – Quilt Exploration Group) got together in Angela’s  new big studio and played.  It was so much fun that we decided to repeat the play part for the next few mouths doing different projects each time.   We will all be “teaching” a technique or leading in the exploration of a new material for the up coming days.

Corinne, Liz and Angela showing a sample for the future
Corinne and Sally

I enjoyed the silk screen printing with dye that we did in the morning and got some nice images.  They are true to the color expected because Angela mixed up the dye that day.   I do not have any idea where I will use these fabrics.  I do know that I will eventually use them.

After lunch we made cards for a fellow creative friend who had fallen over the holidays and could not join the party.

The whole day was great fun and really got me going for this week.

Progress Report: Spiraling Out   I am still quilting  on this project.  I have not done anything this large in a while and I had forgotten how very long the process can take.   This shot is of the quilt under the needle at the top.  It is fun to do the free motion  work again.
 Paper Quilt   I am enjoying working on this project.   I edged the openings  and edges with a  zig -zag stitch and knobby yarns.  I keep trying different solutions to filling the wholes and different arrangements for the four units.   This sort of play takes me much longer than I expect.

Wrapped wire insert
Hand made lace insert

I did eliminate on of  my attempts for filler so I feel like I am making some progress.

Lines in Fabric     This is an exploration project.  I talked last week about doing the DMC Quilt challenge.  This shots shows I am still working – but the progress is slow.  Marty  told me  that  I needed to press each seam toward the outside ,cut the “line” fabric and  then sew the next piece on.  That way I can get narrower lines – and that is my goal. I have really not had an opportunity to do that yet.  I will get to it I am sure.

   Diana  I am pleased with how this top came together  yesterday afternoon.  I  added the gold embellishment to the fabric in a class two summers ago.   It is the just the right touch of elegance for this work.     This will be my last quilt for the Goddess Show.  I plan to start the quilting tomorrow.   I have got to get busy with the labels for that show next.

  Rusty Text    This is really a working title for this top.  I needed to do a little creative work that did not include any pressure.    It is also another  bit of play with the Text stuff for  a possible entry into that competition.   I printed letters on inner facing and mixed that texture with silk.  The silk was also printed on in the green stripes.   When I showed it to Marty on Tue she was quit supportive about the work.  I am still not sure about the direction  I want to go with the quilting of this work, but there is not real  pressure here as I have a mouth before it is due.

Enjoy the wonders of winter.

Keep Crating

Carol


Thur Jan 4 New Year

Hello Everyone,

I hope you  have all had long enough to relax a bit for the hassles of the holidays.  I spent today at the Schweinfurth Art Center viewing the Quilts=Art=Quilts show with a friend.   I always find it so very inspirational.  Fibers can be used in so many ways to express so many ideas!    I got excited all over again about embellishing and piecing and color!   It is good to be stimulated in the beginning of winter.  For us that means lots of snow and shoveling as well as ice cycles.  I took this shot out the bathroom window of the light on the deck last eve.  I like how the light reflects off the ice.  Winter brings a new appreciation for limited color to me.   It is a good thing for me to consider as I have a challenge to work on that uses a very limited pallet using  light, med and dark tones of three colors.  It is the DMC challenge for this year.   That means we all selected a color and purchased the three tons of each of the colors and then gave the other participants  our selections.  The size this year for the three works is 18″X 24″ and one color from the other two pallets , needs to be used in each work.  There are no other rules….sounds like lots of room for variation to me.    I selected purple and my fabric are at the top.  Marty selected blue and her choices are to the left middle.  Dawn chose  black and her fabrics are on the bottom of the right.    I am a bit surprised at how well the three go together too.  I think my work with Leslie’s Riley’ s ” Artist Success Class” – Composition and You  will prove to be helpful here.      I have also decided to impose a little challenge of my own on the first quilt at least.  I want to further my ability to insert slender bits of fabric into my work and this first quilt will use that method.     So yesterday I started practicing with some blue fabric and this is the result.  I think I will play just a bit more before I start on the challenge fabric as we purchased it in Washington state last Sept and I can not run out and get more if it is a total flop.

Jots and Joints
22″ X 34″

Progress Report: Jots and Joints
This quilt is now completed and it is the first one for 2013.    I really was working to show the free form cutting in this work and I feel I was successful in that respect the curving edges work well here too.   I am also having fun mixing my hand painted fabrics with stock fabrics. This close up shows the raw silk in the left hand corner and some of the silk screen image.  I sketched them after looking at a circuit board from a calculator.  The drawing was done from memory several day later, so it is really my own invention.

In looking at the photo here I am concerned with the high number of wrinkles present.  Perhaps more quilting is in order.  I will need to do a bit of study over the next few days.


Spiraling Out   This quilt top is about half quilted.  It grew a lot as I worked on it.  The whole project started with some discharged fabric that I purchased form my friend Randy Kennan last summer at the  Quilting By the Lake Conference.   I had done just had my first experience with this type of print dyeing in my class with Judy Langille.  I was/am fascinated by the effect one gets as one does not have a lot of control as to how the color will disperse .   I am free motion quilting on the surface and doing a bit of zig-zag  couching along the way to push the spiraling feel of the top.   I feel I am nearing the middle point of the quilting work on this piece.   

Diana   This  drawing on old silk is the start of my next and probably final goddess quilt for my show this mouth.   I did the drawing three times before I got what I wanted on the fabric and all three were “traced”  from a  drawing that I did to begin with.  The drawing was done from a ancient Greek coin.  My Grandfather Howard found the coin while he was in Greece in WWII.  My mother made the coin into a pendant by adding a silver band around the out side and creating a bail that holds a diamond from my great aunt May’s engagement ring.    On the back of the coin is an owl that I used to create this foam stamp.  It will also be a part of the  quilt The owl is Diana’s creature and that is why it is on the back side.

Letters
This last image is also a start that I made this week.  I stenciled the rust and brown letter shapes onto white inner facing and plan to pair  it with some orange silk that has green lines on the surface.  I got the silk scarp from my friend Jean Riley before she moved to PA four years ago.  It is not something she had silk screened, but something that  had  been in a bag full of silk that she was given.  We quilters are  frugal and sharing bunch.   I want to create a second entry for the Text Challenge with these  fabrics.

Lastly as to my 30 day challenge- I am going to stay away from sugar for my first challenge.  I realized on Friday last week that there was far too much candy,cookies and sugar around this season- so I passed most of it off to the teen ages and made that my challenge.  It has been an eye opener- I did not realize that I had developed a craving for it, but I have.  So this will be a good test.

Keep Creating ,

Carol