Thur Sept 13, 2012 Summers Still Present

Hello Friends,

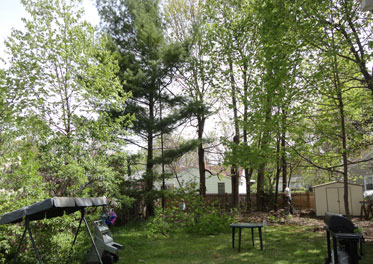
I am just home from my walk on this glorious autumn day.  Here the sun is shinning and the temperature is oh so wonderfully mild with a slight breeze.  One would not know it was Sept except for a few little signs like the grasshoppers that jump and fly way from my path as I walk along.  Some  wall nuts have fallen and their green/yellow husks stain the streets.  I find myself looking for the skeletons of nuts that some squirrels clean out to look like hollow eye alien heads- or perhaps they are strange buttons.     The golden rod is blooming as are a few blue purple bachelor buttons.  What colors! The passing yellow school buses add to the feeling of fall too.   I like to store up these of images for colorful memories when the world is all blues and whites of winter.   I must really do a good job of that this week as I left my camera in Maine between the cushions of a friends house.  She will ship it to me, but for the time being memory must do all the work.  The absence of my camera also means that I can not show what  my wonderful students did in the card making class.   I was so very pleased with all there efforts as  the cards were all as beautiful and unique as all the gals who were there.  I really like teaching when it is as open ended as that class can be.  They cut there own stamps from erasers and stamped them with dyes and inks.  They them mixed those images  with great papers and fabric scraps into wonderful cards to send to there friends.  One gal said she was not going to send all her creations, but frame two of them instead.  We all had fun and laughed  together.    My lecture titled  “Playing to your Strengths” on Sat was well received too.    I felt very pleased as I drove home -a  1009 mile trip round trip – to be able to drive into a newly completed garage.  We have been planning that project for years and I am sure I will be even more delighted in mid winter when I do not have to scrap off my car before I can drive away.   I feel ready to take on what ever Mother Nature throws at me this year.

Progress Report:   Tides Out

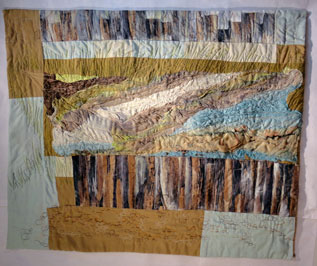
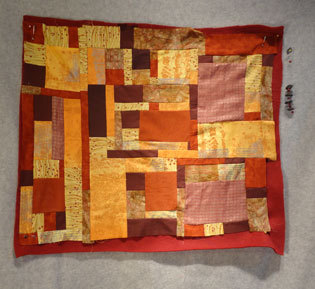
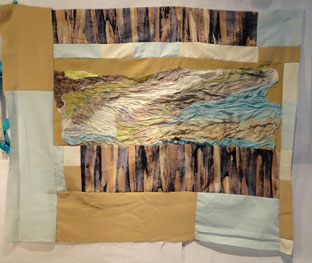
  I am showing this quilt because I do have a photo of it.  I took the quilt to my  art quilters meeting a week ago Tue and when it was up on the wall I suddenly realized that the bottom was not adding to the work at all.   Just weighting it down.   So when I got home I cut 9.5 inches off the bottom got rid of the sand and most of the second fence and refaced that area.  I gave the improved and  finished quilt to my hostess as a thank you  gift.  She was delighted as she knew it was the coast of Maine that was the inspiration.   I know that I work too quickly some times and it take time and fresh eyes to sometimes see the errors.


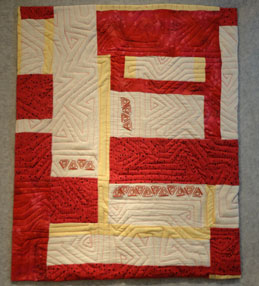
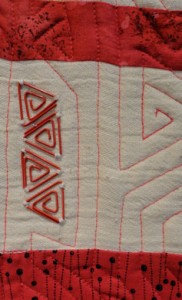
Line Work  The only other area I have been working on is a little challenge of my own to work through the elements and principles of design this year.  I  have been reading art and design books and this mouth I am playing with line in my quilt work.  I will take photos when I get my camera and post the progress.

I hope you are enjoying the wonders of fall and creating great things.

Hugs

Carol


September 3, 2012 Labor Day

Hello Friends,

I always see this weekend as a marker of the start of fall- even the official day is the 22.  I am posting this just a little early as I am off  to do a bit of teaching in Maine this week end.  I  will go back to my Thur posts next week and tell you more about the class at that time.    Summer has rushed by me with all its events and joys.  I did not get as much studio time as I would have liked, but that is the pattern for me at the moment.    The trip to the south west was wonderful.  I had a great time with my friends and took a ton of photos.  The colors and the textures were great.    I found the rusts,browns sage greens  and strong blues of the clear sky really fascinating.   Those influences fed directly into my two class  at Quilting by the Lake.    We experienced the joys of construction this summer  as  well  because we added a new garage to the back of our house.    I did finish both of the graduation quilts- but in the rush I forgot to take pictures of them.  The one for my grandson has already gotten rave reviews as he tells me it really adds color as well as warmth to his dorm room.

Progress Report :Slipping Through

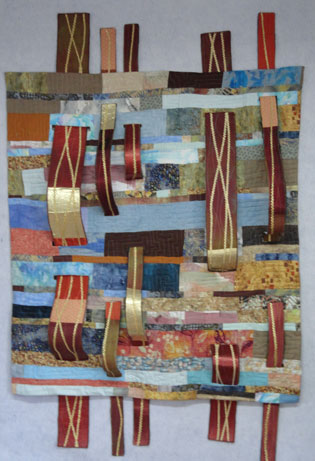
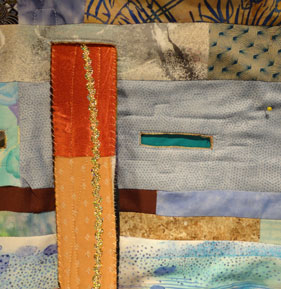
Full shot of the quilt showing the ribon sections passing through the qult
Slipping Through
39″ X 44.5″

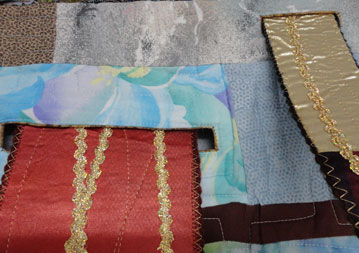
   I have finally finished this quilt.   It has given me lots of challenges.  I had to start over after I discoverd that working this large made the openings for the “ribbons” to pass through saged with the weight of the fabric.  The solution was to put boneing in the quilt at the top and bottom of each whole.   I really wanted this quilt with its new direction for me to be an entry in a quit show so that aspect pushed me forward when I hit the blocks.  The “ribbons” created a problem too as I fused them to Tyntex this time instead of using batting inside.   I wanted them to stand higher off the surface and have more body.   shot showing the ribbons passing through the quilt and casting shadows.I like the final effect even though it was a challenge for me

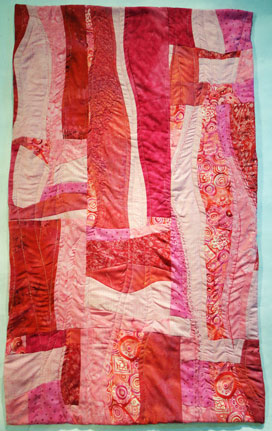
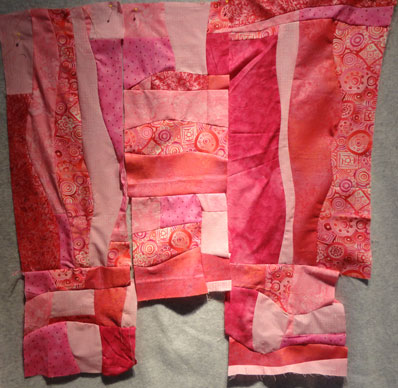
Pink Curves

shot of the finished quilt
Pink Curves 18″ X 31″

      This was the first thing that I finished this summer.  I think I learned a lot about how to cut curves and I still have more to learn there.   I like the action of the reflective machine work and the hand work also added to the interest on the surface.   I will keep working with curves as I feel there is still lots of ways to use them and there is more to explore here.


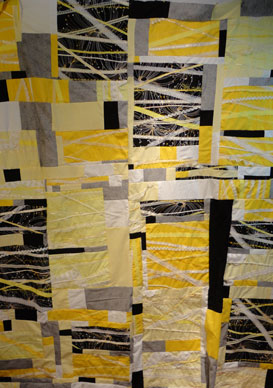
Lace Layers
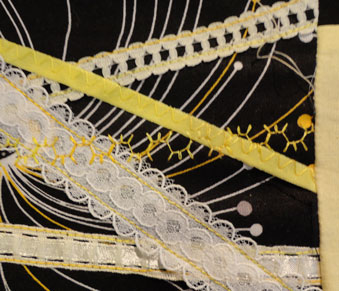
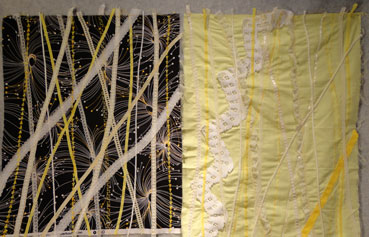
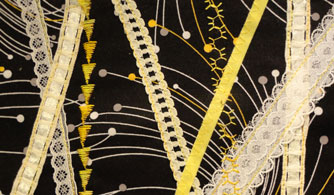
I started this work  before summer too.   shot of most of the top of this quilt in yellows and blackshot showing the lace and fancy stitches crossing the black fabricI enjoyed adding the lace on top of the surfaces of yellow  this created strong texture- one of my real loves.   The black is such a great contrast with it’s wonderful detailed lines of yellow ans white that it too works to make the piece stronger.   I added some fancy machine stitches to the surface when I was adding the lace as well.

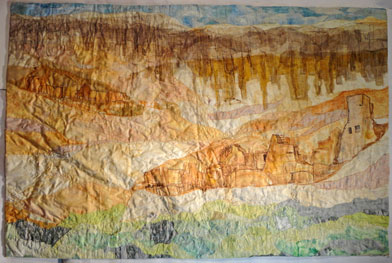
Canyon  de Chilly – White Tower

Full shot of the quilt
Canyon de Chilly White Tower
46″ X 30.5″

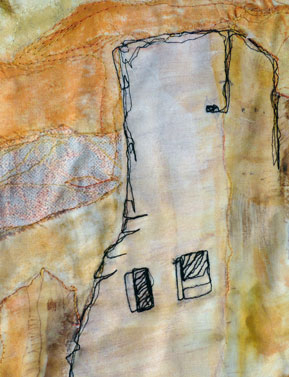
 This quilt was lots of fun with lots of new learning exeriences.  I started the work in Vsalerie Goodwin’s class at Quilting by the Lake.  She taught us how to sew on organza to build up layers.  The close up of the tower is a good example of that process in action.shot showing the tower and windowsThe organza was painted with fabric paints a to get the tones and shades I wanted on this part of the work.  Then it was sewn down to the background.   The class was about composition and she did a good job of helping me see how that could be used to my advantage and pointed out to me that I did not need to make my work look exactly like the real location.

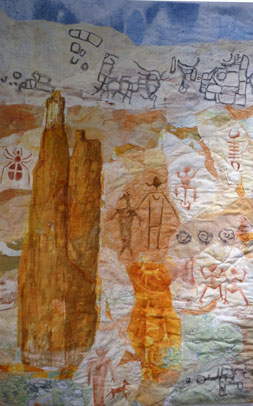
Canyon Shadows- Petroglyphs 

full shot of the quilt showing the stone tower plus the petroglyphics
Canyon Shadows- Petroglyphits
23″ X 35″

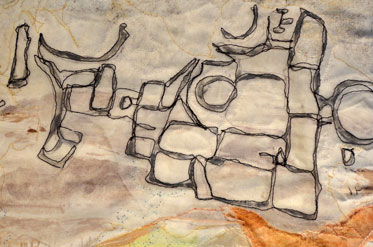
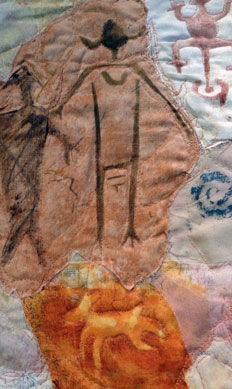
  This quit came about because I had made the petroglyphic images for the first canyon piece – but when I got home I felt that adding them to the already too big and busy piece would only spoil it . I had also removed my organza map of the ruins from the first canyon piece as it had become a strong landscape in my mind without that part.  In this piece they serve as a strong transition to the sky section of the workclsoe up of the map of the ruinsThe organza does mute the colors of the stone I think.   shot showing several petroglyphsI was fascinated by how  many petroglyphs this canyon held and how very strong the images were.  The figure on the left was done by and Anasazi Indian 2000 years before the one on the right that was created by a Navajo about 200 years ago. 

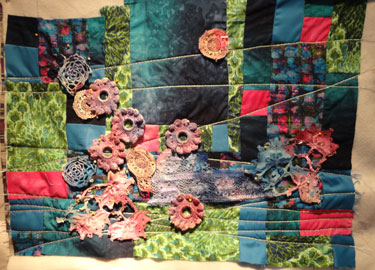
Tide’s Out

full shot of the quilt
Tide’s Out
31″ X 25.5″

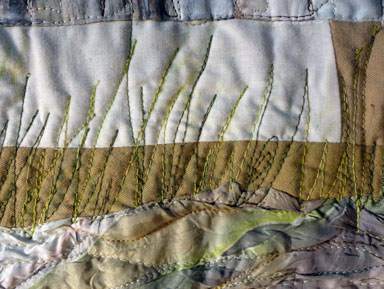
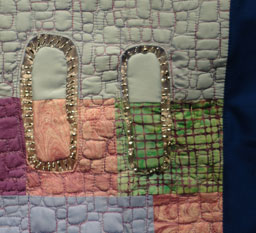
This quilt belongs to the challenge series as it started with the wrinkled silk that is the water portion on this work.    There is a place along the  east coast where the land has these board fences along the shore line and at one point the ocean juts into the land.  That is what I was trying to show here.  Shot of the grasses and the silk near the top of the quiltI enjoyed doing the machine drawing of the grasses along the fence on this quilt.   Using two types of green variegated thread really helped the process I think.

Excavations

shot of the quilt showing the cut away sections as well as the added on sections
Excavations
26″ X 21.5″


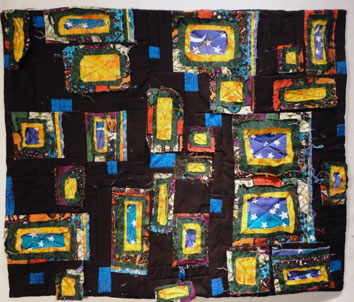
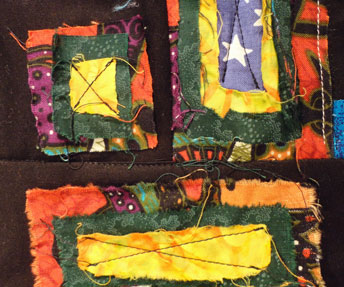
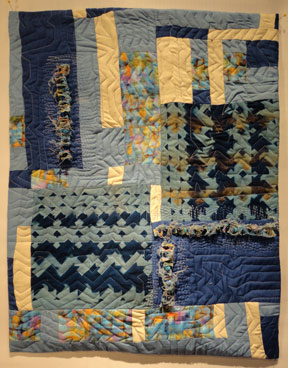
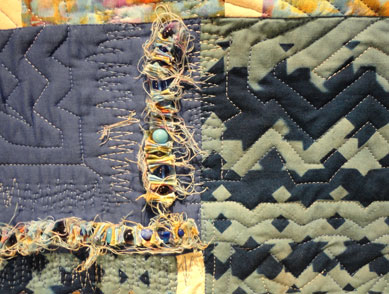
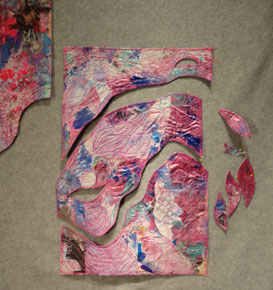
This quilt is also one of the Exploration Challenges.  I was working from a book that talked about cutting and tearing into lower layers of the stacks of fabric.

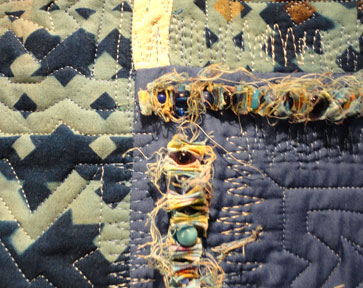
shot showing the added pieces as well as cut away sectionsI like all the texture in this work and the messiness of all the frayed edges only adds more interest to my eye.  I think I will try this idea again in the future and  work with a different more unified color pallet.

Shifting Gears

full shot of the quilt
Shifting Gears
20″ X 26.5″

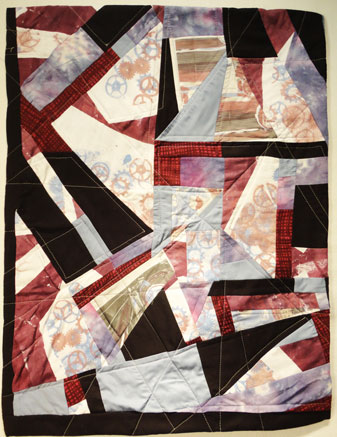
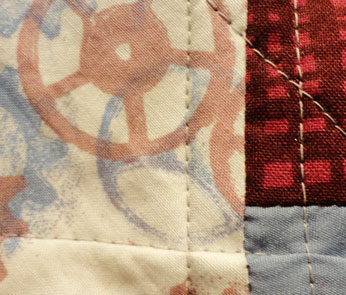
This quilt came out of the class with Judy Langiel.  I made the screen of the gears in her class and printed the fabric there.  I combined the gears with a photo transfer image of a  model A.  I am challenging myself to new colors and to trying to work with angles as opposed to rectangles and squares.

shot showing the print of the gears and some quilting

I hope everyone had a fun filled and creative summer and is now ready to shift gears into the delights of fall.

Keep Creating

Carol

June 21, 2012 Summer Salutes

Happy Salutes everyone.

So now summer really begins.  Like everyone else I am looking forward to lots of events!    The pleasant summer days pull me out of doors and off to do lots of other explorations.  There is graduation and weddings and plays to attend.   I have travel plans- to the far west of the US, to Pennsylvania, and to Indiana.  Then there is camp and art shows as well.  So I am going to take a summer recess and only post the first week of each mouth until Sept.   The school teacher in me see that as a time to restart.   There will be one other change.   Tomorrow I am meeting with my Computer Programmer and the Blog add will be changing.   Patty has graduated and she no longer needs to use the blog as a part of her educational material so I will be leaving her host and moving to one of my own.  That should make things easier and some what more understandable.   Her help has been invaluable to me and I will still need her assistance on occasion I am sure.  So enjoy your summer and get away from the computer a bit and enjoy the outside world.

Progress Report:   Circling Events

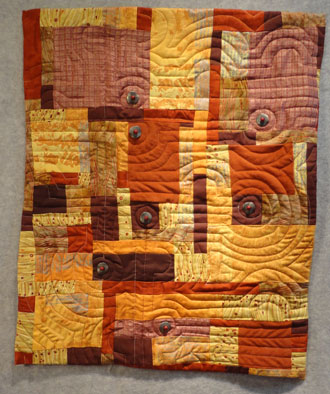
Circling Events 18"X22" $75.00


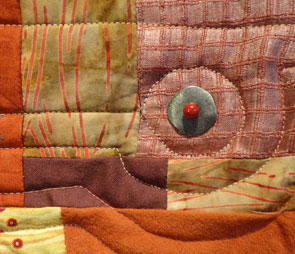
I finished several quilts this week and this is one.   I have really enjoyed these little explorations with pattern and and limited color.   The there are many textures in this one too, suede, metal , the glass beads and the pale rust fabric has a very distinctive weave that I like as well.      My idea was to make all of the finished work for sale and so I have included the price in the caption.

I have also been criticized for not making my photos bigger so I am slowly trying to expand the size of them  this week.  I would love feed back on this area.

  This detail shows the suede at the bottom.  The bead and the metal disk are setting on the woven textured fabric.


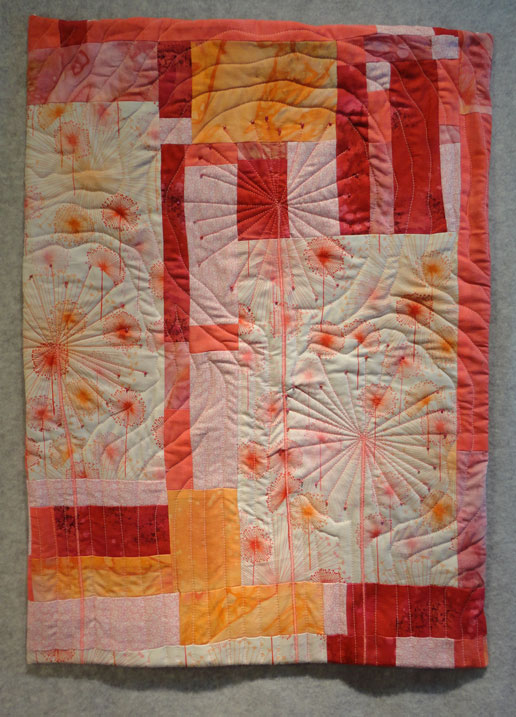
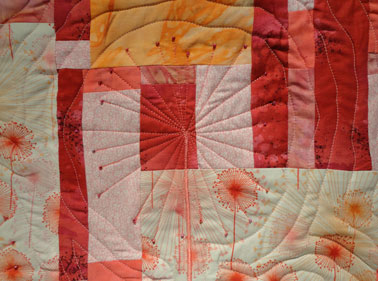
Dandelion  This is my first attempt at enlarging the image for the blog.   I like this quilt as it makes me feel cheerful.   It is great to be posting it on the first day of summer too.

Dandelion 16" X 22" $65.00


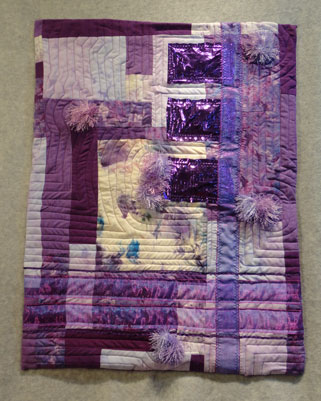
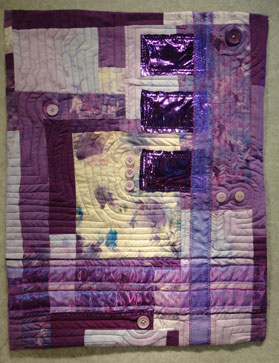
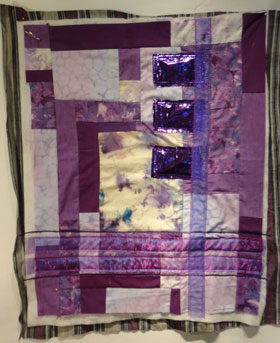
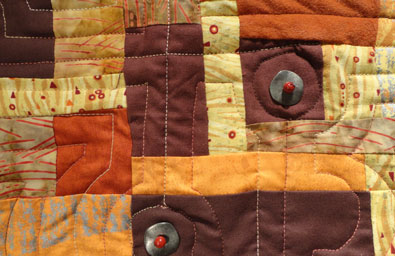
Purple Power  I had thought that I was finished with this piece a few week ago. But when I looked again I decided the  buttons did not work for me.  Because I had finished

Purple Power 18.5" X 24" $ 78.00

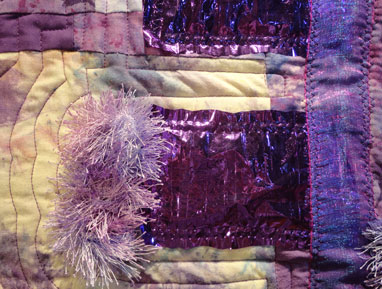
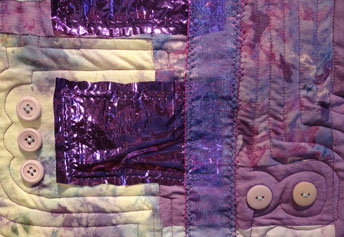
the quilting I really could not remove them from the surface.  This presented a new problem….. after a bit of looking and reflecting- I decided to cover the buttonsI tried several fabrics and settled on this high furry stuff that some one had kindly given me.  I think it gives the work a nice little kick.


This close up also shows the woven ribbon  that adds another texture to the surface of this work.

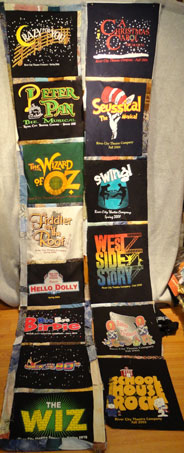
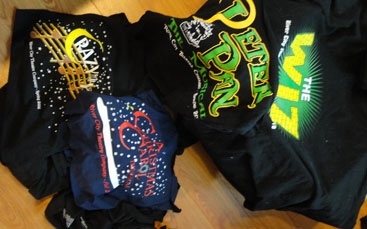
Zane’s Graduation  Quilt  I am making progress on both of the graduation pieces but this one shows the most growth this week.  I have now completed two of the three rows of the tee shirts.   The green and white tees will be in the middle so this shot is of the center and the right side rows.  Zane likes browns and muted colors so I have used those colors between the blocks.  They are very narrow as there are so many tee shirts and they are so big that keeping the sashing thin is necessary to keep the size of the quilt limited to college dorm bed sizes.   Many of these tee shirts also had lists of the casts on the backs and I intend to place them on the back of the quilt in the proper location to go with the show represented on the front.  I know this will be a challenge for me to keep the placement correct-but I think it will be well worth the effort.


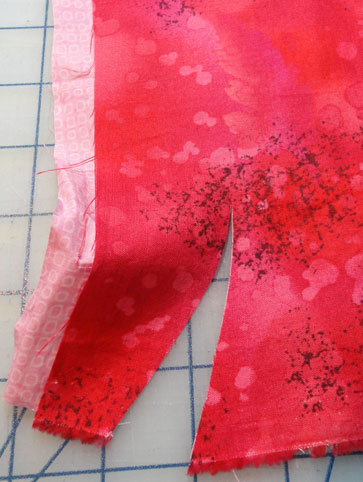
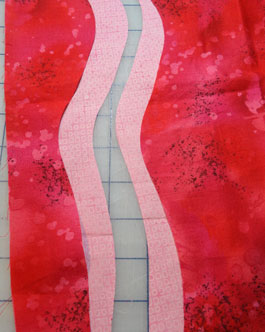
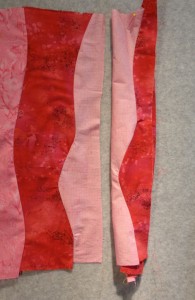
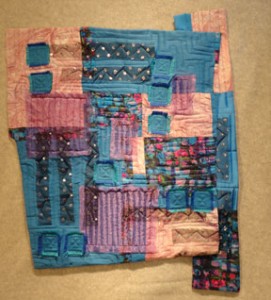
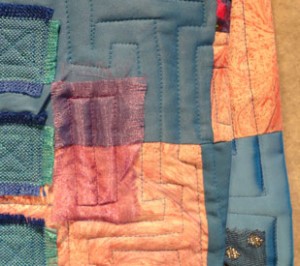
Curve Cuts   I started this last week and realized  when I re read the post that  I did not explain the steps at all.  To cut a curve that will fit exactally one needs to cut the two pieces of fabric at the same time.   So place face up one piece on top of the other. The second one must also be face up.  Then using your rotorey cutter cut both pieces at the same time doing your curves.

The second shot shows the two fabrics slightly shifted so you can see how the four pieces will fit against each other.   The pinks are on the bottom and will fit with the exact opposite megenta.


  This shot shows the two pieces sewn together.  They still need to have further pressing- but at this point I am still adding sections as the left one shows.


This last shot is of the parts pinned in one configeration.


Blue Blocks  Here are my newest Blue Blocks for the year.  The really nice thing about this project is it travels well so I will not fall behind while I am away with my summer activites.


I hope everyone has a grand summer and I will see you again  in Aug.  I will post the new  Blog Add here however.

Keep creating

Carol


Purple Power 18.5″ X 24″ $ 78.00

June 14, 2012 Flag Day

Hello,

When I was out today I saw lots of flags flying in Honor of Flag Day today.   The WWII vet from down the street all ways has  his flag out , but there were others on the street joining his.   It is so clear and beautiful that they all look wonderful.   I have lots of memories of flags.   Of course I said the pledge every day at school and the same all the years that I taught.  When I was a crossing grad in sixth grade we where also charged with putting the flag up every morning and taking it down carefully and folding it up at the end of our duties.   I remember making a norther  civil war flag with Mom out of a pillow case that I dutifully colored.  She then pressed it to make the colors permanent- my first coloring fabric experience.  It was carried in the 4th of July parade when we celebrated the Civil War centennial.  Many of the kids in town marched in a double line wearing  cards around there necks with the names of soldiers from Grandview who went to that war.  I do not recall who got to wear Great Grandfather’s name, but I got to march as the one nurse that volunteered.  That flag got pinned to the ceiling in the play house and stayed there for years.   The only other time I remember making flags was for the play Annie Get your gun at school and thous flags were the colorful triangle ones you see at fairs and around car lots.   My friend Susan is always making prayer flags and they do look festive in her garden all summer long.   My thoughts do not seem very patriotic- but I do love that wonderful flag called the Stars and Strips- may she always fly over this wondrous land.

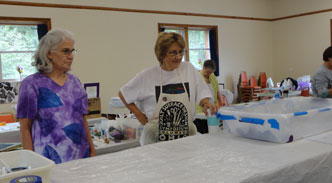
I had a busy week as far as quilt events are concerned.  Sally celebrated her birthday by renting the fire hall in Varna and invited us to come and spend the day with her playing on any project we wanted. It was great fun.    There were about a dozen of us and all sorts of work was going on.Photo of the hostess Sally is wearing the apron in this photo.   Sandy was working on copper wire jewelry.  She bent and pound away all day long and created one fine piece. shot of sandy and the tools
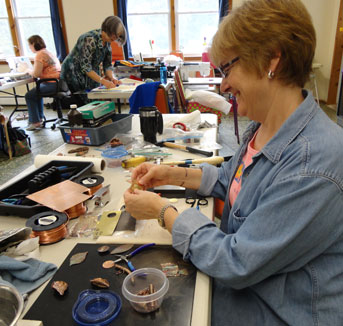
This shot shows all the pieces.  The one she worked on is the rectangle one  in the center.   I think she is having fun exploring this new technique.
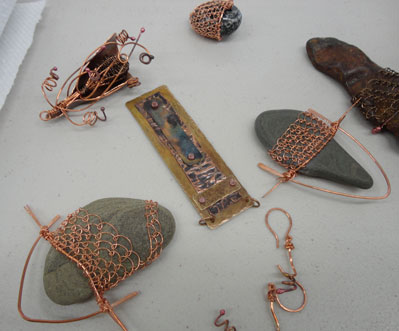
shot of about six pieces of wire jewerly


Carol spent the day working on a jacket. She was creating Seminole Piecing strips to insert into the work in this shot.   Cherri worked on a paper quilt all day long.   This photo is of her with the quilt under the machine.   I really like her irregular edges.  Because it is paper there is lots of strength and the shape does not fold or droop.   I think I will try an irregular shape some time myself do to her inspiration.
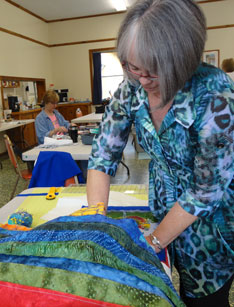
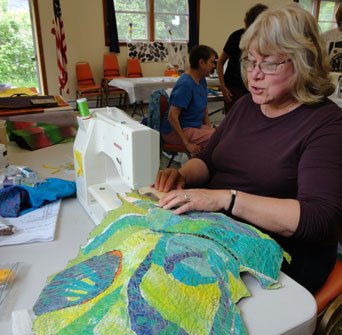
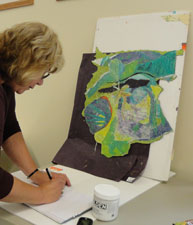
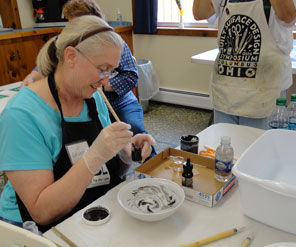
By the end of that day she had created  a paper dragonfly to apply to the top of her work.  It is in the center of the quilt.  This shot shows her making notes and the work with some black  she was auditioning behind the openings.  Several of us worked wet.   Ruth did the oldest Chines form of marbling. ( I am not even going to try to repeat the name as I know I can not spell it)   She was trying to create an image for the Breast Cancer quilt  she showed last Tue at the Diva meeting.I did rubbings that I then silk screened over them  in the morning.  Then in the afternoon I stenciled over the images  for a third layer.
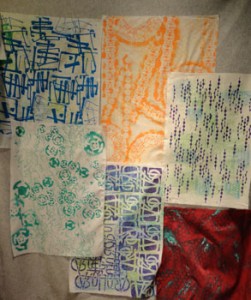
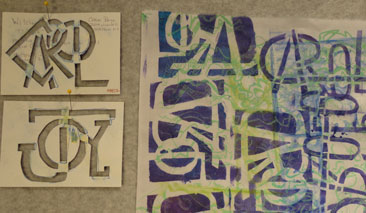
  This shot is only a few of the fabrics I worked on.   I got all excited by the name stencil and cut two more letter based ones this week.  One is my name again and the other is the word JOY.    This shot is a close up of the fabric that got me started on the new stencils. I have not used the new ones yet but plan to do so soon.    I think we all had a good time and went home happy and excited by the day.  It was a fine way to celebrate Sally Birthday and an inspiration to all of us.
Progress Report:  Slipping Through     I am making progress on this work although it does seem slow to me at times.  I have stared quilting around the openings that are completed.   There is only one more to be placed, faced, cut and flipped.  When that is done then I can spend the whole hour on quilting.  The quilting pattern is reflective of the wholes with little rectangular sections added for interest.
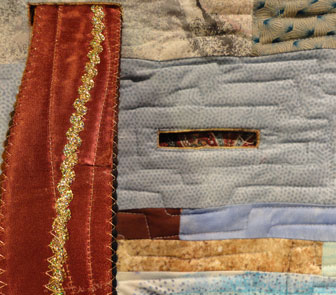


New Top- now titled Circling Events–   This quilt was only a top last week and I am now adding the facings so I did not take a full shot of it.  Deciding to add metal disks and beads gave the surface little centers of interest.  Then I featured those further with quilting patterns. I really like the colors of the fabrics in  this work.
Dandelions     Work on this quilt too ready  for the facing stage, so again I am showing just a detail.  I put a little glass bead at the end of each arm of the seeding units on this top.  They add a little sparkle as well as finish to the stitch lines.  The rest of the top is reflective quilting. one can really see the beads in this close up.


Paper Quilt   Cheri’s work on Sat really inspired me to get going on my paper quilt.  I already had a bit of a vision about where I wanted this one to go so it is still a rectangle.  Now the edges are all zig-zagged and I am ready to play with how to add the back and paper parts on top.  On the left is extra material that I can use for more top shapes.    I have not decided what color to use behind this work  either.


Lace Play   I did a bit of playing yesterday and started two new pieces.  This fist one is highly textured because I started with a panel of fabric and just added lace to the surface.  After I had done a bit of that I added a few of those fancy stitches that many  new machines have, but I do not use.  They have added extra  texture to the surface so they seem like a good idea.  I did the yellow block fist and then though I wanted more contrast to show all the work I was doing.
This is a close up showing two of the stitches a triangle and a spiked curved stitch. The stitches really show on the  the black.   I also added ribbon to the surface.   I plan to cut the blocks into smaller units when I am done creating several more.


Fuchsia Fabric Fun
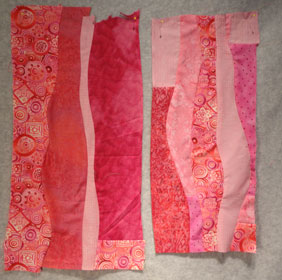
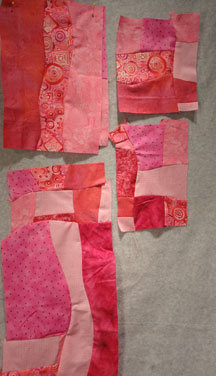
   I also did a bit of curved piecing with the  fuchsia fabrics.  I cut some long pieces and they layered one piece on top of a second.  Then I cut a curved line with my rotary cutter from the top to the bottom of the stack.   First I took the wright hand piece from the top and stitched it to the left hand piece from the bottom of the stack.  Because the two pieces were cut at the same time they fit together perfectly.  The next step was to stitch the two remaining pieces together.   I then changed the fabrics and repeated the process adding two more to the edge of the first two.  This  photo shows two pieces of fabric with  four cut united with one another.   Then I tried slicing horizontally with smaller blocks.     I am not at all sure where this will lead- but I am enjoying the process.
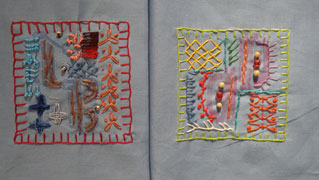
Blue Blocks   Lastly here are two more hand worked blocks for this week.

I am having fun with my summer and enjoying the creative process .  I hope you can say the same for your self.

Keep Creating

Hugs

Carol

PS.  Please check out the newest issue of “Cloth Paper Scissors” as my friends Susan and Carolyn are  featured  in the article On-the-Road Art Experiments. Page 56.
June 7,2012 The Fox

Hello-

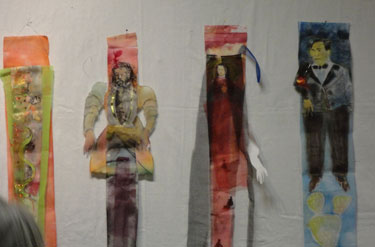
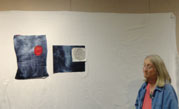
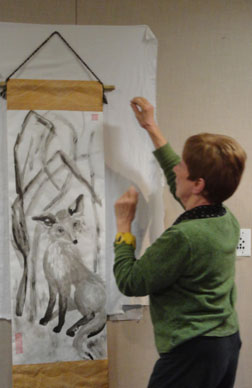
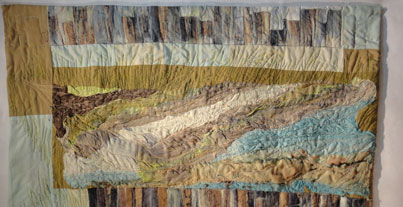
Being busy seems to be the way of my world.   I am still excited from the Art Quilting Group meetings I went to on Tue.  The  Quilt Exploration Group was full of lots of talk about summer events and creative doings.  Then I went south toward  Ithaca and dropped my sewing machine off of a cleaning at the quilt shop on the way.   I picked up Susan who is just home for the summer.shot of four bannershowing figures  We talked, laughed, shared and caught up with each other as we rode to the Diva Meeting.  She showed off her pieces  of Mexican historical figures that she  is creating .   The meeting its self was very lively with lots of show and tell. Ruth showed us her work in progress about for a breast cancer event.  Sally  presented a great quilt that I really love.

Unbroken Circle by Sally Dutko

Her layers and style are so inspiring to me.  The last work I want to show is Alice’s.  She showed  about 15  beautiful scroll paintings she had done.   I really enjoyed this fox that she had painted.     This turned out to be a little bit of a for shadowing for Susan and myself.  For as we  drove home through town – what did we see walking down the middle of the street, but a little fox.   He passed by us with no concern and I watched him continue down the center line into the night.    It left wonder in both of us as I can say I have never seen a live fox that was not in captivity before in my life.


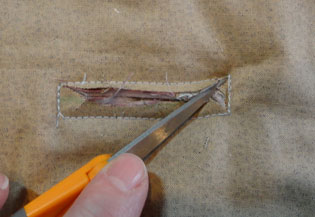
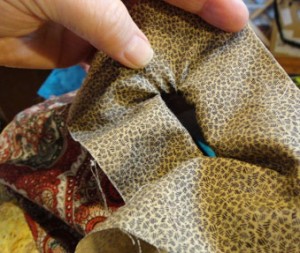
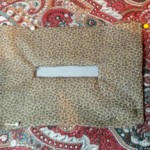
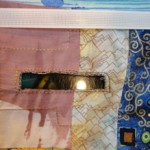
Progress Report:   Slipping Through   This project is  coming along slowly as I seem to uncover more problems with it along the way.   I have done other quilts where I had openings like Oranges Slices and even quilts with parts passing though.  But the size and weight of this one pose  a few different challenges.   First I am going to explain the process of creating the openings them selves.   First I decide where on the surface I want the openings to be located .  Then on the top side of the quilt I place a small piece of fabric right sides together.  I mark the size of the opening on the back of the scrap. Then I sew around that line and create a box shape.  Next I make a cut in the middle of the box. Slipping the scissors through that opening one needs to cut away as much of the facing fabric and the batting as one can without cutting the thread and the top layer.   When this is completed flip the quilt to the back side and pull the facing through the opening.  Now one presses the fabric in place gently pulling to make it as flat as possible.  Next the facing is pressed to the back of the quilt and slip stitched down.     This step is followed by additional pressing and top stitching around the opening. At this point I insert boning on the top and the bottom of the opening between the batting and the quilt top.  Then I stitch  around the quilt opening  through the top ,boning, batting and backing all in one step.  This photo shows the top side with a piece of  boning  resting on top.   I push the   boning as close to opening as I can get it before I quilt around the opening.   The last image shows one of the strips passing through a completed opening and a finished whole to it’s right.   There is a bit of turquoise fabric behind a second  opening so you can easily see it.

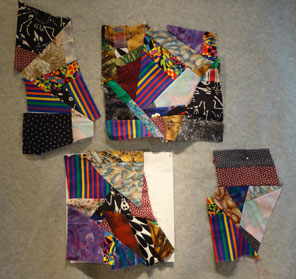
Nick’s Graduation Quilt   I continue to make crazy quilt blocks for this project.  I have six done at this time.

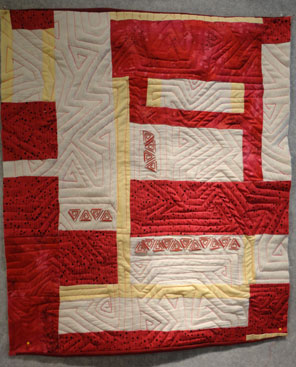
New Top- Untitled   This top is coming together and I like what is happening.  No name yet.  I am just going to live with it and see what quilting and or embellishing techniques seem to be operate and hope that tells me what to do next and what to title this quilt.Regular Red/ now titled Triangular Trails   I have really enjoyed working on this quilt.   The red paperclips where the inspiration and their shape needed

Triangle Trails 18.5" X22.5"

to be reflected in the name, hence the title change.   The quilting reflects the paperclip shapes too.  This quilt makes me feel happy. Dandelion : This top is inspired by the fabric.  I have always been attracted to the flower and the image of the explosion as well.  I used the fabric image as the inspiration for the quilting too.Blue Blocks    Lastly I continue to work away on the blue blocks.   I hope summer is visiting all the folks in the northern hemisphere and fall is beautiful for all the rest of you.

Keep Creating- and if you are not a creator- I hope you are a supporter of those who do.

Hugs

Carol

May 31, 2012 Trees

Hello-

This week has been a full one what with the Memorial Day holiday and the beginning of summer – at least in my mind.   I went off to a picnic at my friend Beth’s Camp.  It was a glorious day and full of fun, water, boats, food and friends.   Hats and sun screen meant that I came home with only happy memories and no sun burn.

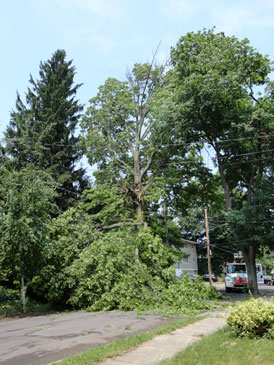
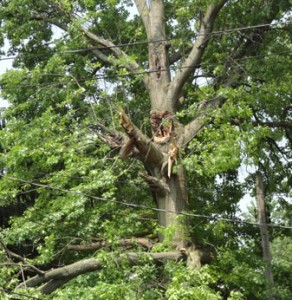
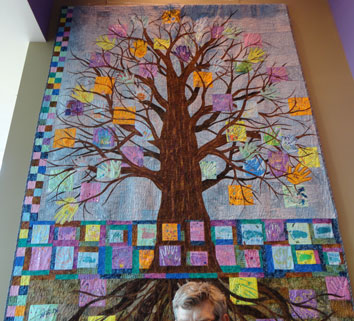
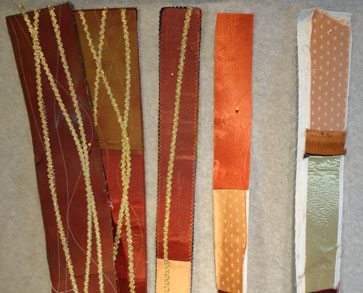
We had brief  Thunder Storm  with lots of wind and noise  pass through our area.  There was a lighting strike  just down the street and the big old oak was hit.  That knocked off one of the big branches and scarred the tree.   The branch was across the street and across a power line too.  We did not lose power until it was turned off for the clean up.  The tree looks old now with the side missing.    The reason I titled this blog Trees was a second event this week where a tree was featured.  That was the installation yesterday of Sharon’s  Tree Quilt at the chapel in the Children’s Hospital.  The tree is made up of  hand  and foot prints all of them came form patients and hospital staff .   The childerns  hands became leaves and branches the Dr and nurses hand prints became  the roots and stalk of the tree.   Sharon used the baby’s foot prints for the ground area.It is 10′ X12′ and quite an under taking to quilt with her regular sewing machine- but she did it and did so splendidly.   The names of the participants are also a part of the colorful blocks that make up this quilt.   Sharon is proud and I think she should be- it was quite a task.                                                                                              Progress Report: Slipping Through  I  am enjoying working on these units to slide through the quilt.  This photo shows the five I have created in various stages of completion.  The fist three are ready to be added to the top.  The fourth shows the strip with the fabric fused to the surface and trimmed.  The next step is to add the yarn to the edges and embellish it with the brad and stitching.  The last strip has been fused but it is not trimmed yet.  I really like the different textures of the fancy fabrics that are used on these units and think they will look good passing through the other parts of this quilt.


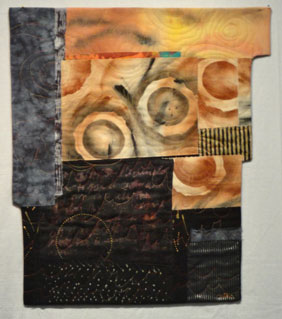
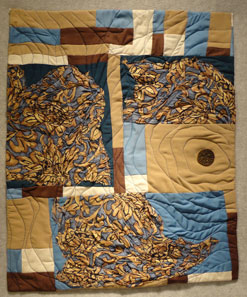
Single Drop Adventure Challenge This quilt is  the second in the wrinkle series.  It is complete now. The  blue and brown silk scarf that this work was made

Single Drop 18" X 22"

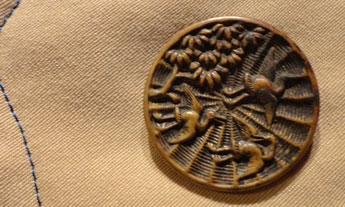
form was one of my Aunt Mays scarves and very fragile.   from the 20’s I think.   This technique of wrinkling and then stitching it down allowed me to display and preserve the scarf and to feature one of the buttons from her button box.  I do not know the history or any special significance of the button.  But it is a fascinating piece.  I like the three cranes and the tree   branch on top of the radiating pattern.  That pattern effected my choice of quilting pattern.   Although I did not try to make it as regular spaced and uniform as the button I did try to make a flow pattern that moved around the quilt top.                                                                                                                            Purple Power  This quilt also became a completed piece this week.  It had to hang on the door for several weeks while I

Purple Power 19" X 24"

looked at it in order to see how I could conquer the problem of the big white whole in the middle of the top.   My solution was to add the ribbon over the top to break up the area.   The  Shinny squares came first and them the two horizontal  transparent  ribbons.  It is wonderful how the same ribbon when applied vertically reads with such a difference in color.   I added the buttons on to break the squared feeling of this work.   The white area is still a very dominate center area, but I feel it reads more as a window behind now and not a whole in the center.

Layers and Lines  I though this quilt was completed  a  week ago.  But after time and a second look this week

Layers and Lines 18.5" X 20.5"

I felt differently.  The original irregular shape was interesting, but some how not enough.  So this week I added a Shape on the back of the project.   It helps with the balance of the work I think. This shot shows a close up near the top where on can see the  line up of the  pink section.

Nick’s Quilt      I am still struggling with the assembly of the crazy quilt blocks for this work.   I am sure there has got to be an efficient  way to do it by machine and perhaps someone else has it all figured out.   But  I am striving to create my own way of doing so.   The white in the bottom par shall block is my paper  template for size. I do love a challenge.


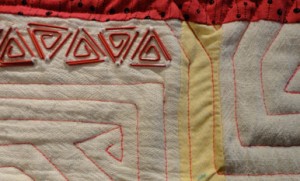
Regular Red  I started this quilt last Friday.  It is wonderful when one sort of puts its self together the way this one didIt is trimmed now and ready for facings.   I have had these red paper clips for awhile and I really like the shape they create.  They are what I wanted to feature with this quilt.  As can be seen in the closeup I used that shape as the inspiration for the quilting pattern too.

New Top Untitled

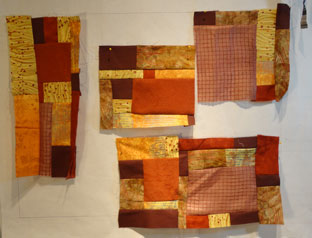
This start happened yesterday.  I used two of the fabrics( the yellow  and the light orange ) that I purchased on  the shop hop tour that I took earlier this mouth.  I may yet change the arrangement of the units of this work as I am in the early stages.  

Blue Blocks  Finally I did work on the Blue Blocks this week as well and here are two new ones.


Keep Creating

Hugs

Carol

May 24, 2012 Getting Organized

Hello-

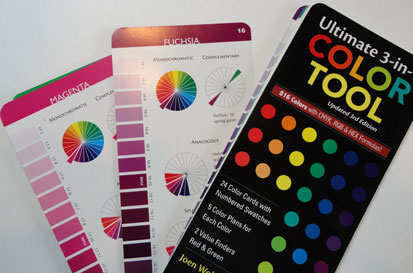
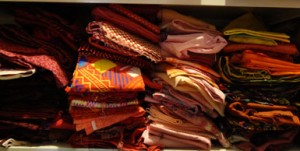
This week I seemed to be in the spring cleaning mode.  I sorted my clothing closet and drawers in the kitchen.  For the studio I pulled all the fabric off the shelves and refolded  most of it.  I put  them back in a new arrangement.  I used the 3-in1 Color Tool by Joen Wolfrom as my guild.  Ever sense Angela did a color talk at the Quilt Exploration Group meeting in the beginning of May I have tried to consult the tool for color ideas more and more.  It only made sense to me to arrange the fabric in the same manor as the tool to make it easier to pull fabric when I want it.  I like how the arrangement looks and I sure can tell where my color choices are thin.   I had already noticed that my choices of greens was not all that big- but when I used the tool I realize I have only one piece of fabric that is Chartreuse.   I did not rush out and by more  but I am now aware.  The process also has brought to my attention the fact that what I always though of as wine is labeled Fuchsia and the color labeled  Magenta is the really strong color in my collection.   I guess it really only is a case of the label, but it is better for clear understanding if I use the proper label.   I keep my fabric on metal shelving in a four foot deep closet so this  shots only shows one shelf at the open door.

I am still working on the graduation quilts.   The tee shirt project is three fourths is done with the fused interfacing step.   Nick’s strips are still in the process of being assembled.

Progress Report: Cobble Stones

Cobble Stones 16.5" X 24"

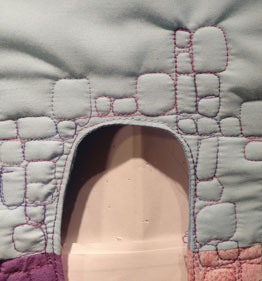
This quilt is completed now.  I like how the beads are similar in shape to the quilting on this piece.   The opening reflect this idea as well and I think this adds unity to the piece.

shot showing one of the squares, faggoting  and the quilting I now have a true understanding about why this quilting pattern is so popular.  It is lots of fun to do and there are seemingly few ways to make errors.


Wrinkle Work  – Adventure Challenge  

full shot of the majenta and blue quilt
Wrinkle Work 16.5" X 24"

This quilt also got completed this week.   The wrinkled silk is fun to sew on and I like all the lines that it creates. The close up shows how easy it is to follow the wrinkles on the silk.

shot of the fuchsia silk wrinkles with the sewing on top

Berry Blast

Full shot of the quilt showing the angelina and matalic cords
Berry Blast 16" X 23"

  This quilt is also complete.   The Angelina triangles really add a feeling of motion to this work.   Shot showing the angelina and the matalic thread stitiched on topI am not real happy with how this shot makes the quilt look off square .  I hope to get some additional instruction on how to take better photos in the near future.

Slipping Away  I intended to make this quilt one with units slipping through this background.  It has proved to be a challenge.  First I tried a series of strips in cream black and rust.Shot of rust cream and black stipsI really like these strips but think they would fight with the back quilt and not enhance it.  Visual decisions need to be made visually. These are fun- but far too busy  with an action that does not work here.   I will use them sometime some where- but not on this project.   So I went for the idea of a different texture and a color combination that is closer to the quilt that would not have a textural competition with the back quilt.   For body in the strips I used the Pellon like my pyramid mobile.   I added  machine stitching and gold brad  on top for texture.  There is some gold in the print of some of the fabrics and I feel this pulls the two ideas together a bit more.I have only finished the one strips.  The edges are  closely zig-zagged to act as a finish.

Paper Quilt   I stared an new paper quilt this week as well.

  This piece has almost more color than I want.  That or they are all too close to the same size so I will be doing some over painting.  I want to move on to the next step of cutting it before I paint though.   I did have fun with the quilting of this piece however.  I did connect the paper to the felt along most of the edges and then I loaded the bobbin with a heavy nylon thread and did all the big sweeping free motion stuff from the back side.  It was very freeing.


Single Drop-Adventure Challenge  This quilt is also a silk wrinkle project.   The quilting is where the name for this quilt came from.


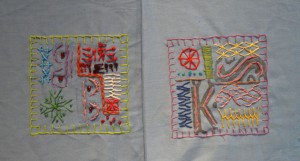
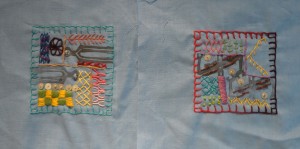
Blue Blocks I have completed some more in this series.Two more blue blocks with various colored embrodery thread   My goal is to explore new stitches and I feel like I am doing that .


I hope that spring is treating you well.

Keep Creating.

Carol

May 17, 2012 Spring Leaves

Hello,

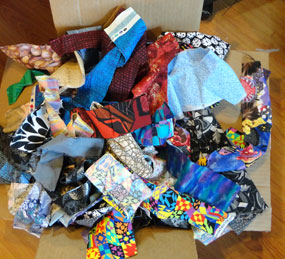
I am still enjoying the unfolding of spring here in upstate New York.  The oak tree is now leafing out and I enjoy the wonderfully translucent  apple green of the leaves.   They are so very delicate and frail now. The shadows they cast seem some how softer too.   I know that  they will thicken and change color in a week or two.  The tree is flowering as well and the long pollen filled pale green blossoms are falling all over the walk and drive.  The season seems to be doing double time with it’s amazingly fast changes.      I realized that I need to do a bit of double timing myself as graduation is just around the corner for my grandson and my nephew.  I got a box full of tee shirts from Zane for his quilt this week.  He has been in 22 plays and wants his quilt made from them.Shot of the box of tee shirts showing some cut and some full sized    Most of them are black with a few blue, one white and one green.  I have already put in an  hour and a half  cutting away the backs and arms and I still have five shirts to go.  I will then iron fusible interfacing to the backs so they will not stretch before I add sashing.   Zane’s graduation date is the 25 of May so I will be late with this gift, but he seems OK with that.  When Nick was asked what kind of quilt he wanted he told me he just wanted lots of color. box of scraps   So yesterday I started through my stash cutting  three strips from different pieces.  One strip was about 1.5″, the second 2.5 ” and the third was4.5″.    The pulling out pieces and  cutting  process made me realize I need to do some refolding and sorting.   I will sew all the strips together in a random manner and slice them again.  It will be a real playful quilt.       I will enjoy that process.

Progress Report:   Wiggle Wiggle – Adventure Challenge( previously Blue Boundaries)

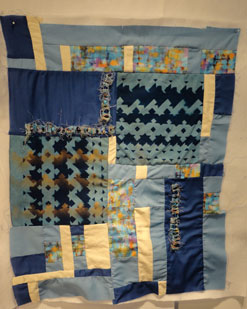
Full shot of completed quilt showing blues, cream
Wiggle, Wiggle 17.5"X 22.5"

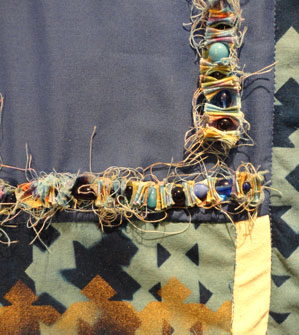
The cream fabric on this project is from an old silk shirt.  I sun printed the blue patterned fabric using paper stencils I created by cutting away parts of scrap booking pages.    The texture and the reason this quilt belongs in the Adventure Challenge category is  from Terry White’s book Enhance Your Quilts- Embellish!   The process is one where you take a slender strip of fabric and accordian fold it.  Then you slip a threaded needle through the folding and insert a bead.  Then you continue folding and inserting beads.  If you come to the end of the fabric and you want a longer unit, just add more on.   It  close up showing the printed area and some of the bead work toois fun and the fabric add interest to the beads.

Opel Opening- renamed Cobble Stones- Adventure Challengeshot showing two of the cut out units and the faggotting with silver and clear beads.  is still in progress.   This quilt uses the whole process and the suspension of the cut outs with the faggoting.   I like how the faggoting is going, but that process is very slow for me .  Now that comes from Louis Ericson’s book, Design&Sew it Yourself. This shot shows the quilting and on the right you can see the dark blue that will become the facing for this quilt.


Wrinkle Work- Adventure Challenge

Shot of fusha and blue quilt.  I had lots of fun with this project.  I tried not to make the pieces square and that turned out to be more difficult than I expected.  It stared with three pieces of fabric that I had previously sewn wrinkled silk toThat process is from Louis Ericson’s book too.   Then to quilt this work I started sewing lines from the end of the lines on the silk units.   The final effect of the quilting is a lot like water flowing around rocks.    This quilt has turquoise print  panels on left and right sides that will become facings.

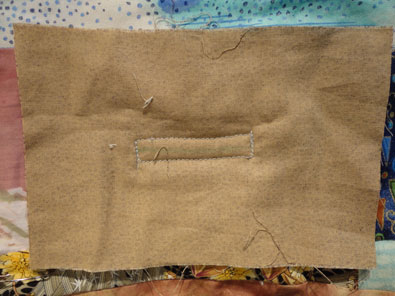
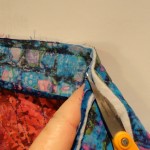
This close up shows the facing good side to good side with the quarter inch seam shewn.

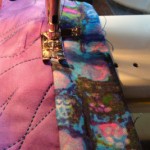
This shot shows the trimming away of the batting and the backing so the facing is flat and the bulk is minimal.

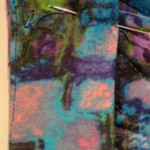
This shot shows the machine tacking the facing back to create a crisp line when it is pressed and then hand stitched to the back of the quilt.                                                                                                                 This last shot is of the facing turned to the back and ironed in place the pin is holding it and I will hand stitch the facing to the back.  You can see the machine stitching line along the far left just inside the turned area.   I think the fact that I used the same material for the backing and the facing makes this hard to see.

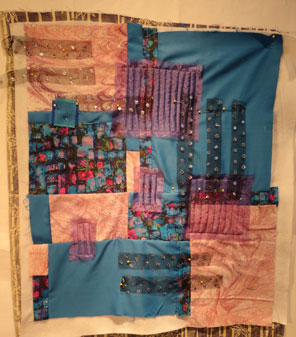
Purple Procedure    This work had been shifting around on the design wall sense the  April 26 post when I noticed how the while unit in the center became a big  whole to my eye.    I have added ribbon on top and built up the surface a bit and that is helping solve the problem.  .

Purple quilt with ribbon and celophan added on top  I plan to do some hand stitches and add some beads to the surface as well to help this quilt along.


Slipping Away- working title

This is the back unit for some more of my slipping through units.  It is made up of some of the same fabrics that I used in Beth’s quilt from Dec.   I wanted a bold but low contrast body to pass through.   I am leaning toward a blue or green at this point.  I will try several combos before I make the final decision.   I think this will work.


Blue Blocks

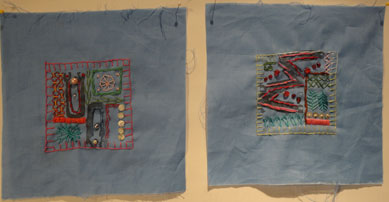
   This photo shows two of the hand blocks that I have been building  this year as my weekly mini projects.   The block is 8.5″ square with a 4″ square in the center.  I stamp two or three of my hand carved stamps in the blue center and then embroider and bead around the square until I feel it is finished.   I will show two every week until I catch up with the completed blocks.   These may become my Calender for next year.

Keep Creating

Hugs

Carol

Bird Calls May 10, 2012

Hello,

I was awakened while the world  was still dark today by the birds.  “Calling up the sun ” was what Grandfather Howard called the predawn bird songs.  The birds have been an active part of my life over the last few weeks.  I watch two Cardinals vivaing for the territory near the front window a few weeks ago.  They kept flying and screaming at one another for the better part of a sunny afternoon.  I do not know who won or how they decided who would occupy the area.  But I do know one proud fellow sits on a branch of the oak that  stretches over the house and sings from that point on a regular basis.   I also see and hear Robins, Black Capped Chickadees  and various other birds while I am out of doors.  The crows who are so present all fall and  winter seem to have found other places to haunt as I do not see or hear them much at all.    I do not know or recognize many bird songs but I do enjoy there cheerful sounds.

Progress Report: Circuit Board

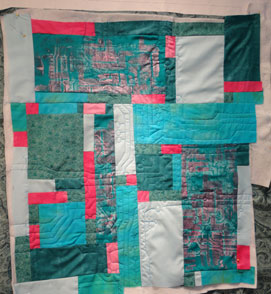
Full shot of the turquoise and fusha quilt
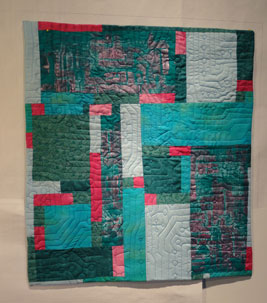
Circuit Board 20"X221/2"

   This quilt is completed now.  I enjoyed doing the quilting in the pattern of the circuits and hope I can find a new place to use that pattern.     There is still fabric remaining with the print of the circuit board on it so it will appear again some where.   I have also decided to include the size along with the title for the works that are what I consider complete.   I also have a bit of real circuit board out of a computer key board that would be fun to stitch into a work sometime.

Wiggle,WiggleClose up of the top showing the quilting.  Adventure Challenge- 

I am only showing a close up of this work as it is nearing completion.  I still need to hand stitch two facings down and to add a sleeve to finish this piece.   It will be done for next week.   The texture here is soft and only stick out about 3/4 inch.


Wholes- renamed Opel Openings 

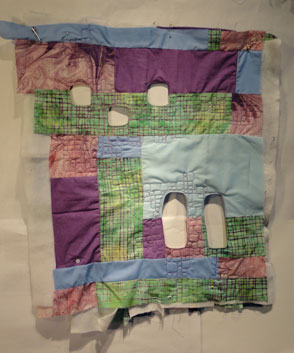
Full shot of the partul quilted purple green and blue quilt. Five wholes in this work

I am making progress on this quilt.   I decided to make the quilting as a reflection of the openings.  I know lots of other quilters use pebble quilting but this is my first try at it.   I know understand why it is so popular as the process seems to just flow along.   shot of oening and quilting  I also plan to use the faced shapes that where cut out of the quilt as a part of this project.
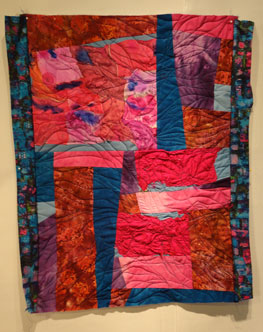
shot of this blue green adn fusha quilt in progressBerry Blasts

It was suggested a that I show my process a bit more.  So here is a sample of that.  I made this top with the intention of applying the painted lace on the top of it.    Here is the audition of the lace.  It did not work in my eye.   The background is competing too much with the lace.    So I removed it and tried another  solution.    Turning the top 90 degrees  helped give the quilt a stronger orientation.   But is did not have a focus to me.      So I created so  triangular shapes on top.  After pinning   Angelina to the surface was much happier.  I  find the new look much more agreeable and it has a much lighter feel to me.

Blue and pink top with netting on top Layers and Lines

I am having fun using transparent fabrics here.  They add so much dimension to the surface when the quilting is added.

Close up showing more of the quilting

Sea ShoreTop  in blues and browns featureing a silk landscape type center. -Adventure Challenge:  This piece belongs to the Adventure Challenge because the wrinkled silk that creates the image in the center grew from the Louis  Ericson’s book.  I tried her method of crinkling silk and then sewing the wrinkles  down to create a texture.  I only saw the landscape in the silk after it was applied.  Then I tried to add a bit to that feel with the material that looks like an old fence to the work.


The weeks sure seems to be flying by.

Keep Creating

Hugs

Carol

Adustments May 3, 2012

Hello,

I got  two  new pairs of  glasses  this week.  One pair is  specially  for close work, like the computer, reading  and stitching.   What an adjustment this has become- taking them on and off…. the not having them handy and having to search for them when I want to get going on a project.  I know I will get the hang of it with time- I just do not want the disruption.      Adjustment and disruption have become the words of this week for me.   It started out smoothly with last Thursday’s outing with three of my friends.  We went for a Shop Hop to break in Liz’s new car.   I tried to build my green stash a bit as it seemed thin when I returned fabric to my shelves the day before.

All four of us in front of a raffel quilt
Liz,Carol, Nancy,and Dorla

We had a good time and enjoyed the day.   I  am glad to say that I did stay under the limit I had set for my spending.

We are having a garage built and that requires a few adjustments too.  We needed to cut down some trees in the back yard so I called the tree men and to my surprise they appeared in 15 min.  I though they would give me an estimate and we would plan from there- but they where ready and willing to do it then.   So I said yes.   Now that is not much of an adjustment- but it was unexpected and I could not help but be pulled away from the studio to check and watch the trees fall.before shot of the trees to be cut      Below is a before shot.  They took down five trees.   The wood men did not have their shredder with them so they offered me a deal.  $400 less if I would drag the cut down tree and limbs parts to the curb for city pick up myself.   The money made me agree- adjustment #2.  I know have that job awaiting me, but I will get help from the 19 year old on Monday next week  after I take him to the Dr-adjustment  #3.   Tuesday went as I had planned and I went to both of my quilt meetings and got the usual stimulation.  Wednesday morning I hit the studio all excited for a full day of   using the some of the new  fabric and exploring some of ideas from the day before.  I did a little work and then a phone call from Alexis and the school nurse, interrupted me.  She needed to see a Dr do to a foot injury- adjustment #4.   By the time that was all settled the day was gone.  We have a follow up Dr appointment on Fri- adjustment #5.  This morning I expected to see the contractor to make final decisions about the garage-but my husband could not be in attendance do to a final exam-  adjustment#6.  That appointment got moved to Friday morning- adjustment #7.    I guess I am a bit frustrated as I see my studio time slipping away due to all these unexpected  suspension of work time.      I know life is full of interferences- I guess I just want the interruptions to  be a bit more spread out.  In reality there a where not that many- only one adjustment per day- so I really have no grounds for complaint.

Progress ReportShot of turquoies and fushe quilt showing the beginning of quilting

Circuit Board– formerly Ramble.   I changed the name of this work when I stated quilting it.  After deciding to feature the intersections of the fabrics and reflect the images from the screen printing, it became Circuit Board.   The screen that was used for the print on the fabric from two weeks before was made from an enlarged photo copy of a circuit  board out of an old calculator.    I am  enjoying the quilting process as I look at yet another bit of electronic work from the  inside of an old computer key board as a suggested direction.  There is a lot going on under the surface of the world we live in.


Purple: did not get any attention this week  as I am not at all happy with the arrangement of the parts.  It will just need to be studied for a bit longer until I know what needs to be done with it.

Wiggle -Adventure Challenge:   This top has become part of the Adventure Challenge as a result of the addition of beads. shot of blue and white top with beads added on it  In the new book Enhance Your Quilts- Embellish by  Terry White,one of the many techniques she suggests is the use of fabric scraps and beads.  There are lots of cool ideas to try in this book from my point of view.  I had some scraps of the multi colored fabric form this quilt and some blue beads so I followed one of her suggestions. shot of the beads and the fabric scraps strung together I like the effect of the torn  fabric with the smooth beads  as the contrast id so strong and the texture is so high.     Calling it Wiggle is  a comment on the use of the fabric and may change.

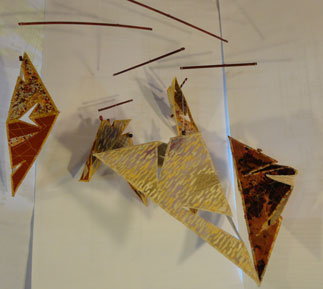
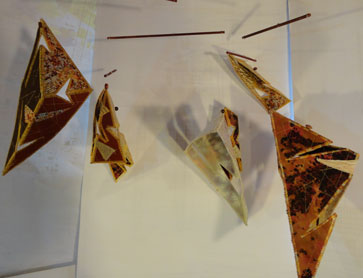
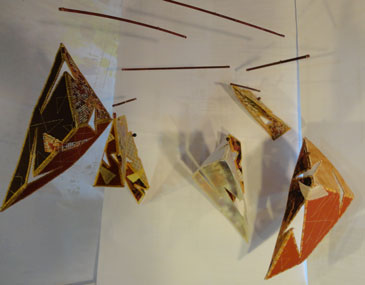
Pyramid Mobile:   This project has been lots of fun and I enjoy the final result.  The colors are a bit weak I think so the next one will be bolder in  that department.shot of the molile #3    Taking photos of the was a challenge all by its self.  Not surprising as it is a  work that moves.shot of molile Shot of molileI really like the play of the shadows with this work.  But I have always been fascinated by shadows.


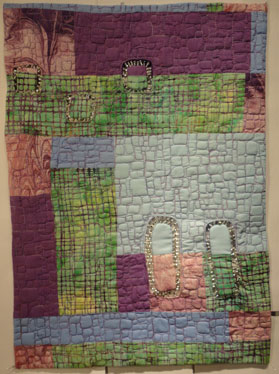
Wholes: working title:   This top has five faced openings  in it.  I was attempting to reflect the shape of the pattern in the green fabric with the openings when I cut them.  I am not sure how this work will develop, but looking and thinking about the problems it presents is a great part of the fun for me. Shot of purpe and green quilt with five wholes


May your week be a calm one without too many unexpected  events.

Keep Creating

Carol

Creative Fiber Collage Artist Carol Boyer