Button Necklace Instructions: Carol Boyer March 2012
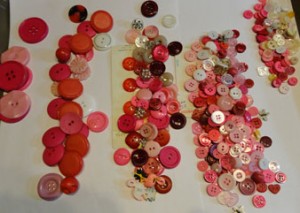
1. Sort your buttons by size into at least five stacks. You need the most buttons in the smaller sizes and as few as five of the biggest ones. ( but do not worry if you do not have a lot of the smallest ones- I usually do not use them too much after the first group of 5(the first two inches) and the last 5( final two inches) of the necklace construction. I usually throw in a few “Fancy” and or color contrast buttons too to add interest. Now you are ready to begin constructing the necklace.
2.Using crochet Hook #6 start by chaining through a shank button twice( I tend to choose a color that is different from the basic color of the necklace so I can find it easily when I am wearing the finished necklace)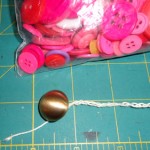
3. Then chain for 20”. Taking note of this point- chain 12 more stitches slipping the last one into the end of the 20 stitch to create a loop. Now stitch over all the stitches in the loop until you have returned to the 20” section.
4. At this point chain through all the stitches back to the button.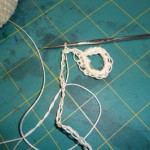
5. Using safety pins- mark the 10” location on the chain between the button and the loop. (I usually put two pins here so I can easily see its location as I work back.) Then mark with safety pins every two inches on the chain.
Step B Adding the buttons:
1. Using the hook and thread turn back one stitch toward the loop end of the chain.
2. Skipping one stitch then slip the hook into the second stitch and make three stitches that hang below the chain.
3. With the third stitch slip the hook through one of the buttons form the smallest pile (you may need to change to the smaller hook to do this process)
4. With the hook, grab a bit of the thread and pull it through the whole in the button and make a stitch with it.
5. Now Stitch back through the first stitches until you are back to the base chain.
6. At this point set aside a button of similar size to the one you just used to be used at the other end of the necklace.( I usually put the set aside buttons in a zip lock bag that I mark A)
7. Chain into the base row, skip a stitch and chain in again.
8. Now you are ready to add the next button by chaining down three stitches.
9. Repeat steps 3, 4, 5, 6, 7, and 8 about five times or until you reach the safety pin. **
Step C Adding two buttons
1. Skip one stitch and chain down three stitches.
2. Slip your hook through the next size up button from your collection and pull the tread back through the loop so the button is on the thread.
3. Now chain down two more stitches and add a button (one of your smallest ones if you have enough to do so) in the same manner as you did the first five times.
4. Now carefully chain up the whole five stitches back to the base chain, being careful not to pull the thread too tightly so the hanging units become stiff.
5. Chain into the base row over two stitches.
6. Start as second zip lock bag to hold the matching buttons for the second two inches on the second half of the necklace. Mark this bag B
7. Repeat steps 1 to 5 under heading C adding buttons to the necklace base and to the bag as you proceed to the next safety pin. **
Step D Adding three buttons and four buttons
1. Skip one stitch and chain down three stitches.
2. Slip your hook through the next size up button from your collection and pull the tread back through the loop so the button is on the thread. (This is the third size)
3. Now chain down three more stitches and add a button (one of your second sized ones.) in the same manner as you have been doing.
4. This time you chain down two more stitches and add the smaller button to the bottom before you turn and chain back up to the top. Again be careful not to pull too much so the chain is stiff. Begin bag C with matching buttons.
5. Chain into the base row over two stitches and repeat step four. Do this action three times.
6. On the fourth trip down you add one more button any were along the way that you feel it needs it. I usually feel the necklace needs and extra button near the top. Do this for drop rows four and five and you should be to the next safety pin. **
Step E Adding five and six buttons
1. Skip one stitch and chain down three stitches. Now add one of your biggest buttons and chain down three more and add another button.
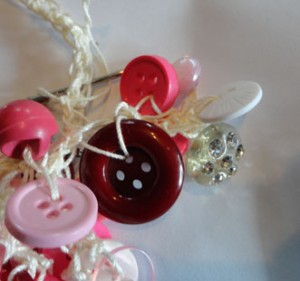
2. Continue to chain and add a buttons in ever smaller sizes until you have five in the line. Then chin back up the string to the base row. At this time I also start to add a novelty button into my mix if I have any. Start a new zip lock bag.
3. Chain into the base row over two stitches to start the next addition. You may increase to six buttons as you near the safety pin if you desire as this is the center of the necklace.
4. Repeat steps 1 to 3 as you proceed to the center safety pin. **
5. CONGRATULATIONS! You are half way done.
Step F Adding five and six buttons.
1. Skip one stitch and chain down three stitches. Again add one of your biggest buttons and chain down three more and add another button.
2. Continue to chain and add a buttons in ever smaller sizes until you have five or six in the line depending on you previous choices. Then chin back up the string to the base row. I continue to add the novelty buttons. Now you remove buttons from the zip lock bag and put them on the necklace.
3. Chain into the base row over two stitches to start the next addition. If you increased to six buttons try to decrease to five as you near the safety pin.
4. Repeat steps 1 to 3 as you proceed to the next safety pin. **
Step G Adding three and four buttons.
1. Skip one stitch and chain down three stitches. Now select a button from you bag marked C.
2. Slip your hook through the button from your collection and pull the tread back through the button.
3. Now chain down three more stitches and add a button (one of your second sized ones.) in the same manner as you have been doing. Repeat until you have four buttons on the chain before you turn and chain back up to the top.
4. Chain into the base row over two stitches and repeat step 3. Do this action two more times.
5. On the fourth trip down you add only three buttons before returning to the top. Repeat the three button addition twice. You should be at the safety pin. **
Step G Two buttons
1. Skip one stitch and chain down three stitches.
2. Slip your hook through the next size up button from bag B and pull the tread back through the loop so the button is on the thread.
3. Now chain down two more stitches and add a small button.
4. Chain back to the base chain.
5. Repeat steps 1 to 4 until you have reached the safety pin. **
Step H Final buttons
1. Skip one stitch then slip the hook into the second stitch and make three stitches that hang below the chain. Add a button from the bag marked A
2. Chain back to the base. Continue to do step 1and 2 until you have fie ore six buttons on the base or you have reached the loop.
3 Tie off the thread with two knots and weave the tail into the chain.
**
I recommend that you do this every two inches or each safety pin- but you may not want to stop at the safety pins.
1. on a piece of scrap paper squeeze out a drop of white glue.
2. With a tooth pick dip into the glue and then slip the tooth pick into one of the stitches in each hang down row of the necklace. This little bit of glue dries clear and will assure that the necklace dose not pull apart.
CONGRADULATE yourself and wear you buttons with pride.
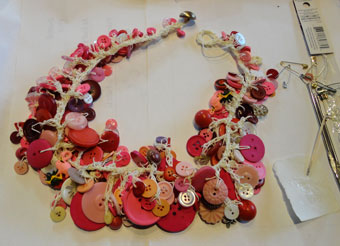
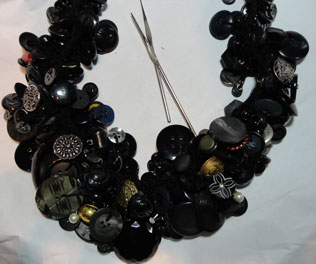

thanks for the post buddy.http://www.comodesbloquearcelular.net
Very interesting points you have observed, thanks for posting.
this was a great report.http://www.revendaautorizada.com