
I enjoyed creating these little fellows and I want to share how I did it. 
Here is the pattern on quarter inch paper so you can see the size of the pattern parts. I will add the size of the units as I use them.
1. Cut four yellow body parts. ( that is two and a half inches on the bottom and at 3 inches from the bottom edge begin a gradual taper to a point 5 and 1/4” from the bottom – try to keep it rounded. If you want a taller minion add to the strait sides of the minion.
 2. Leave one part plain( this will be the back. Stitch hair on two of the units if you want the Minion to have hair. Cut the goggles( see the pattern- they look like an eight on its side) On the last side glue the goggle eyes behind the goggles and then stitch around the eyes. Follow this with a mouth.
3. Now carefully stich  he units together doing one side to the back and one side to the front and then stitching the two units together. If you want stick up hair add it when you do the seaming. Turn
 4. Lightly stuff the top of the body. Now take a narrow strip of gray felt and stitch it around the head to create the goggle band.
5. Take two of the pipe cleaners and fold the first in half cut in the center. Fold this pipe cleaner in half. This will become the center finger of the hand. Then fold the second piece of pipe cleaner in half- then fold up about a 1/2” and then down again This creates a “M” shape that needs to wrap around the remaining section of the pipe cleaner toward the cut end. Take one of the yellow felt rectangles that is 1” X 1 3/4” and rap it around the pipe cleaners and stitch it closed with yellow thread. ( repeat step 5 to do a second arm)
 6. Position one arm in the center of the left side of the body about 1/2” below the goggle band and stitch it to the body. Repeat for the right side of the minion.
7. Take the pocket and stich a “G” in the center of the black diamond that will then be stitched to the center of the pocket. The pocket with the “G” then gets stitched to the pants unit. I trim away about 1/3”
  from the pants unit to create the “bib” and begin to attach the pocket. Using a running stitch I work around the pocket and start across the bib stitching the pans to the body as I go.
 8. At the corner I stop and add the suspenders with a small button on top. I continue stitching the pants to the body around to the back.
9. The suspender needs
 to be pinned in place if you want them to cross. The second suspender needs to be pinned on the front and on the back and stitched down when it is reached. I overlap the front and back and then trim. Continue to the running stitch around to the front of the minion and bury the thread on the inside when the circuit is complete.
10. Stitch closed the back of the pants with blue thread and star to add the blue base circle to the minion. Do not stitch too far around the circle.
 11. Legs are made with a the pipe cleaner each. Fold in half and make a small foot at the end. Using one of the two black rectangles that is 1” X 2” warp the unit around the leg above the fold and stitch to the pipe cleaner and end. Do the same to
  the second leg. Then stitch the blue unit to the top of the leg in the same manner.
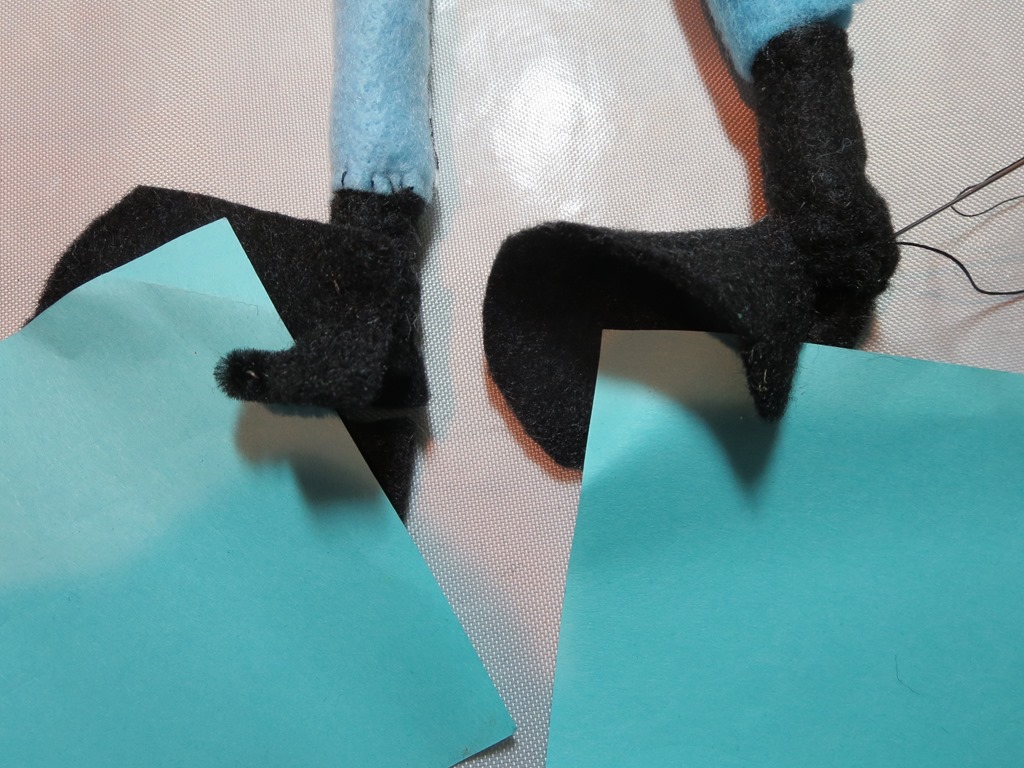 12. The toe of the boot is made form the arched black felt . One side of the bottom of the arch is tacked to the heel and then wrapped around the pipe cleaner toe. stich the unit together
 tucking the top in over the toe and back.
 13. Add a bit more stuffing and start to stitch around the bottom of the Minion. The legs are then stitched to the front of the body unit below the suspenders as one reaches that point on the circle. Keep stuffing as you work forward so that it is full enough to set flat and hold its shape.
The materials list:
1. one sheet of yellow, blue, black and gray felt( about .29 cents each at Michaels)
2. Three black pipe cleansers
3. goggle eyes
4. small buttons
5. embroidery thread black and blue
6 Batting to stuff the minion with
Equipment: scissors, needles and a sewing machine is nice- but the parts can all be connected by hand
I love these little guys, Carol! They must be relatives of your sweet dolls that you distribute bite far and wide …