Category Archives: Uncategorized

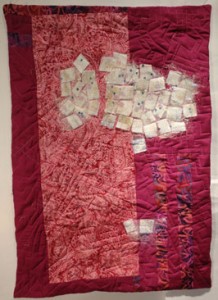
May 17, 2012 Spring Leaves

Hello,

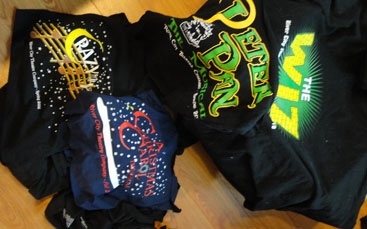
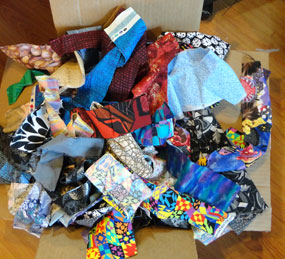
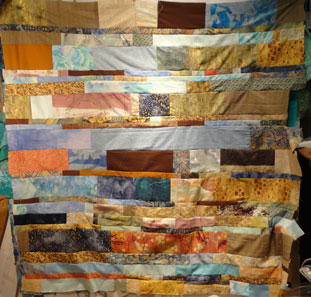
I am still enjoying the unfolding of spring here in upstate New York.  The oak tree is now leafing out and I enjoy the wonderfully translucent  apple green of the leaves.   They are so very delicate and frail now. The shadows they cast seem some how softer too.   I know that  they will thicken and change color in a week or two.  The tree is flowering as well and the long pollen filled pale green blossoms are falling all over the walk and drive.  The season seems to be doing double time with it’s amazingly fast changes.      I realized that I need to do a bit of double timing myself as graduation is just around the corner for my grandson and my nephew.  I got a box full of tee shirts from Zane for his quilt this week.  He has been in 22 plays and wants his quilt made from them.Shot of the box of tee shirts showing some cut and some full sized    Most of them are black with a few blue, one white and one green.  I have already put in an  hour and a half  cutting away the backs and arms and I still have five shirts to go.  I will then iron fusible interfacing to the backs so they will not stretch before I add sashing.   Zane’s graduation date is the 25 of May so I will be late with this gift, but he seems OK with that.  When Nick was asked what kind of quilt he wanted he told me he just wanted lots of color. box of scraps   So yesterday I started through my stash cutting  three strips from different pieces.  One strip was about 1.5″, the second 2.5 ” and the third was4.5″.    The pulling out pieces and  cutting  process made me realize I need to do some refolding and sorting.   I will sew all the strips together in a random manner and slice them again.  It will be a real playful quilt.       I will enjoy that process.
Progress Report:   Wiggle Wiggle – Adventure Challenge( previously Blue Boundaries)
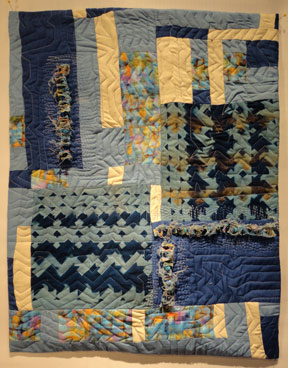
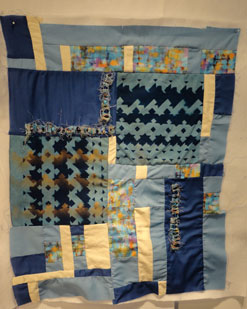
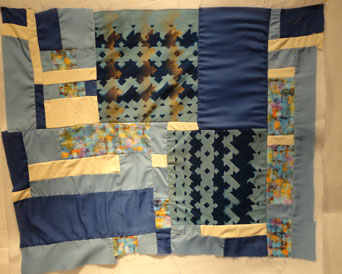
Full shot of completed quilt showing blues, cream
Wiggle, Wiggle 17.5"X 22.5"

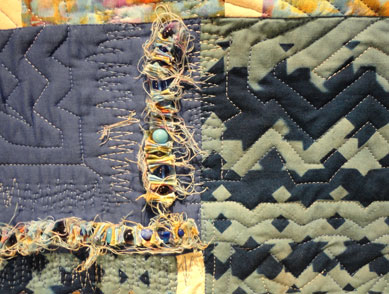
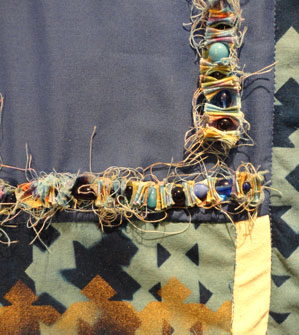
The cream fabric on this project is from an old silk shirt.  I sun printed the blue patterned fabric using paper stencils I created by cutting away parts of scrap booking pages.    The texture and the reason this quilt belongs in the Adventure Challenge category is  from Terry White’s book Enhance Your Quilts- Embellish!   The process is one where you take a slender strip of fabric and accordian fold it.  Then you slip a threaded needle through the folding and insert a bead.  Then you continue folding and inserting beads.  If you come to the end of the fabric and you want a longer unit, just add more on.   It  close up showing the printed area and some of the bead work toois fun and the fabric add interest to the beads.
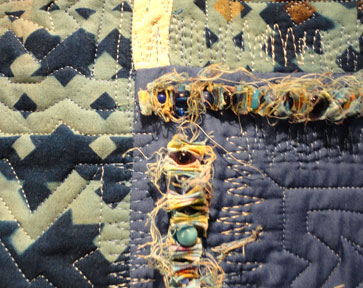
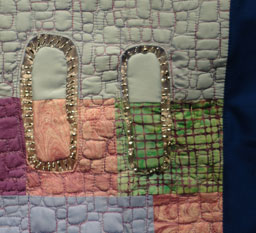
Opel Opening- renamed Cobble Stones- Adventure Challengeshot showing two of the cut out units and the faggotting with silver and clear beads.  is still in progress.   This quilt uses the whole process and the suspension of the cut outs with the faggoting.   I like how the faggoting is going, but that process is very slow for me .  Now that comes from Louis Ericson’s book, Design&Sew it Yourself. This shot shows the quilting and on the right you can see the dark blue that will become the facing for this quilt.


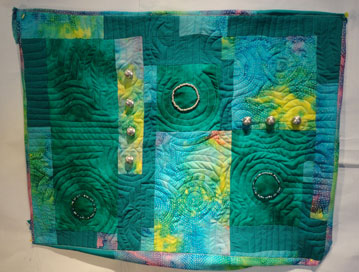
Wrinkle Work- Adventure Challenge
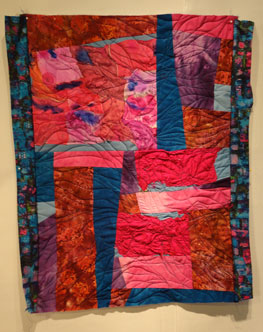
Shot of fusha and blue quilt.  I had lots of fun with this project.  I tried not to make the pieces square and that turned out to be more difficult than I expected.  It stared with three pieces of fabric that I had previously sewn wrinkled silk toThat process is from Louis Ericson’s book too.   Then to quilt this work I started sewing lines from the end of the lines on the silk units.   The final effect of the quilting is a lot like water flowing around rocks.    This quilt has turquoise print  panels on left and right sides that will become facings.
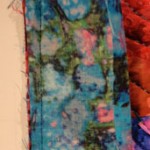
This close up shows the facing good side to good side with the quarter inch seam shewn.
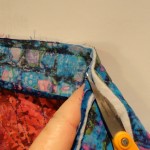
This shot shows the trimming away of the batting and the backing so the facing is flat and the bulk is minimal.
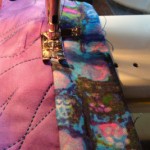
This shot shows the machine tacking the facing back to create a crisp line when it is pressed and then hand stitched to the back of the quilt.                                                                                                                 This last shot is of the facing turned to the back and ironed in place the pin is holding it and I will hand stitch the facing to the back.  You can see the machine stitching line along the far left just inside the turned area.   I think the fact that I used the same material for the backing and the facing makes this hard to see.
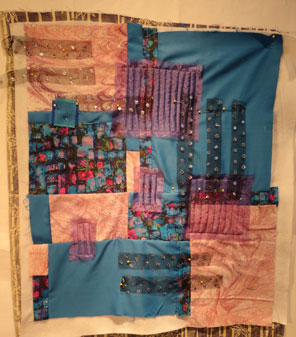
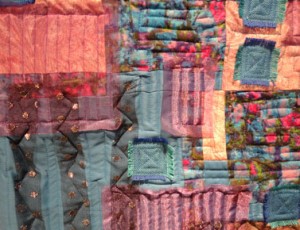
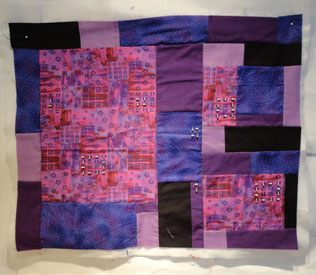
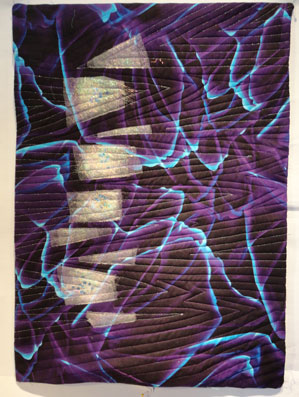
Purple Procedure    This work had been shifting around on the design wall sense the  April 26 post when I noticed how the while unit in the center became a big  whole to my eye.    I have added ribbon on top and built up the surface a bit and that is helping solve the problem.  .
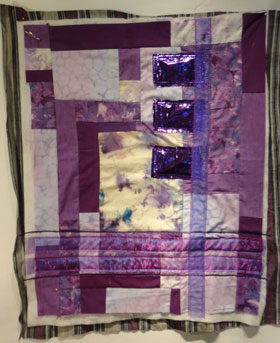
Purple quilt with ribbon and celophan added on top  I plan to do some hand stitches and add some beads to the surface as well to help this quilt along.


Slipping Away- working title

This is the back unit for some more of my slipping through units.  It is made up of some of the same fabrics that I used in Beth’s quilt from Dec.   I wanted a bold but low contrast body to pass through.   I am leaning toward a blue or green at this point.  I will try several combos before I make the final decision.   I think this will work.


Blue Blocks
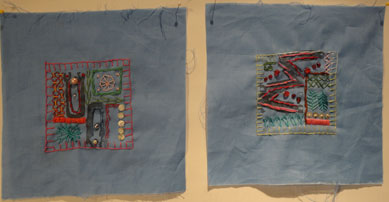
   This photo shows two of the hand blocks that I have been building  this year as my weekly mini projects.   The block is 8.5″ square with a 4″ square in the center.  I stamp two or three of my hand carved stamps in the blue center and then embroider and bead around the square until I feel it is finished.   I will show two every week until I catch up with the completed blocks.   These may become my Calender for next year.

Keep Creating

Hugs

Carol
Bird Calls May 10, 2012

Hello,

I was awakened while the world  was still dark today by the birds.  “Calling up the sun ” was what Grandfather Howard called the predawn bird songs.  The birds have been an active part of my life over the last few weeks.  I watch two Cardinals vivaing for the territory near the front window a few weeks ago.  They kept flying and screaming at one another for the better part of a sunny afternoon.  I do not know who won or how they decided who would occupy the area.  But I do know one proud fellow sits on a branch of the oak that  stretches over the house and sings from that point on a regular basis.   I also see and hear Robins, Black Capped Chickadees  and various other birds while I am out of doors.  The crows who are so present all fall and  winter seem to have found other places to haunt as I do not see or hear them much at all.    I do not know or recognize many bird songs but I do enjoy there cheerful sounds.

Progress Report: Circuit Board

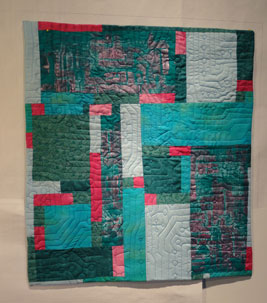
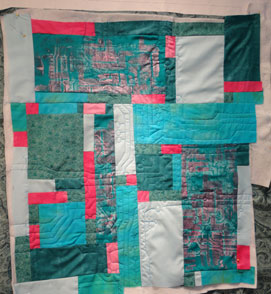
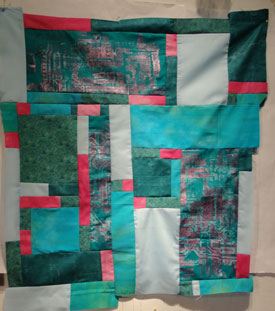
Full shot of the turquoise and fusha quilt
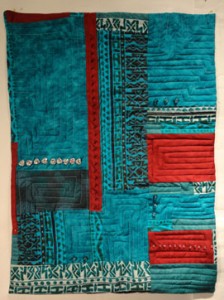
Circuit Board 20"X221/2"

   This quilt is completed now.  I enjoyed doing the quilting in the pattern of the circuits and hope I can find a new place to use that pattern.     There is still fabric remaining with the print of the circuit board on it so it will appear again some where.   I have also decided to include the size along with the title for the works that are what I consider complete.   I also have a bit of real circuit board out of a computer key board that would be fun to stitch into a work sometime.

Wiggle,WiggleClose up of the top showing the quilting.  Adventure Challenge- 

I am only showing a close up of this work as it is nearing completion.  I still need to hand stitch two facings down and to add a sleeve to finish this piece.   It will be done for next week.   The texture here is soft and only stick out about 3/4 inch.


Wholes- renamed Opel Openings 

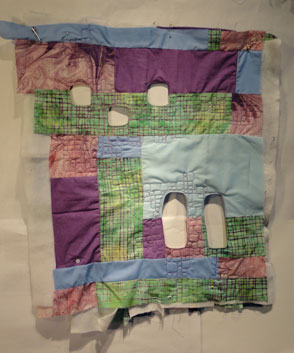
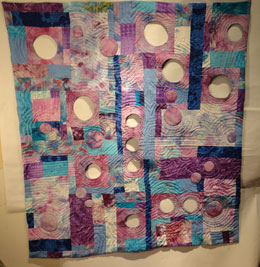
Full shot of the partul quilted purple green and blue quilt. Five wholes in this work

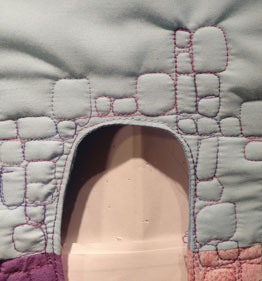
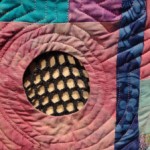
I am making progress on this quilt.   I decided to make the quilting as a reflection of the openings.  I know lots of other quilters use pebble quilting but this is my first try at it.   I know understand why it is so popular as the process seems to just flow along.   shot of oening and quilting  I also plan to use the faced shapes that where cut out of the quilt as a part of this project.

shot of this blue green adn fusha quilt in progressBerry Blasts

It was suggested a that I show my process a bit more.  So here is a sample of that.  I made this top with the intention of applying the painted lace on the top of it.    Here is the audition of the lace.  It did not work in my eye.   The background is competing too much with the lace.    So I removed it and tried another  solution.    Turning the top 90 degrees  helped give the quilt a stronger orientation.   But is did not have a focus to me.      So I created so  triangular shapes on top.  After pinning   Angelina to the surface was much happier.  I  find the new look much more agreeable and it has a much lighter feel to me.

Blue and pink top with netting on top Layers and Lines

I am having fun using transparent fabrics here.  They add so much dimension to the surface when the quilting is added.

Close up showing more of the quilting

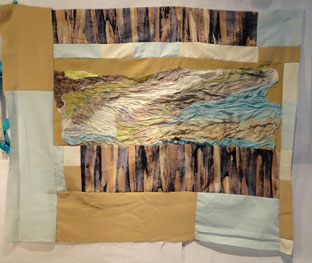
Sea ShoreTop  in blues and browns featureing a silk landscape type center. -Adventure Challenge:  This piece belongs to the Adventure Challenge because the wrinkled silk that creates the image in the center grew from the Louis  Ericson’s book.  I tried her method of crinkling silk and then sewing the wrinkles  down to create a texture.  I only saw the landscape in the silk after it was applied.  Then I tried to add a bit to that feel with the material that looks like an old fence to the work.


The weeks sure seems to be flying by.

Keep Creating

Hugs

Carol
Adustments May 3, 2012

Hello,

I got  two  new pairs of  glasses  this week.  One pair is  specially  for close work, like the computer, reading  and stitching.   What an adjustment this has become- taking them on and off…. the not having them handy and having to search for them when I want to get going on a project.  I know I will get the hang of it with time- I just do not want the disruption.      Adjustment and disruption have become the words of this week for me.   It started out smoothly with last Thursday’s outing with three of my friends.  We went for a Shop Hop to break in Liz’s new car.   I tried to build my green stash a bit as it seemed thin when I returned fabric to my shelves the day before.

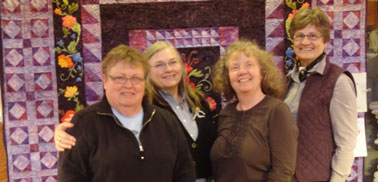
All four of us in front of a raffel quilt
Liz,Carol, Nancy,and Dorla

We had a good time and enjoyed the day.   I  am glad to say that I did stay under the limit I had set for my spending.

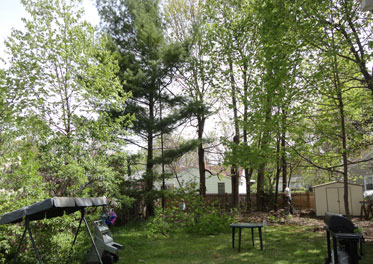
We are having a garage built and that requires a few adjustments too.  We needed to cut down some trees in the back yard so I called the tree men and to my surprise they appeared in 15 min.  I though they would give me an estimate and we would plan from there- but they where ready and willing to do it then.   So I said yes.   Now that is not much of an adjustment- but it was unexpected and I could not help but be pulled away from the studio to check and watch the trees fall.before shot of the trees to be cut      Below is a before shot.  They took down five trees.   The wood men did not have their shredder with them so they offered me a deal.  $400 less if I would drag the cut down tree and limbs parts to the curb for city pick up myself.   The money made me agree- adjustment #2.  I know have that job awaiting me, but I will get help from the 19 year old on Monday next week  after I take him to the Dr-adjustment  #3.   Tuesday went as I had planned and I went to both of my quilt meetings and got the usual stimulation.  Wednesday morning I hit the studio all excited for a full day of   using the some of the new  fabric and exploring some of ideas from the day before.  I did a little work and then a phone call from Alexis and the school nurse, interrupted me.  She needed to see a Dr do to a foot injury- adjustment #4.   By the time that was all settled the day was gone.  We have a follow up Dr appointment on Fri- adjustment #5.  This morning I expected to see the contractor to make final decisions about the garage-but my husband could not be in attendance do to a final exam-  adjustment#6.  That appointment got moved to Friday morning- adjustment #7.    I guess I am a bit frustrated as I see my studio time slipping away due to all these unexpected  suspension of work time.      I know life is full of interferences- I guess I just want the interruptions to  be a bit more spread out.  In reality there a where not that many- only one adjustment per day- so I really have no grounds for complaint.

Progress ReportShot of turquoies and fushe quilt showing the beginning of quilting

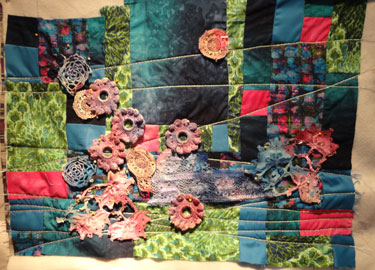
Circuit Board– formerly Ramble.   I changed the name of this work when I stated quilting it.  After deciding to feature the intersections of the fabrics and reflect the images from the screen printing, it became Circuit Board.   The screen that was used for the print on the fabric from two weeks before was made from an enlarged photo copy of a circuit  board out of an old calculator.    I am  enjoying the quilting process as I look at yet another bit of electronic work from the  inside of an old computer key board as a suggested direction.  There is a lot going on under the surface of the world we live in.


Purple: did not get any attention this week  as I am not at all happy with the arrangement of the parts.  It will just need to be studied for a bit longer until I know what needs to be done with it.

Wiggle -Adventure Challenge:   This top has become part of the Adventure Challenge as a result of the addition of beads. shot of blue and white top with beads added on it  In the new book Enhance Your Quilts- Embellish by  Terry White,one of the many techniques she suggests is the use of fabric scraps and beads.  There are lots of cool ideas to try in this book from my point of view.  I had some scraps of the multi colored fabric form this quilt and some blue beads so I followed one of her suggestions. shot of the beads and the fabric scraps strung together I like the effect of the torn  fabric with the smooth beads  as the contrast id so strong and the texture is so high.     Calling it Wiggle is  a comment on the use of the fabric and may change.

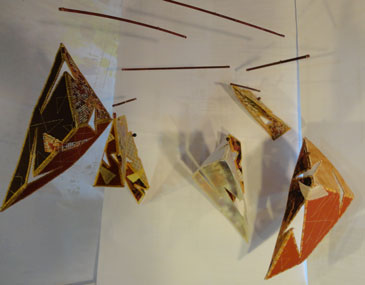
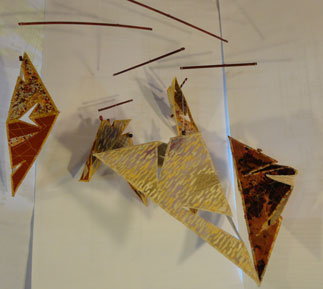
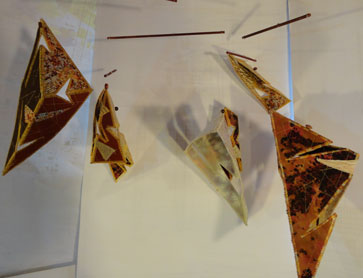
Pyramid Mobile:   This project has been lots of fun and I enjoy the final result.  The colors are a bit weak I think so the next one will be bolder in  that department.shot of the molile #3    Taking photos of the was a challenge all by its self.  Not surprising as it is a  work that moves.shot of molile Shot of molileI really like the play of the shadows with this work.  But I have always been fascinated by shadows.


Wholes: working title:   This top has five faced openings  in it.  I was attempting to reflect the shape of the pattern in the green fabric with the openings when I cut them.  I am not sure how this work will develop, but looking and thinking about the problems it presents is a great part of the fun for me. Shot of purpe and green quilt with five wholes


May your week be a calm one without too many unexpected  events.

Keep Creating

Carol

Rain April 26, 2012

Hello-

We have had a lot of cold and  rain this week. I was especially aware of the rain as I drove home this morning.  I like the sound of the wind shield wipers as they slap across the glass in their rhythmic action.  When I got home I sat in the drive and   watched the drips run down the window  and noted  the colors of the world reflected upside down in the streaming droplets. Light on the bottom dark at the top.   I so  took walk in the rain  that I went around the block before I retreated into the house.  Some how the world seems calmer or closer  when it is raining.  The drumming of the drops on the umbrella create a rhythm- a dance that I enjoyed ,but could not match.     I enjoy the fan splash of water created by swift cars, but only when I am not in the path of the spray.  The rain  ring  patterns on the pools are also fascinating to me.   The world is greening up around here and I am sure this rain will push that action forward.

Progress Report:  

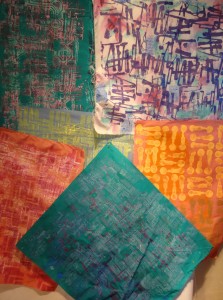
Lots of new work this week.  I started out silk screening and then  over printing fabric.Sample of some of the printed fabric    This shot shows some of my creations.  I find that when I get going on this process I do a lot of images not knowing what  they may become- but sense I am making a mess I just have a lot of  fun.   As it turns out I used two fabrics that I produced in tops this week and one even got all the way to the framed stage.

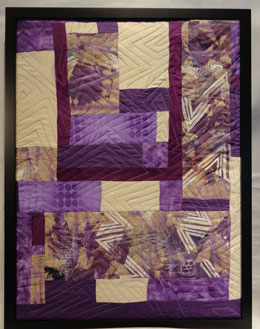
Intense

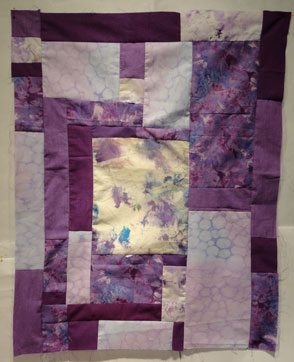
Purples and creams with the stamped fabric in the same color pallete   
Intense

Thia work was one of those rare works that seemed to have a mind of its own.   So from the first cut of the painted material and it’s placement on the pin wall it all just came together.    Even the quilting pattern was suggested by the white patterns created by the stencils.   I do not resits when this happens but  just go along when the fingers seem to do all the work without my “controlling” things.

Ramble( working title)  This top came from the printed  fabric in the upper left hand corner.  It is a top that I put together yesterday afternoon. I like the intense colors here.   All the small fuchsia sections really make the eye travel across the surface of  this work and the big solid sections give your eye a placTurquoies light blue and fusha top in various sized squarese to rest.


Purple Procedure    This top is a  personal challenge, as it  has such a strong central plannel surrounded by the purple rectangles.  It has almost become a whole.    I am not sure how I will solve this design problem at this point. Variouse sections of purple fabric around a cream center.Blue Boundaries    top with cream and variouse blue fabrics
 This top was actually the first one I did this week and started me on the printing  .  The beep blue  patterned fabric was created last summer at Quilting By the Lake  in the Independent Studio.  I came across it while looking through my stash and it excited my fancy.  In looking at this photo I see I may need to take out some of the seams as there seems to be a great deal of puckering here.


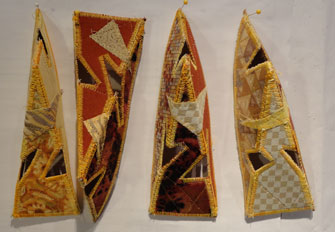
Pyramids   These four fellows are going to be added to the  3-D sculpture  I started in my workshop a few weeks ago.  I needed time.  I am thinking that they may all work together well now.

 Four small pyrmids in shades of brown and cream   I am feeling quite comfortable with this constructions process now and want to go forward with the inter action between the forms.  Choosing the fabrics to be used on the various sides of the units turned out to be a more difficult design decision than I expected- especially  sense I do not know for sure how they will interact with one another.  I just seem to plow blindly forward however.  I have realized that I can re make any unit and fix a color problem in the future too and that is very freeing.


Keep creating friends and enjoy the daily changes of this season.

Hugs

Carol

No Water April 19,2012

Hello Readers,

Spring is here and I am enjoying the sunshine and the greening of the world around me.  We experienced a turn off of our city water for the better part of one  day this week while some work was done up the street.  I am thankful for the warning so I had time to fill pots and the bath tub  with water before it was turned off.  After seven hours we are back on the city’s system and there is a big patch on the right hand side of our street up near the corner.  I had not  used much of the water I had stored by the time the trucks closed things up and went away in the afternoon,  but the loss of the water from my tap set me to thinking about how much I take it for granted.  I never had to carry water from a well or pump, but I can imagine how necessary and difficult a job that must have been and still is for millions across the globe.  My grandmother Ruth told me stories of how the water she had to pump was used repeatedly.  First use  in the kitchen was to wash  fruit or vegetables. Then the water went  to wash the dishes and then to wash out a shirt or some other garment if it was not too dirty.  It might then be used to wash the floor and if there was still any water left it was used to was the sidewalk out front.    Not a bit was wasted on just one use and never pored down a drain as we so calmly do after just one use now days.    The fact that I could not paint fabric that day as I had planned is just a temporary set back  and I will print today with a lot more care.    We can not live without water.   I plan to be more aware of my use in the future.

Progress Report : Glide

full shot of the truquoise and green quilt with the matal add ons
Glide

  This quilt is finished now.   I like how the metal looks against the fabric.  It is the  high contrast in texture that I find exacting I think.    I did the quilting with a thread that matched the embroidery thread to unit the quilt as well. image slowing one of the glide units plus a little quilting and the embrodery stitches around itPurple Squared

 Fianl shot of the purple quilt
Purple Squared

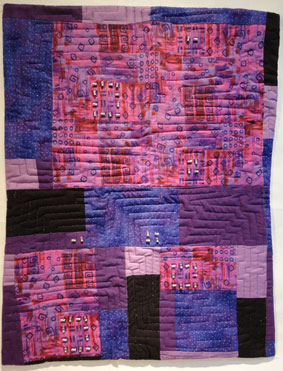
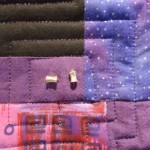
This quilt is  now finished.  I quilted it with purple Madera Super Twist thread in a pattern that reflects the bead created squares on the surface.   I seem to be in a purple mood at the moment as I have material pulled for another quilt on the cutting table.

close up showing two of the silver cylinder beads .


X ed Out    now titled  Raw

 Final shot showing the finished quilt
Raw

I decided to rename this quilt as I finished it.  I like all the raw edges and the primitive nature of the whole thing.  The idea of calling it X ed  Out was based on the big X stitches I used to add texture to the white squares. Some how that term seems to diminish the feeling I wanted to create and the word ” raw”  does a better job.    It is a work that came about do to the cut away parts form my cutting up a bigger work.   The scraps where so colorful as they lay scattered on the cutting table – I just had to use them.    This piece is more of a defiant  thing and not something to be discounted.   Raw says that.


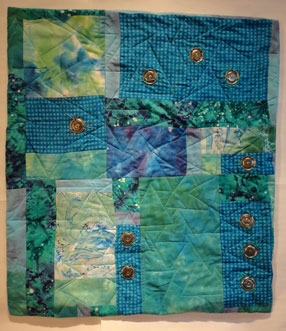
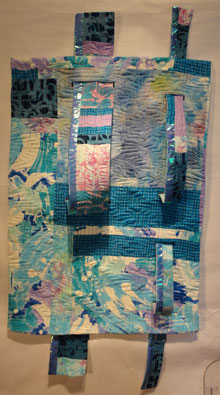
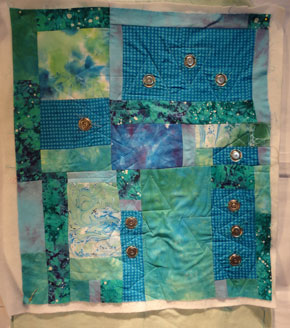
Pull Away   This quilt has been in progress sense the fall.  I just was not sure how to finish it.  But when I pulled it out this week I knew that I was really happy with how it did appear and so I added the snaps to the strips and now the job is done.  I have been Full shot of turquoise quilt with two long units that thread throug and stick out from the surfaceplaying with the idea of a surface with parts that come forward and this is the second attempt at that idea.  The creative work at the Philly show has really encouraged me to go froward with this idea.

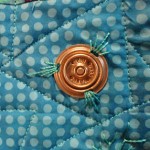
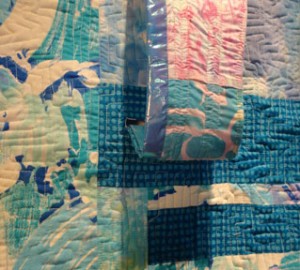
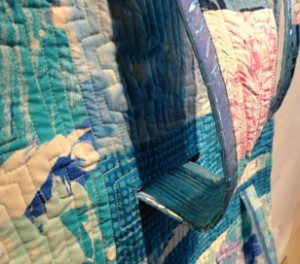
Close up of one of the loopsThe loop really do stick out about 2.5 inches from the surface and the shadows are really exciting I think.  The fact that I used a metallic  fabric also adds to the way light effects the surface of this work. I am going to keep playing with this idea.  This second view shows better how far away from the surface I am pushing the quilt.  I always have loved texture and now I am pushing toward sculpture I a bit.side view of the looping sectionI hope spring is dancing on your door step.   Keep Creating.

With Hugs

Carol

Spring Things Thur. April 12, 2012

Hi hi,

I am still feeling a little behind – natural I guess what with being away and then holidays.   The kids are out of school this week too and so I have done a lot with them.  The weather has not been very cooperative for doing work out of doors, but we did  do a little.  Raking the last of the leaves  and getting the grass ready  it’s first mow. The leaves are starting to bud out and screen off the views of neighbors homes and yards too.   I enjoy the fresh green of spring and the transparency of the leaves.   I am looking to start a new round of Project Divest- or perhaps it is just Spring Cleaning.   I have contacted one of the local Elder care homes and I will deliver a dozen quilts on Monday to decorate their halls.

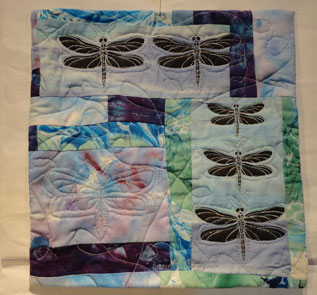
small quilt in pale tones of blue and green with dragon flies printed in black
Dragonfly Days

I will take photos this time and try to do a little article for the local news paper in order to encourage others to pass their work on into the world.

I did finish quilting  my Dragonfly Days mini quilt for the SAQA auction this week.  I need to add the sleeve and do the documentation and it will be ready to send.   I had a good time outlining wings in Maderia metallic thread.  I am hopeful about being a more active participant in that organization after the conference.


Progress Report:

The 3-D project is still on the wall.  I am not sure where I want to go with it so I will let the piece rest until I “see” a future for  it.    I have been busy working on the tops that I had started before I was away.Shot of all three sections interlocking

Dawn’s GreenHorizonal quilt in green and yellow with silver baeds

I need to tack the facings back and add the sleeve and this one will be complete.  This is the end of Dawn’s green fabric from the DMC  project and that is where the name came from.  I had fun quilting this one with all it’s circles.  As I look at it now however I may replace the silver beaded circle with a glass beaded one as it seems too strong  for that location.  Design decisions  like this one must be made visually I think.


Glide

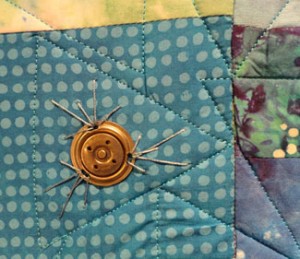
Blue green and turquois with metal glides on the surfaceThis quilt  top was made on the same day as the one above.  I sure must have been in a “Blue Mood”  that day- or more likely I had all the colors out and they just came together in two works.   Glide features some metal units that come from Grandmother Ruth’s home.  Mom boxed up lots of stuff from her house when she emptied it and sent me several.  As I keep sorting through them I keep discovering these strange treasures.  The brown envelope only said glides on the outside so I assume that these where for furniture legs. I stitched each one down with a different stitch pattern to make them interesting.       I am about half why along with the quilting  with the triangular  patterns.Cloes shot showing the metal unit and my fancy stitches WOrk in shards of pruple with silver durm beads on top in square patternsPurple Squared

This is the third quilt I started.   I applied the silver drum beads in square patterns to reflect the print on the fabric this time.  It is ready for me to begin quilting.  I am still in the “think” stage for that step.


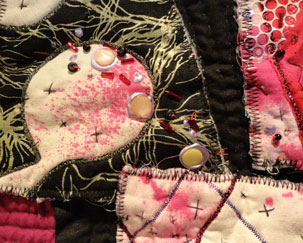
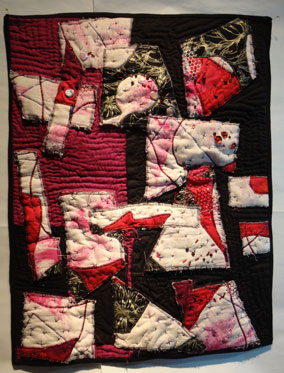
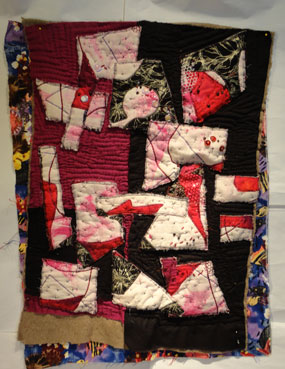
X ed OutBlack and fusha background quilt with cream and fusha appliques      I have lots of mixed feelings about this work.   It was created from the leftovers of the cut up quilt  that I made  the mini from.  They where all lying there on the cutting table and looked so challenging.   I may have gotten carried away here.     I love all the hand stuff- but I am in question about it.  I really like the overlap of the applique parts- and the negative  space is strong.     I hope that trimming it up and squaring it off will help make the work feel more organized.   The title may say it all and it may just be an experiment to toss.    We all have failures when we step out of our usual methods of the creation process.          Detail of the Xed stitches and part of the bead workI hope spring is dancing at everyone’s door.

Keep Creating

Carol

Philadelpha April 5, 2012

Hi All-

I am just home form my wonderful experience in Philadelphia.  I am sorry if you checked in last week and there was no post.  I did the work on Wed and tried to post from the hotel on Thur eve- but I had no success.  Sometimes the technology is beyond me.

I did enjoy the drive down to as the trees are starting to open and things are greening up the father south one ventures.  When I went for walks along the river next to the hotel I saw Dog Tooth Violets and Blue Bells.   The Van Goth Up Close Show at the Philadelphia Museum of Art was my first stop.  It was amazing!  I had only seen to of the works presented before so my eyes where hungerly looking at each work.   I have always enjoyed his use of heavy paint- but I was not prepared for the use of the  color red.  There where paintings of grasses and fields in large numbers of green tons and shades and then Van Goth would throw in one ore two thin little dashes of red!   It would wake up my eye and make me look for more surprises.  I saw lots of red by the end of the show in all sorts of unusual  places like the weave in a basked of fruit or in a shadow.   I was jazzed by the end of the show and even though I tried to look at other exhibits  in the museum- that process was useless- I was viewing  brain full.  As my friend Barbara would say of the students when we would take them to the Museum of Modern Art- I had”museum feet”- and was overwhelmed and needed processing time to absorb it all.

The Identity:Context and Reflection conference sponsored jointly  by the Studio Art Quilt Association and Surface Design Association started on Friday morning.   There was a great lecture by Bruce Pepich titled ” Museums and Contemporary  Fiber Art: Where Are We Today?”.  He held up lots of hope for a strong growing interest in fiber works as a growing field for museums.  He also noted the changing complexion of fiber/weaving departments  in art schools curriculum’s as further proof of  the change in attitude toward this art.   The rest of the day continued with more information in the form of a slide show and two panel discussions about fibers.   The evening  included a trip to the Wayne Art Center where we participated in the opening and awards ceremony of the Art Quilt Elements 2012  Show.    What a visual feast that was too.  It was great to see and talk with so many of the artists about their work and have them explain about specific parts.   I purchased the catalogue and although is does not  have the impact of the actual event- I still find I am drooling over the images.   Perhaps I was sensitized to red by the Van Goth experience- but it seemed like there was a lot of red and orange in this show too.     Saturday morning we boarded buses and started touring Fibers Philadelphia.   There where nine spots on the tour with at least two galleries in each area and  five in several.   I took lots of photos for my own enjoyment- but because I did not get permission form the artists I will not post any of them.  I was amazed at the variety of images and materials from knitted  wire jewelry to the fanciful use pin tucks for building surfaces in a fine quilt.  For the second time I went back to the hotel with “museum feet” and  image fulled head.   The Sunday morning session was a good as Fridays had been.  Sandra Snider did an especially fun bit of roll playing to the theme ” And What do You Do?”   She helped us all see how we as Artist can approach this point at the beginning of conversations and present ourselves in a more positive light.   It was great.     I then hooked up with a three other gals, one from Texas and two from Oklahoma and we went back and visited three galleries we had missed the day before.   Our last top was the studio of one of Dianne Koppisch Hricko  who’s studio is housed in the same building as the  “In the Box out of the Box”  fiber show.    It is great to see another artists studio space.

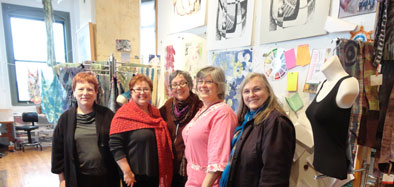
the five of use in front of her board    Dianne is primarily a fabric dyer who works a lot in silk.  She is the gal in the middle of the photo.  Michelle   Lasker  is far left, Janice Filler second,   Dianne,  Sharon Hedges is forth and I am on the far right.  For a second time I went to bed with lots of new fiber images in my head.


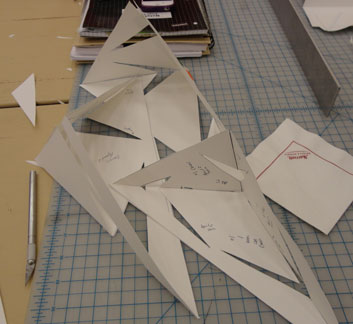
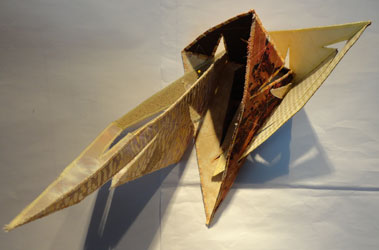
I was glad to get up on Monday and go to a workshop where I would be focusing on one thing.     Cameron Mason was my teacher and the class was Beyond the Surface:Sculptural Explorations with Soft Materials.   What fun for me!    She did a great little power o point to start us off . Them we did a little sketching and she demoed some ways of working and we  all went to work.  Our first markets where in paper and tape.  It was fun to see how things would fit together.   I settled on a open pyramid type form. White paper units  I continued my exploration of openings with this project too.   After the paper was worked out we moved onto cutting the forms in  Pentex.  She made us sew them together before we went forward even though we cut them apart.  This step allowed for design changes before the fabric was added.  The fabric made for a whole new set to design decisions.


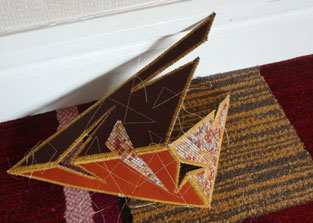
Shot of one unti in progress                                                                                                                                                                     This is one of the units half way assembled.  I stopped and fray checked all the thread ends Shot of all three sections interlockingbefore I sewed the last side by hand.   I think now that I used too may fabrics in the three units- but this is a beginning project and not for a serious piece.


This shot shows all three finished units.  The wholes where the most fun.   I sure like the shadows and  sense they are not connected to one another yet I keep playing with new set ups.  They might even make a very nice mobile too.


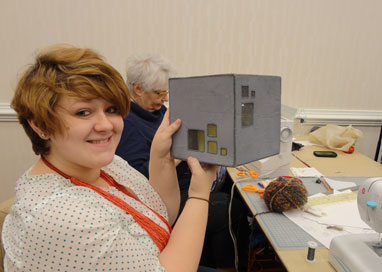
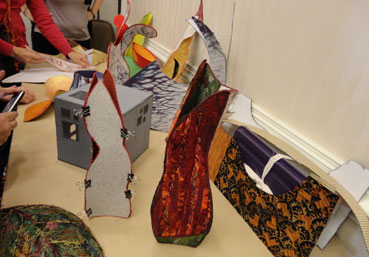
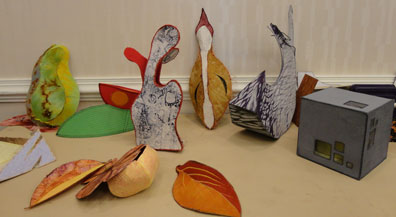
There were as many different directions to the use of the materials as there were folks in the class. Only the Kathleen, who was setting across the table and I did geometric shapes.Katheekn and her box   You can sort of see the yellow box within the gray one from this photo. It was cool.   The others were wonderful too.  I want to keep playing with this idea and I hope to do some more natural forms in the future.

 group of works                                                                                                                                                                             Several of us did not get things at all completed( note the clips and the books inside the one on the far right.  Seciond shot of the table  It sure was a growth experience and something we all strive for when it comes to learning.

I am sure I will be playing catch up with myself for several days before I get back into the studio- but I am anxious to do so.


Keep Creating

Hugs

Carol
Unexpected…. March 30, 2012

I am a bit off balance as there was an accident involving my friend on Wed.  She fell and after stitches she is OK- but unwilling to go to Philadelphia with me.  I am sorry and I will miss her presents this week, but I understand  things change.  I am fine doing the events on my own and the excitement will just be diminished without her.    Life is really a paradox because we must act like all our plans will work as we intend, but there is always  the possibility that they will not.    So I need to stop feeling sorry for myself and just be glad that she will mend and we can share another experience in the future.

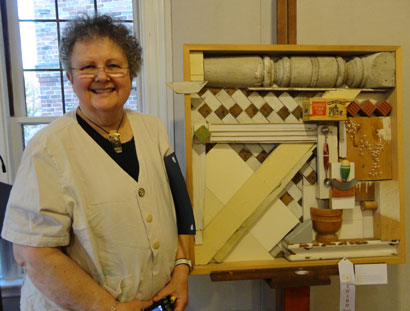
Good things happened this week too.  My friend Barbara won a second place at the Recycled Show at the Rome Art Center.  I am so very happy for her and I like this piece too.

Person and her high relief sculpture


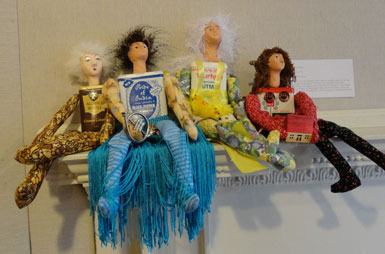
I had several things accepted as well.  These little Spice Girls as I call them were all presented on the mantle piece of the gallery.

Photo so four dolls with spice tin bodies


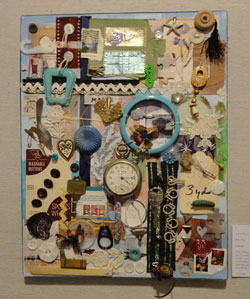
I also had two found object collages in this show.

collage of objects mostly in a blue color
Blue Too

Both were created from stuff that was from my past and mostly out of my grandmothers house. In Blue Too is  the watch that did not work even when I was young and the Hein’s Pickle pin came from the time we visited the factory in about 1958.

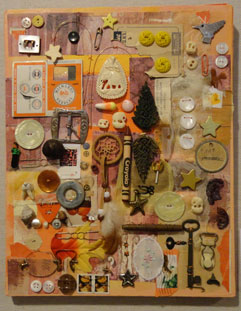
painted canvus with objuevts motnted on top. 
Orange Objects

The glasses in Orange Objects  where Aunt May’s and the elephants are carved ivory from a necklace that was broken when my cousin was wearing it  at a garden party.  We never found all the parts to put it back together again.   They are both real memory pieces for me.

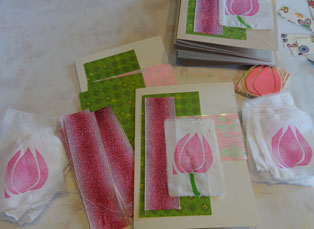
Photos of cards showing tulip and ribbon  I got excited by the wonderful sunny weather and cut a stamp of a tulip and made Spring Cards one day this week.  I put them in the mail this morning.


Progress Report: Angled Balance

Full shost of purple quilt with white angelina
Angled Balance

This quilt is finished now.  I really like how the quilting lines run across the printed fabric lines on this surface.   It was fun to work on this one too.


Knot Know DMC Project #7 and Adventure Challenge

Finished quilt in Crimson, blue green, turquoise and Blaclk
Knot Know DMC Porject #7 and Adventure Challenge #3


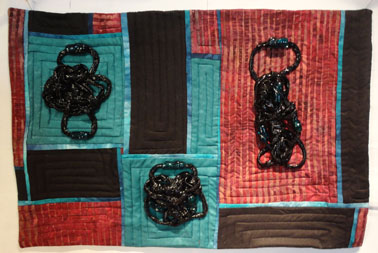
This quilt has lots of extra items after the title because it fits into to series.  I used fabric from the DMC project for the colors.  The black is the addition.  I am nearing the end of the yardage from that project.  I did however use the last bits in two other tops.   The knots make this part of the Adventure Challenge as they are my own derivative from the Lois Ericson Book Design and Sew it Yourself.    I have tow more ideas I want to explore out to that text and then I will be ready to move onto the next book in that Challenge.

Pot Shards

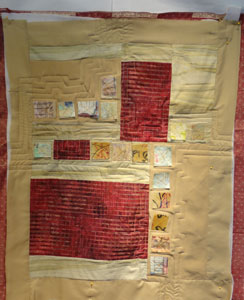
Quilt in browns and golds with bits of pottery on the surface
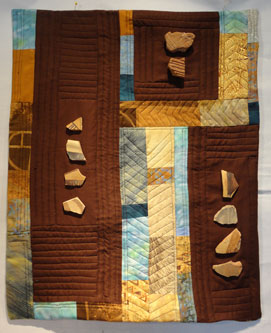
Pot Shards

I am done with this quilt except for the addition of the sleeve on the back.   I did use the pottery design for the quilting patterns as I mentioned last week.   I like the final effect here and may look to pottery again as a source for quilting designs.


Paper Pieces

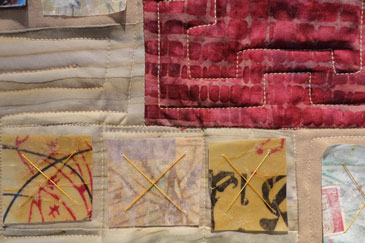
Photo of crimson and tan quilt with paper added on topThis piece uses  the last of Dawn’s crimson from the DMC project with a lot of tan fabric.  One of my quilting buddies gave me these paper bits that she had created in Rayna Gillman’s class.  They are all sealed with matt medium.    I have carried them around in an envelope for a couple of years and they seemed to be the embellishment that this surface needed. close up showing the paper with the quilting around itI have just started the quilting on this one.

I know there will not be any progress on my works this week because of the Surface Design Conference that I am going to.  But I will have lots of other news to talk about next week.    Keep Creating

Hugs

Carol
March 15,2012

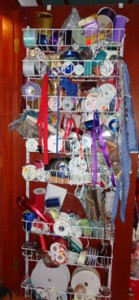
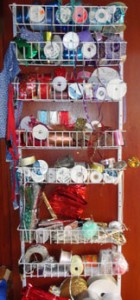
We have reached the” Ides of March”. This comes from Latin  ides… that means the middle- and the 15 is  of this mouth.  The reason we in the western world note the date is because Julius Cesar was stabbed that day.   I will admit that the mouth has been rushing along for me.   I enjoyed the waining half moon this morning as I did my daily check of the sky.   I am still a little sluggish in the morning having not made the full switch of the lost hour that day light savings time  brings.      I did start spring cleaning as this  week.   The quilter in me makes me break up the task into lots of little pieces.  So I tackled my ribbon wall on the back of the studio closet .

Shot of the mess ribbons falling all over the place This is a before shot…….. then we have the after shot.   I should be able to access colors a lot better now.   I will keep at the clean up one little piece at a time and perhaps by the Ides of April I will be nearly finished.door after clean up

Progress Report:     Spiraling Out

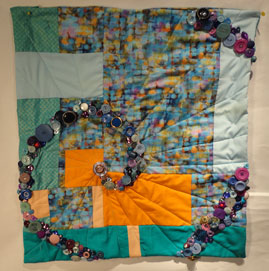
image of the quilt showing the buttons in place and the quiltingThis quilt caused me some frustration this week.  I had quilted it following the spiraling action….. it was awful!   So I spent an evening removing all the machine work.    I am still not sure this is the answer for this work. I guess I will need to put it at the bottom of the stack for a while and see how I feel when I can look at it with fresh eyes.


Crimson Diminished DMC IV

quilt using the DMC colors plus one more turquoise with beads
Crimson Diminished DMC IV

I am still using us the fabric from the DMC project.  I feel I have gained a great deal form this process.  Making me slow down and not try to do everything on one work is one of the main lessons for me.   I believe this work uses the new material well and it still holds to the simple approach.   I think there is just enough fabric – mostly in Dawn’s crimson and Marty’s turquoise that I can add one additional fabric and create one last work in this series.     


Cycling Circuits

Full shot of the quilt with the wholes faces and the quilting done.  I am now ready to begin to fill in the openings.   I have several  treatments  to audition.

whole with navy cotton netThis is cotton netting in a navy blue


whole with painted inerfacing.  This next trial is  inner facing  painted in pink and rose with some of the area left white.   This treatment  could use some spark- like beads too.pueple plastic screen


This third image shows a purple plastic screening in the opening.   This one too needs some embellishment to make the whole more interesting.   I will again just have to live with these for a while before I will know what is the most effective.Golden Rounds Paper Quilt IV

full view of the paper quilt showing the faggotting  This is a full view of the  paper quilt in progress.   I am having fun doing more of the Faggotting  between the paper sections.   I have learned several things along the way here.  Number one- when cutting a curve the spacing is difficult- at least for me.  This irregular spacing, plus the uneven sizes of beads is  the second thing I learned.  And that is I must try each set before I stitch into the section across the opening.  I do like the effect!  It has been fun.    Close up showing the beads between sections of paperSugar Spill

full view of the pink and fusha quilt showing the Angelina This is a quilt that uses a simple composition  a and special materials.  I played with the Angelina  adding  sequins and  felt in the mix.   It was an enjoyable exploration process.

Pink backgound with white felt and blue sequins trapped under Angelinaclose up showing the quilting I reflected the squares of felt in the quilting in this work.  I created a pattern that I may repeat in a future piece.


New work- Fire Works

Blue and purple quilt with angelina in reds on top  This is a new piece that I am excited about.   After playing with the Angelina for Sugar Spill, I did my  typical” What IF????” and  this new thing with fire works came into being.    I have had this strong purple fabric with the turquoise in it ever sense the DMC project got started.   But it is so intense a color that I had not used it before this time.  As you can see here I am still intimidated by it and have mostly covered it with the Angelina.   This work  also spawned a second new piece were I am trying the powerful purple fabric as a whole cloth unit.


Mini 4

Closeup of the Cut up quilt showing mostly lines of quiltng and beads
Mini 4

I still have so much to learn about the photo process.  This time I did manage to  not have the flash show on the glass- but it is very tilted! I see this as room for growth.


Keep Creating everyone

Hugs

Carol


Tutorial for Button Necklace

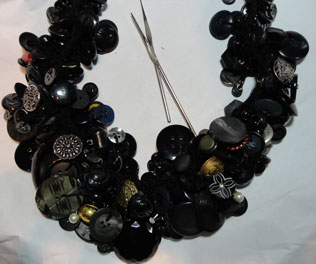
Finished necklace in black buttons


Button Necklace Instructions:    Carol Boyer  March 2012
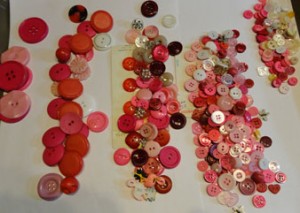
Step A. Sizing the necklace:shot shows five rows of pink buttons

1. Sort your buttons by size into at least five stacks.  You need the most buttons in the smaller sizes and as few as five of the biggest ones. ( but do not worry if you do not have a lot of the smallest ones- I usually do not use them too much after the first group of 5(the first two inches) and the  last 5( final  two inches) of  the necklace construction.  I usually throw in a few “Fancy” and or color contrast buttons too to add interest.  Now you are ready to begin constructing the necklace.
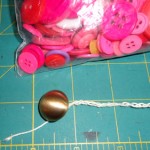
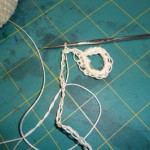
2.Using crochet Hook #6 start by chaining through a shank button twice( I tend to choose a color that is different from the basic color of the necklace so I can find it easily when I am wearing the finished necklace)showing the start of chaining with button on the beginning

3. Then chain for 20”.  Taking note of this point- chain 12 more stitches slipping the last one into the end of the 20 stitch to create a loop. Now stitch over all the stitches in the loop until you have returned to the 20” section.

4. At this point chain through all the stitches back to the button.Loop at the far end of the chain for the button connection


5. Using safety pins- mark the 10” location on the chain between the button and the loop. (I usually put two pins here so I can easily see its location as I work back.)   Then mark with safety pins every two inches on the chain.


Step B Adding the buttons:

1. Using the hook and thread turn back one stitch toward the loop end of the chain.

2. Skipping one stitch then slip the hook into the second stitch and make three stitches that    hang below the chain.

3. With the third stitch slip the hook through one of the buttons form the smallest pile (you  may need to change to the smaller hook to do this process)

4. With the hook, grab a bit of the thread and pull it through the whole in the button and make a stitch with it.

5. Now Stitch back through the first stitches until you are back to the base chain.

6. At this point set aside a button of similar size to the one you just used to be used at the other  end of the necklace.( I usually put the set aside buttons in a zip lock bag that I mark A)

7. Chain into the base row, skip a stitch and chain in again.

8. Now you are ready to add the next button by chaining down three stitches.

9. Repeat steps 3, 4, 5, 6, 7, and 8 about five times or until you reach the safety pin. **

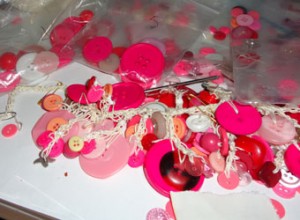
buttons being added

Step C Adding two buttons

1. Skip one stitch and chain down three stitches.

2. Slip your hook through the next size up button from your collection and pull the tread back through the loop so the button is on the thread.

3. Now chain down two more stitches and add a button (one of your smallest ones if you have enough to do so) in the same manner as you did the first five times.

4. Now carefully chain up the whole five stitches back to the base chain, being careful not to pull the thread too tightly so the hanging units become stiff.

5. Chain into the base row over two stitches.

6. Start as second zip lock bag to hold the matching buttons for the second two inches on the second half of the necklace. Mark this bag B

7. Repeat steps 1 to 5 under heading C adding buttons to the necklace base and to the bag as you proceed to the next safety pin. **


Step D Adding three buttons and four buttonsShowing the process of adding buttons

1. Skip one stitch and chain down three stitches.

2. Slip your hook through the next size up button from your collection and pull the tread back       through the loop so the button is on the thread. (This is the third size)

3. Now chain down three more stitches and add a button (one of your second sized ones.) in the same manner as you have been doing.

4. This time you chain down two more stitches and add the smaller button to the bottom before you turn and chain back up to the top.  Again be careful not to pull too much so the chain is stiff. Begin bag C with matching buttons.

5. Chain into the base row over two stitches and repeat step four.   Do this action three times.

6. On the fourth trip down you add one more button any were along the way that you feel it needs it.  I usually feel the necklace needs and extra button near the top.  Do this for drop rows four and five and you should be to the next safety pin. **


Step E Adding five and six buttons

1. Skip one stitch and chain down three stitches. Now add one of your biggest buttons and chain down three more and add another button.

2. Continue to chain and add a buttons in ever smaller sizes until you have five in the line.  Then chin back up the string to the base row.  At this time I also start to add a novelty button into my mix if I have any. Start a new zip lock bag.

3. Chain into the base row over two stitches to start the next addition.   You may increase to six buttons as you near the safety pin if you desire as this is the center of the necklace.

4. Repeat steps 1 to 3 as you proceed to the center safety pin. **

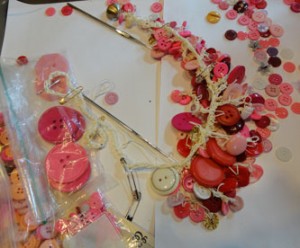
5.  CONGRATULATIONS!   You are half way done.Showing the pink necklace at the hald way point


Step F Adding five and six buttons.

1. Skip one stitch and chain down three stitches. Again add one of your biggest buttons and chain down three more and add another button.

2. Continue to chain and add a buttons in ever smaller sizes until you have five or six in the line depending on you previous choices.  Then chin back up the string to the base row.  I continue to add the novelty buttons. Now you remove buttons from the zip lock bag and put them on the necklace.

3. Chain into the base row over two stitches to start the next addition.    If you increased to six buttons try to decrease to five as you near the safety pin.

4. Repeat steps 1 to 3 as you proceed to the next safety pin. **


Step G Adding three and four buttons.

1. Skip one stitch and chain down three stitches. Now select a button from you bag marked C.

2. Slip your hook through the button from your collection and pull the tread back through the button.

3. Now chain down three more stitches and add a button (one of your second sized ones.) in the same manner as you have been doing.  Repeat until you have four buttons on the chain before you turn and chain back up to the top.

4. Chain into the base row over two stitches and repeat step 3.   Do this action two more times.

5. On the fourth trip down you add only three buttons before returning to the top.  Repeat the three button addition twice.  You should be at the safety pin. **


Step G Two buttons

1. Skip one stitch and chain down three stitches.

2. Slip your hook through the next size up button from bag B and pull the tread back through the loop so the button is on the thread.

3. Now chain down two more stitches and add a small button.

4. Chain back to the base chain.

5. Repeat steps 1 to 4 until you have reached the safety pin. **


Step H Final buttons

1. Skip one stitch then slip the hook into the second stitch and make three stitches that  hang below the chain.  Add a button from the bag marked A

2. Chain back to the base. Continue to do step 1and 2 until you have fie ore six buttons on the  base or you have reached the loop.

3 Tie off the thread with two knots and weave the tail into the chain.

**

**GLUE** 

I recommend that you do this every two inches or each safety pin- but you may not want to stop at the safety pins.

1. on a piece of scrap paper squeeze out a drop of white glue.

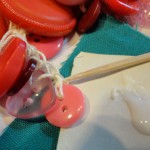
2. With a tooth pick dip into the glue and then slip the tooth pick into one of the stitches in each hang down row of the necklace.  This little bit of glue dries clear and will assure that the necklace dose not pull apart.


CONGRADULATE yourself and wear you buttons with pride.

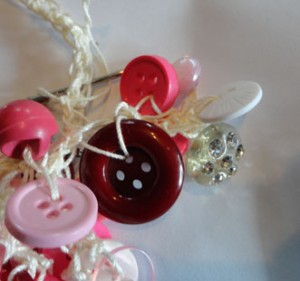
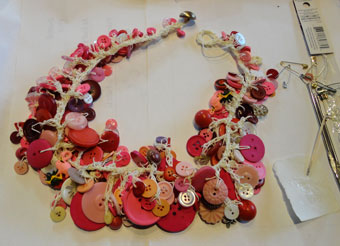
pink buttons on chained cream thread
Button Necklace